
Contents
- I. Install Miniconda
- 1.1 Download the Miniconda installer
- 1.2 Run the installation script
- 1.3 Restart the terminal / make conda take effect
- 2. Create a dedicated MicroPython virtual environment
- 2.1 Create an Environment
- 2.2 Activate the virtual environment
- 3. Install the mpremote tool
- IV. Install VSCode and plugins
- 5. Configuring Python Interpreter in VSCode (Associating with conda Environment)
- VI. Verify the Entire Environment
- Version Record
I. Install Miniconda
Miniconda is a lightweight version of Anaconda, designed specifically for managing Python virtual environments to prevent contamination of the system's Python installation.
1.1 Download the Miniconda installer
# Download the Linux version of Miniconda (Python 3.10 stable release)
wget https://repo.anaconda.com/miniconda/Miniconda3-latest-Linux-x86_64.sh -O miniconda.sh
If the download is slow or fails: confirm that your terminal proxy is active (the export http_proxy=. .. you configured earlier), and the download will be fast if the proxy is working properly.

1.2 Run the installation script
# Run the install script (just press Enter/yes all the way through)
bash miniconda.sh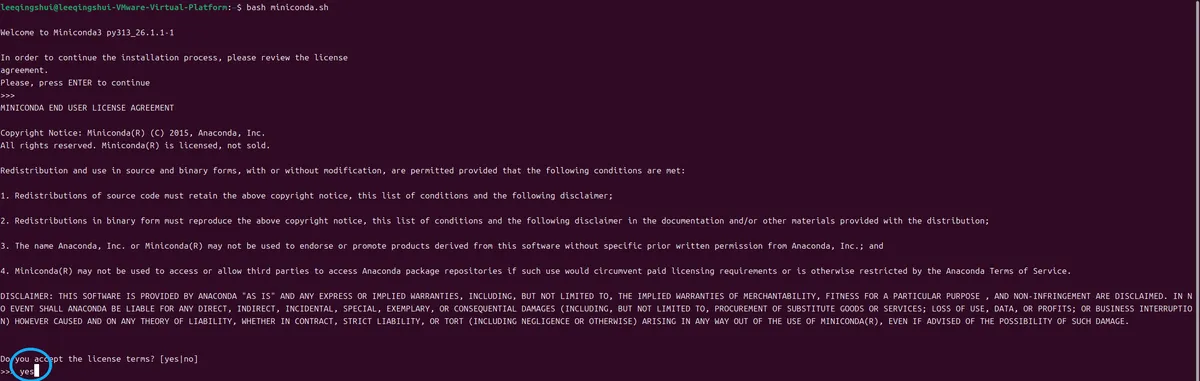
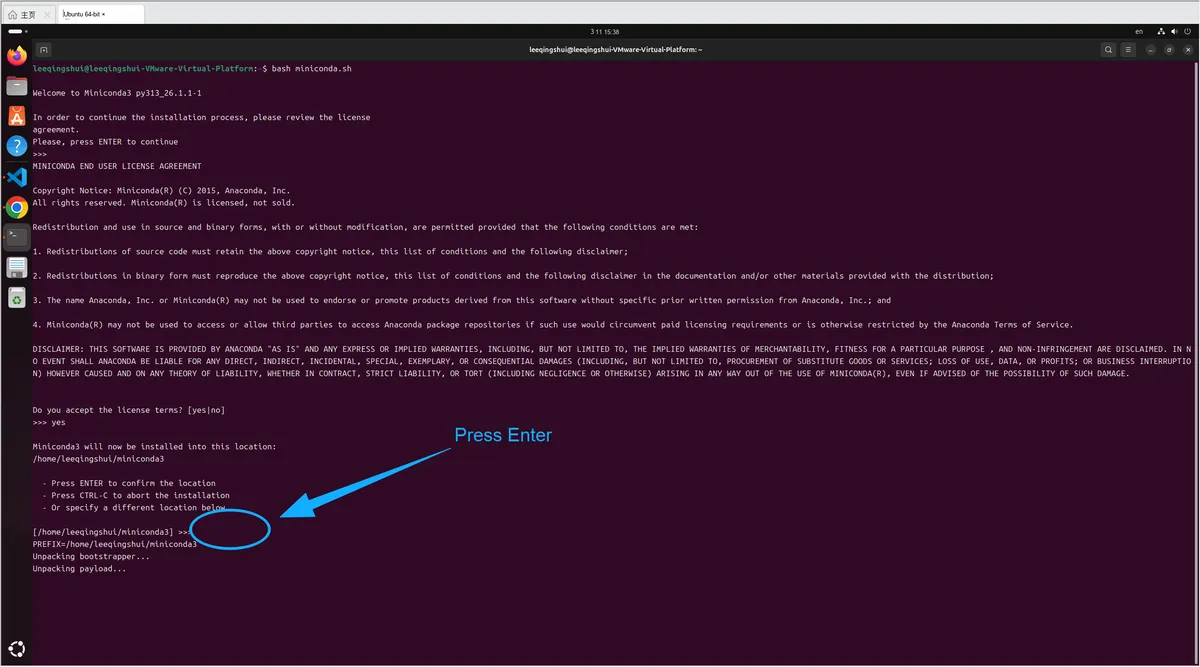
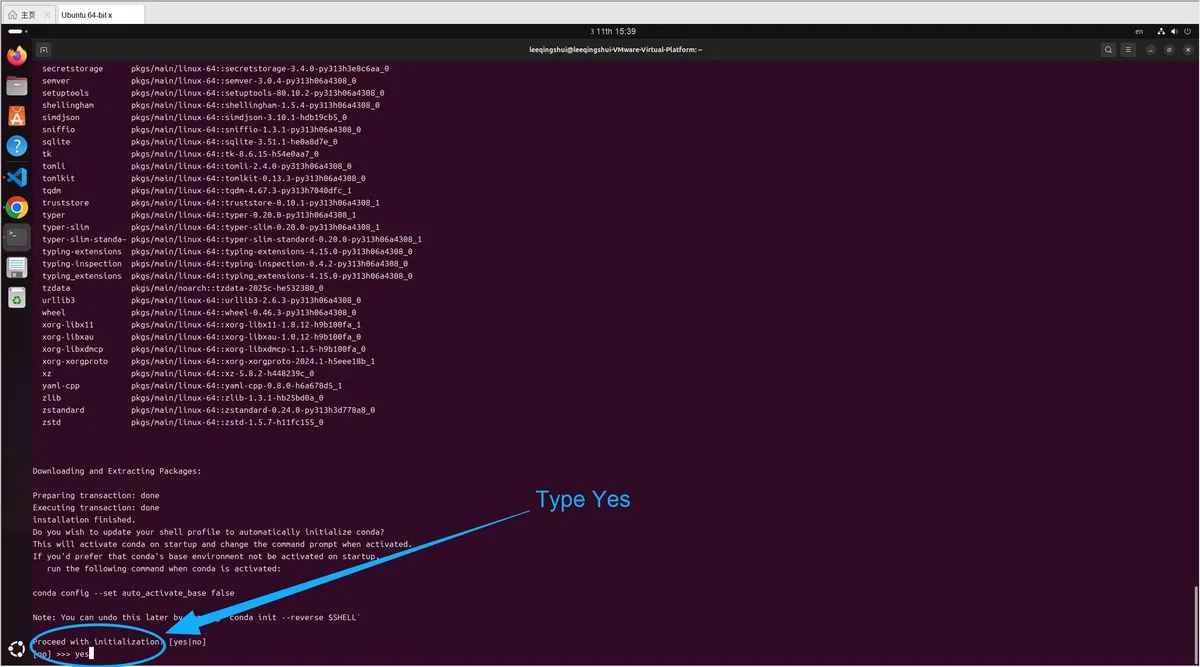
During the installation process, you will be asked "Whether to initialize conda", please select yes (critical! Otherwise the conda command will not be available).
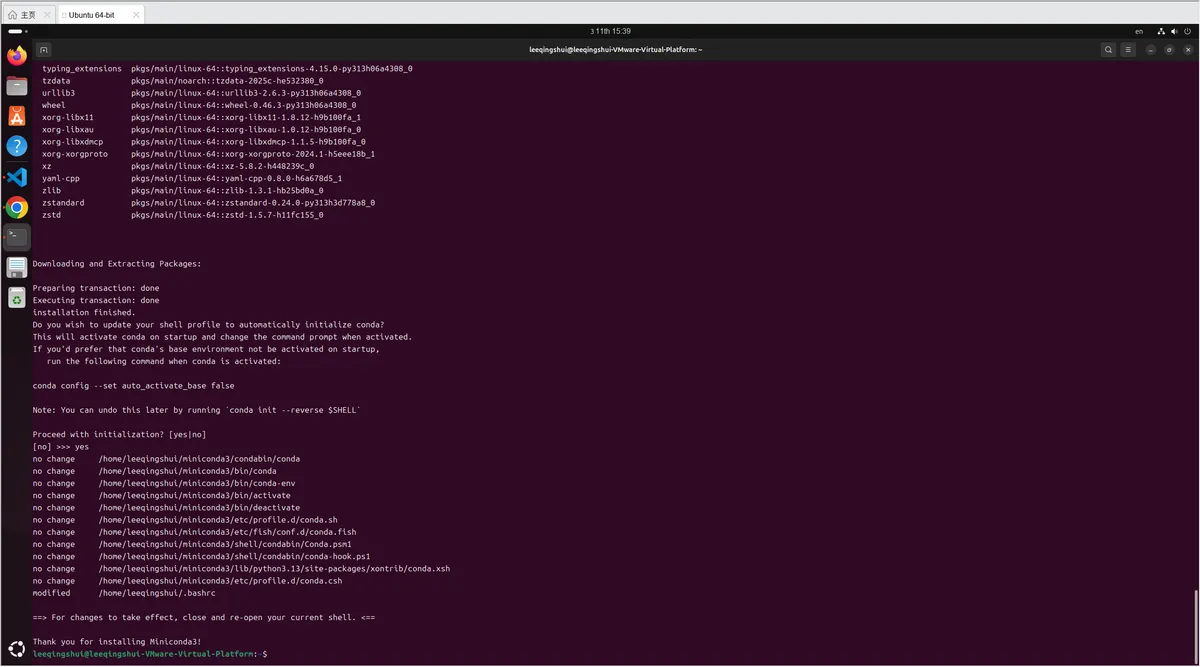
The successful installation result is shown as follows:
1.3 Restart the terminal / make conda take effect
After the installation is complete, close the current terminal, open a new terminal, and enter the following command:
conda --version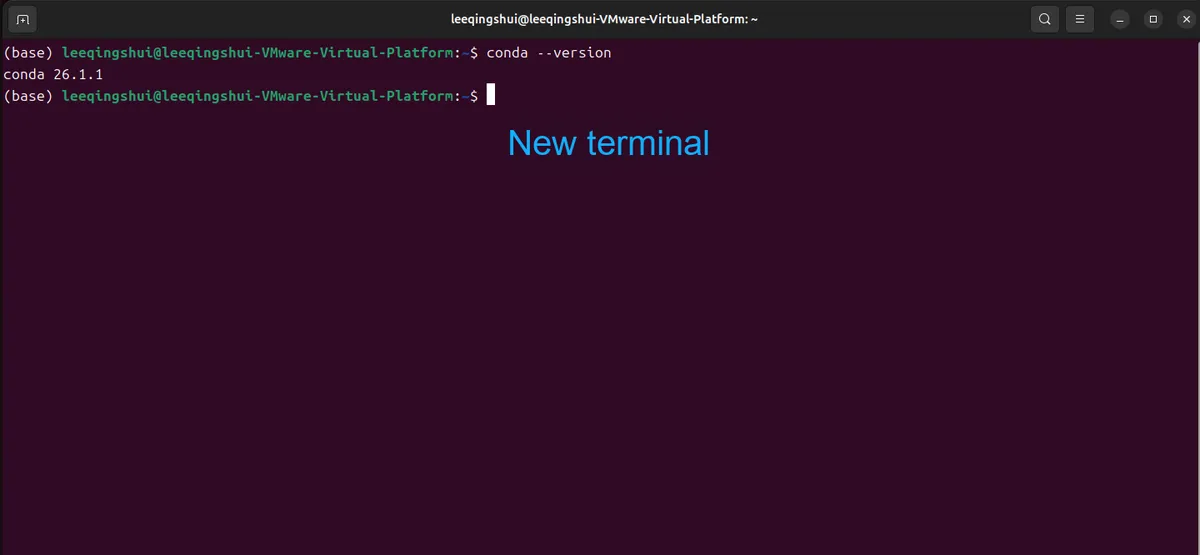
can output version numbers like conda 23.x.x, which indicates that Miniconda has been installed successfully.
2. Create a dedicated MicroPython virtual environment
Use conda to create an isolated environment to avoid conflicts with other Python projects.
2.1 Create an Environment
# Create an environment named "micropython" with Python version 3.12
conda create -n micropython python=3.12 -y
The parameters are defined as follows:
-n micropython: environment name (can be customized, e. g.,mpy)-y: Automatically confirm all installations without manually entering yes.
Note that after running this command, it may not work properly. You need to accept the terms of service of the official channel first. Let's accept the terms before proceeding to create the environment:
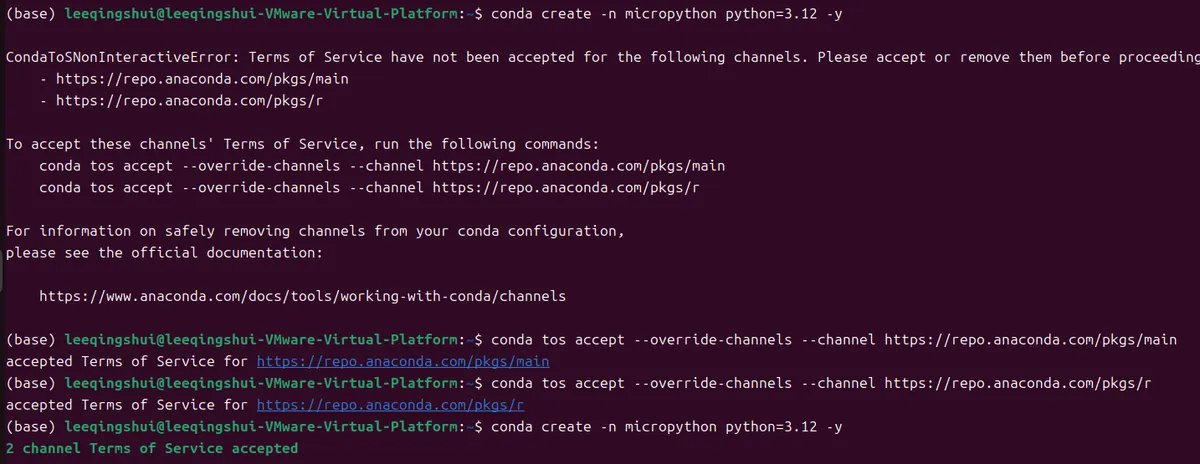
After the terms acceptance is completed, you can just execute the previous creation command.
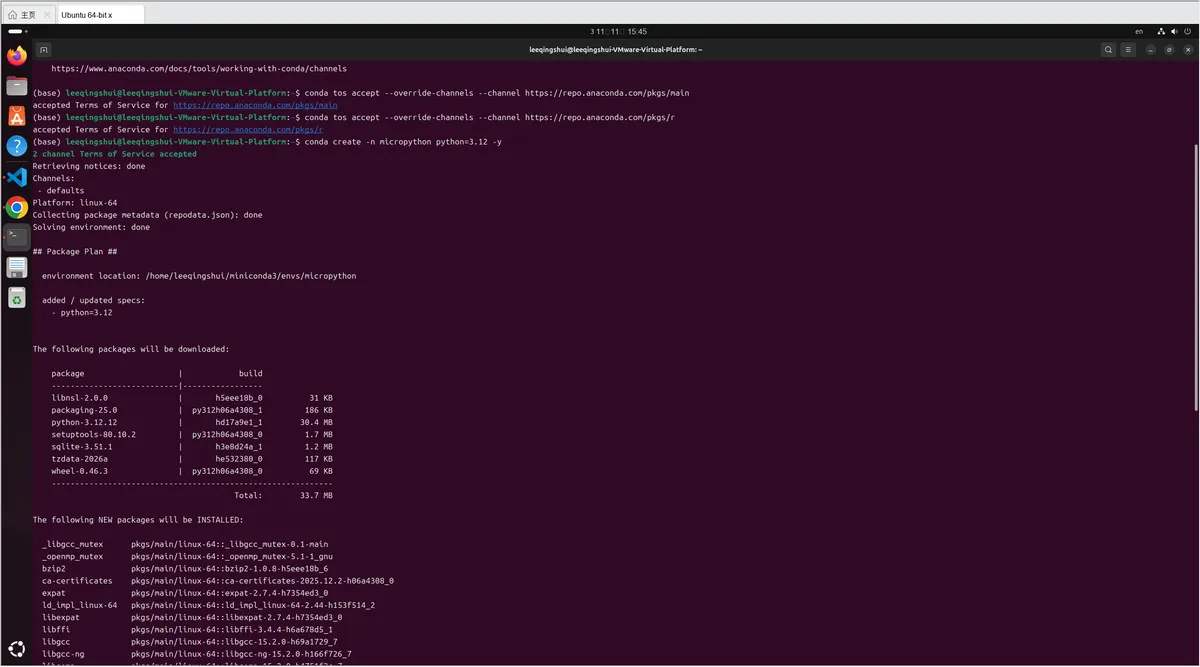
Here is how to use the environment:
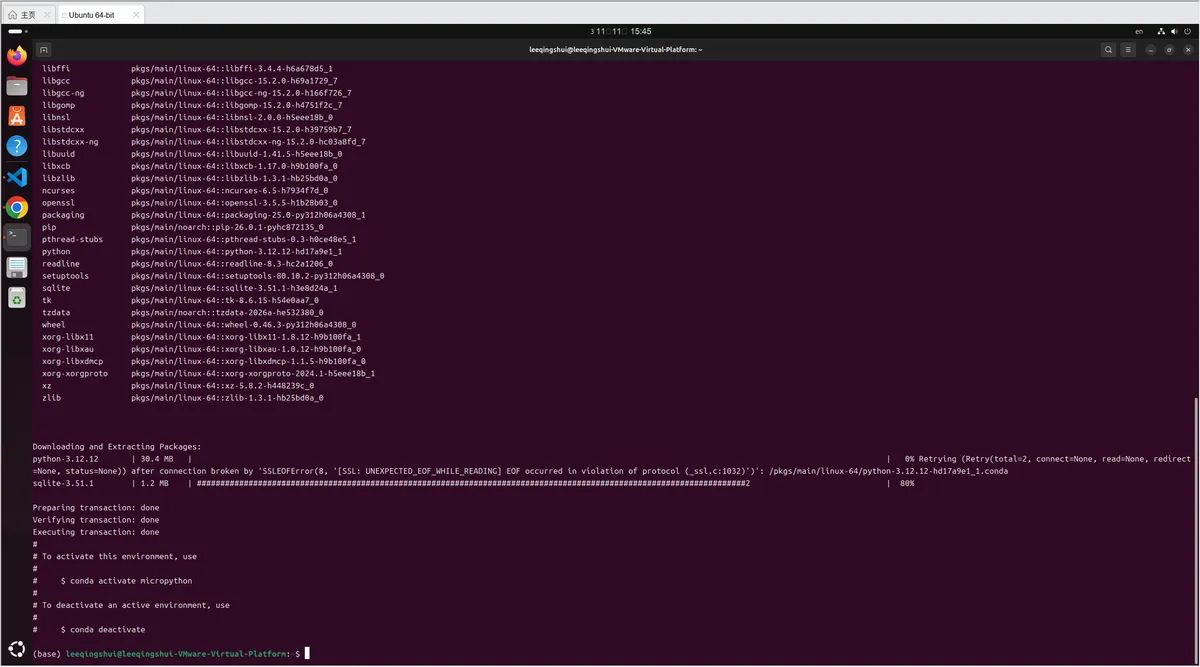
2.2 Activate the virtual environment
# Activate the environment (the terminal prefix will become (micropython))
conda activate micropython
All subsequent operations must be performed after the environment is activated.
3. Install the mpremote tool
mpremote is the official remote operation tool for MicroPython, which is used to transfer code to development boards, run code, and perform debugging.
# Install mpremote in the activated conda environment
pip install mpremote
Verify the installation: Enter mpremote --version, if the version number is output → the installation is successful.
Next, configure serial port permissions for mpremote (to avoid the "Permission Denied" error):
# Add the current user to the serial port group (dialout)
sudo usermod -aG dialout $USER
# Reboot for it to take effect (a reboot is required!)
sudo reboot
IV. Install VSCode and plugins
First, install VSCode:
# 1. Install the required dependencies (used for adding the HTTPS source)
sudo apt update && sudo apt install -y wget gpg apt-transport-https

# 2. Download and add the official VSCode GPG key (verifies the source's legitimacy)
wget -qO- https://packages.microsoft.com/keys/microsoft.asc | gpg --dearmor > packages.microsoft.gpg
sudo install -D -o root -g root -m 644 packages.microsoft.gpg /etc/apt/trusted.gpg.d/packages.microsoft.gpg

# 3. Add the official VSCode software source to the system
echo "deb [arch=amd64,arm64,armhf signed-by=/etc/apt/trusted.gpg.d/packages.microsoft.gpg] https://packages.microsoft.com/repos/code stable main" | sudo tee /etc/apt/sources.list.d/vscode.list > /dev/null

# 4. Delete the temporary key file
rm -f packages.microsoft.gpg

# 5. Update the apt cache (will go through the proxy you configured)
sudo apt update

# 6. Install VSCode (the core command)
sudo apt install -y code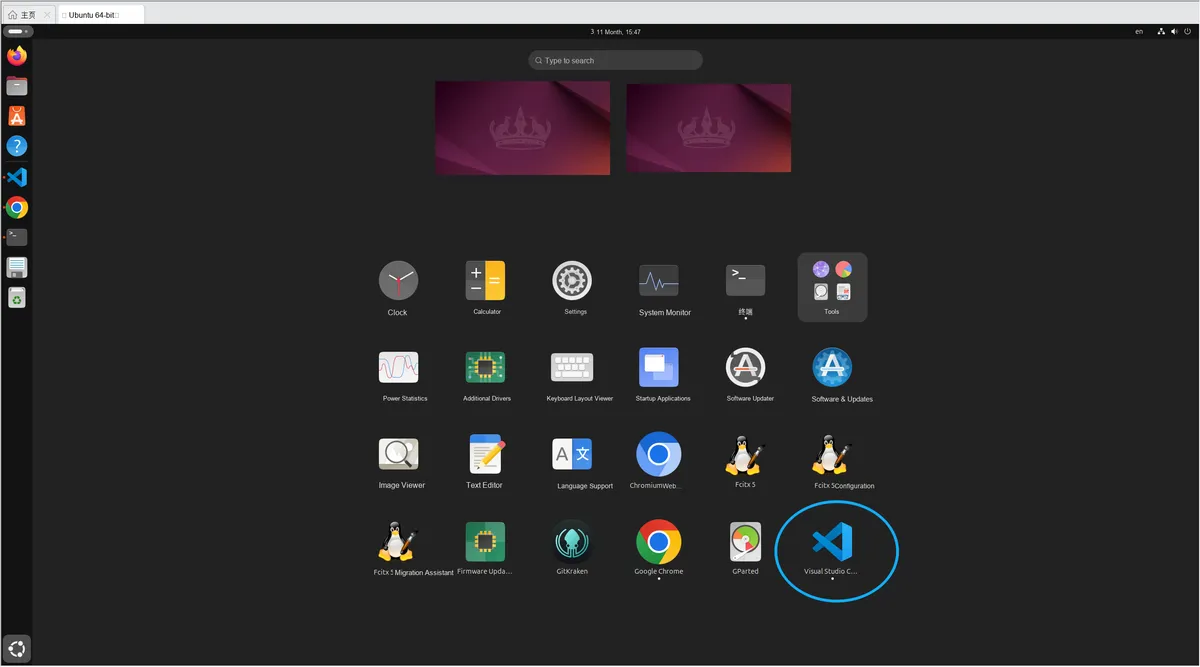
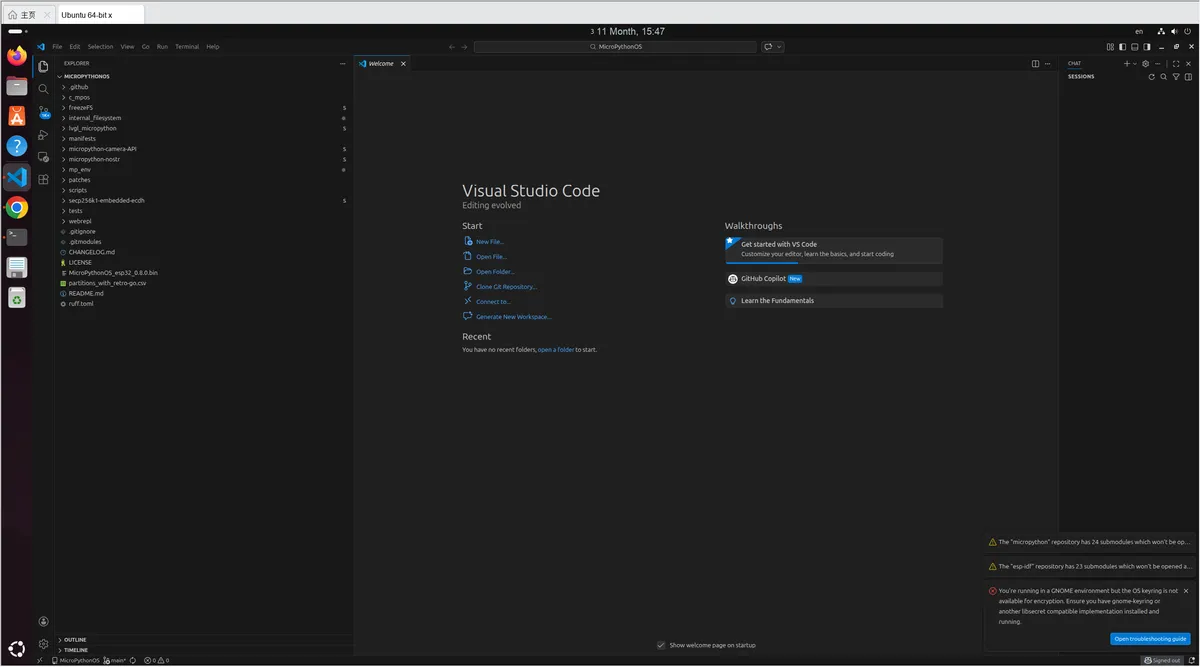
Open VSCode, click the "Extensions" icon (four small squares) on the left, and install the following plugins in sequence:
| Plugin Name | Author / Source | Core function |
|---|---|---|
| Python | Microsoft | Python base environment support, intelligent completion, syntax checking, debugging |
| Code Completion for MicroPython | walkline-wang | Code completion and library function hints for MicroPython-specific modules |
| Micropython-REPLink | swc-fablab | Quick code upload, REPL interaction, remote script execution |
| Serial Monitor | Microsoft | Serial data transmit/receive, log printing, debug information viewing |
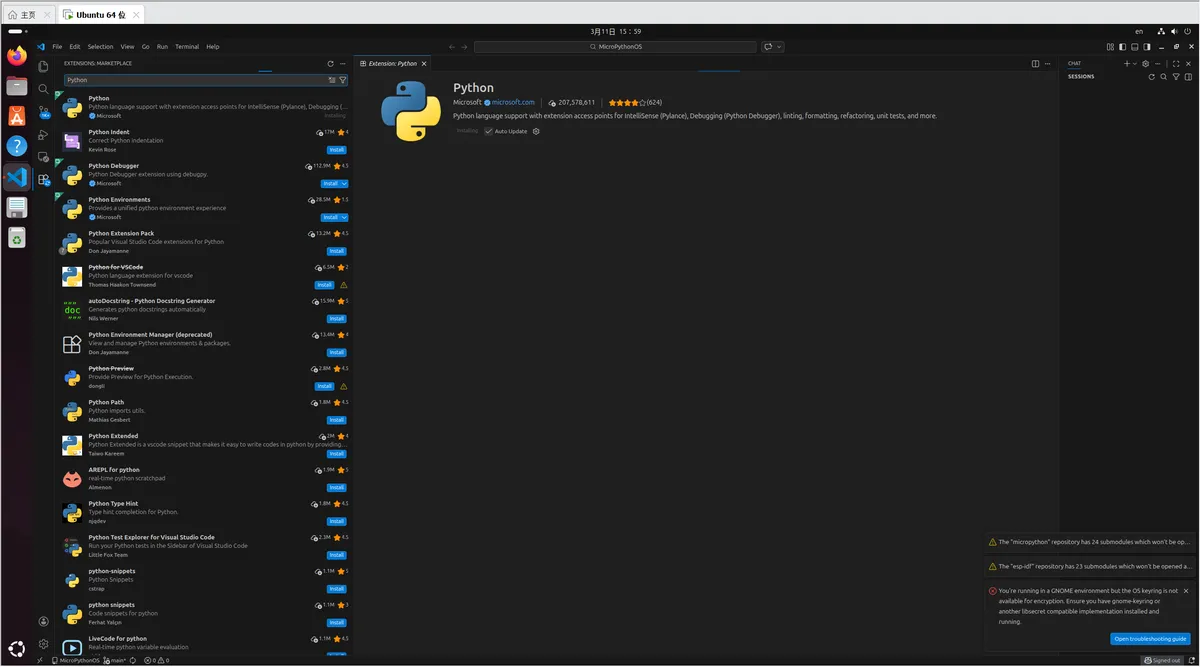
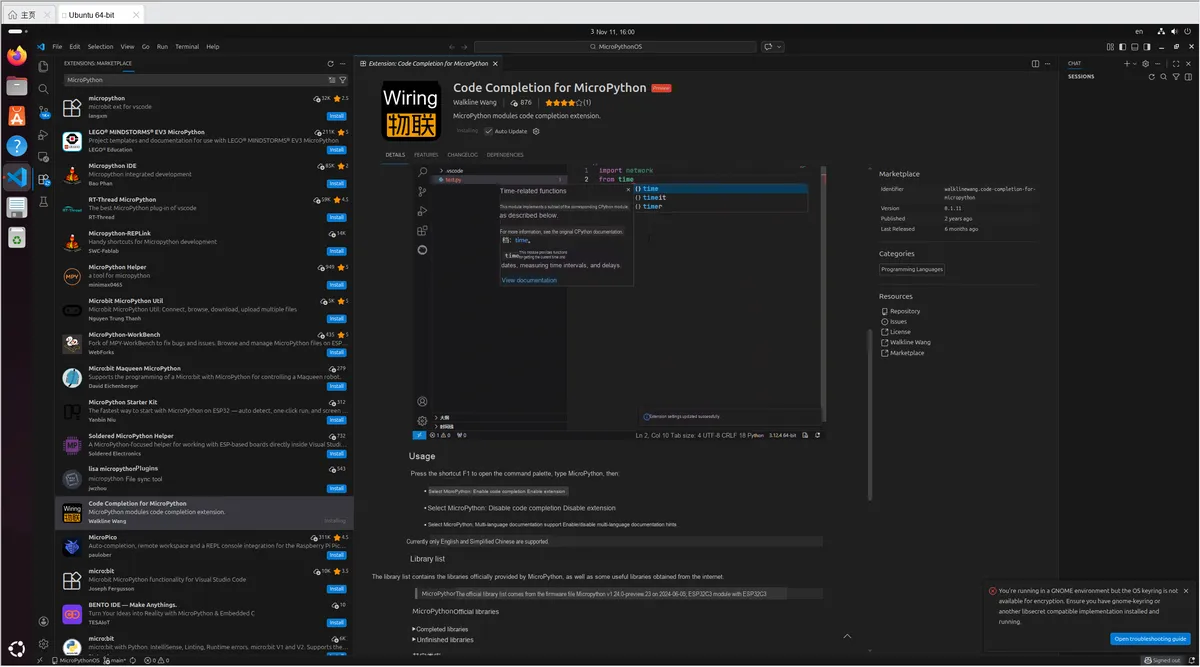
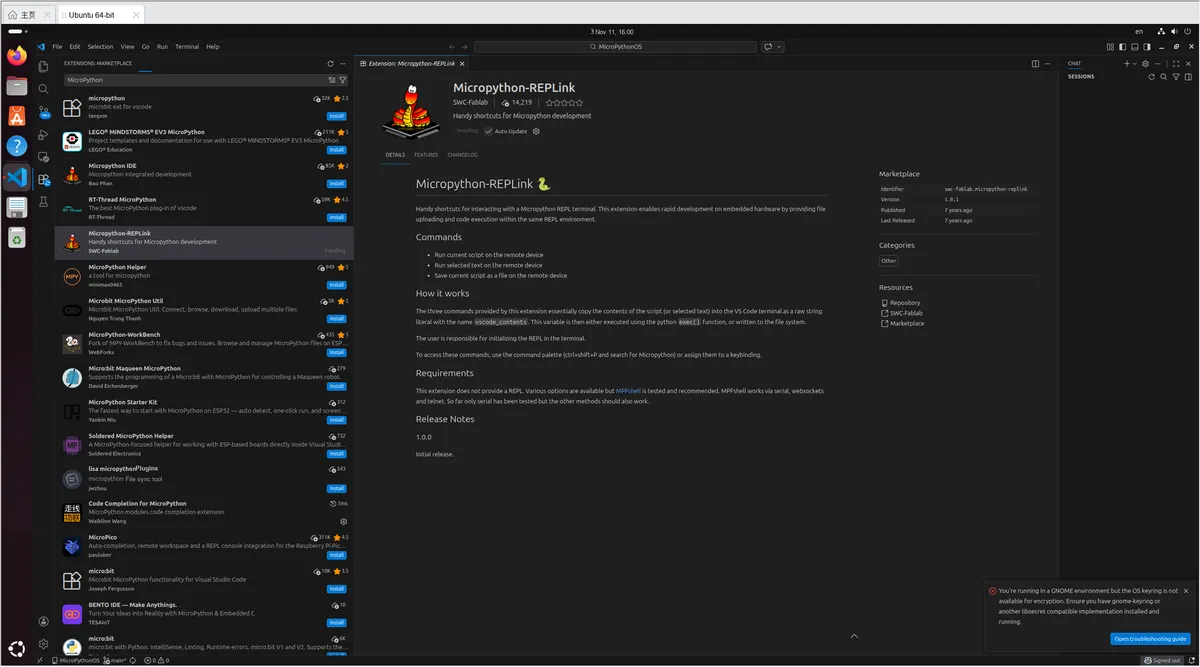
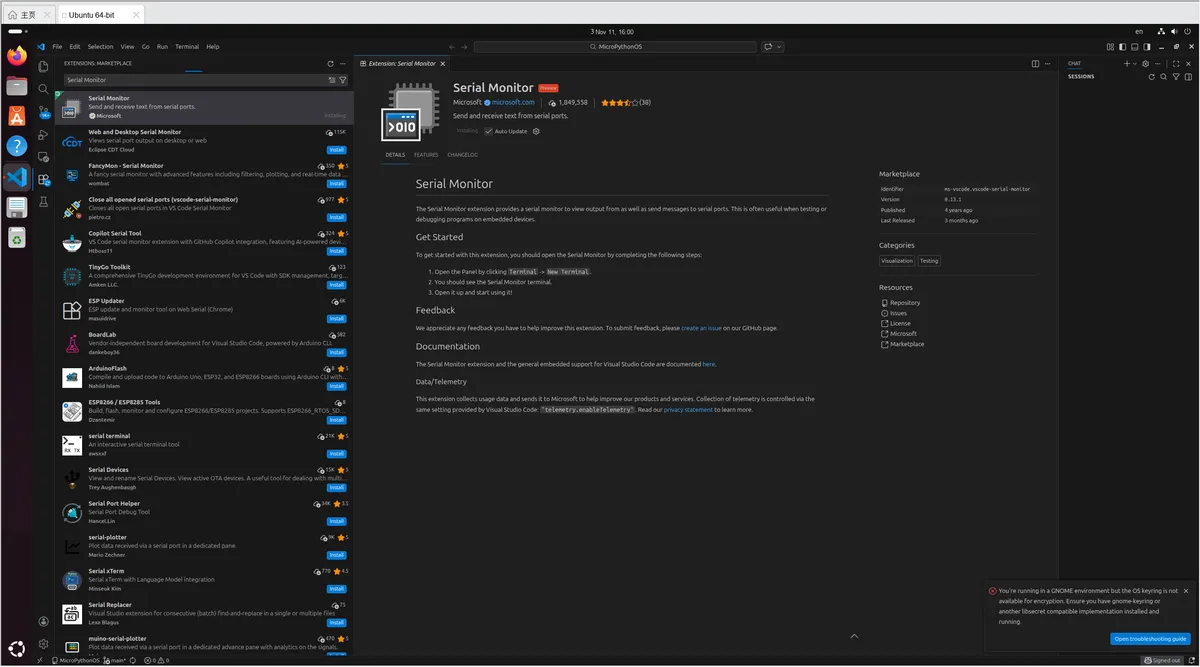
5. Configuring Python Interpreter in VSCode (Associating with conda Environment)
Open VSCode → Press Ctrl + Shift + P to open the "Command Palette":
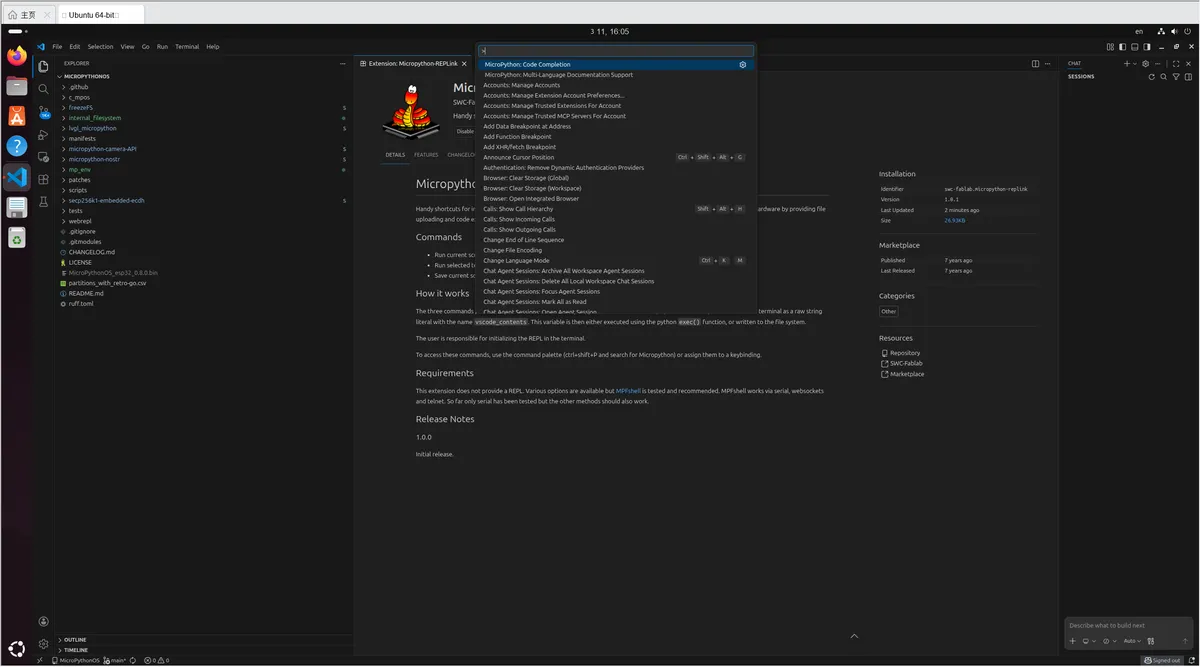
Enter Python: Select Interpreter, then locate the conda category in the pop-up list and find the micropython environment (the path is similar to ~/miniconda3/envs/micropython/bin/python):
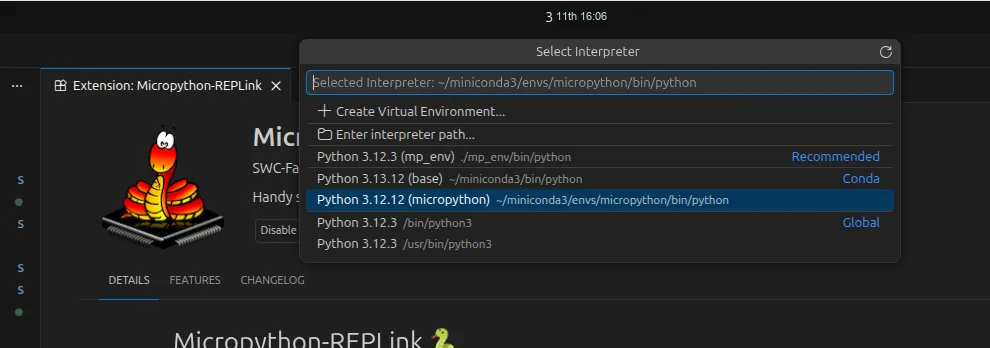
Select this environment → the status bar at the bottom will display Python 3.10.xx ('micropython': conda)→ configuration succeeded.
VI. Verify the Entire Environment
Connect the Raspberry Pi Pico (or other MicroPython development board) to your computer using a USB cable;
Open the VSCode terminal and activate the conda environment first:
conda activate micropythonDetection Development Board:
# List the connected MicroPython devices
mpremote lt
Output something like /dev/ttyACM0 → development board detected;

Connect the development board:
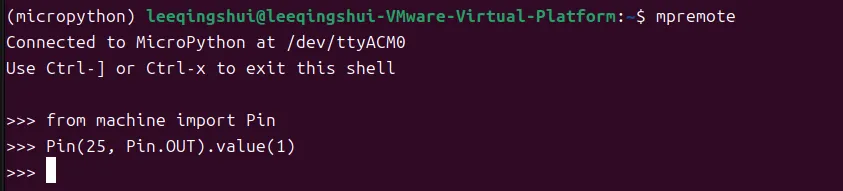
mpremote Test and run the code in REPL:
# Turn on the development board LED
from machine import Pin
Pin(25, Pin.OUT).value(1)
The LED on the development board lights up → The environment is completely normal!
Version Record
Version Number | Revision Date | Modifier | Modified Content |
v1.0 | 2026-03-11 | Lee Eonyong | Initialization version. |