Contents
Abstract
This article introduces the features, architecture, and hardware units of the Avnet ZUBoard 1CG development board, gives a basic introduction to connecting to the board through the Ethernet interface and the serial port, and demonstrates its functions with two application examples.
Main Text
The Avnet ZUBoard 1CG is an FPGA development board based on the RISC-V architecture:
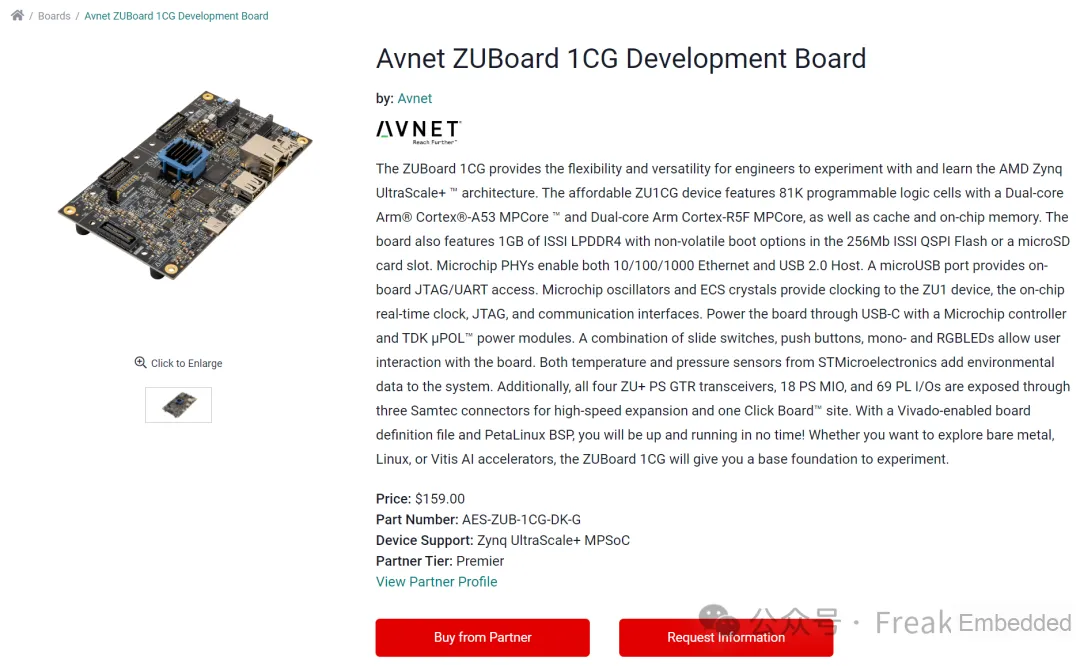
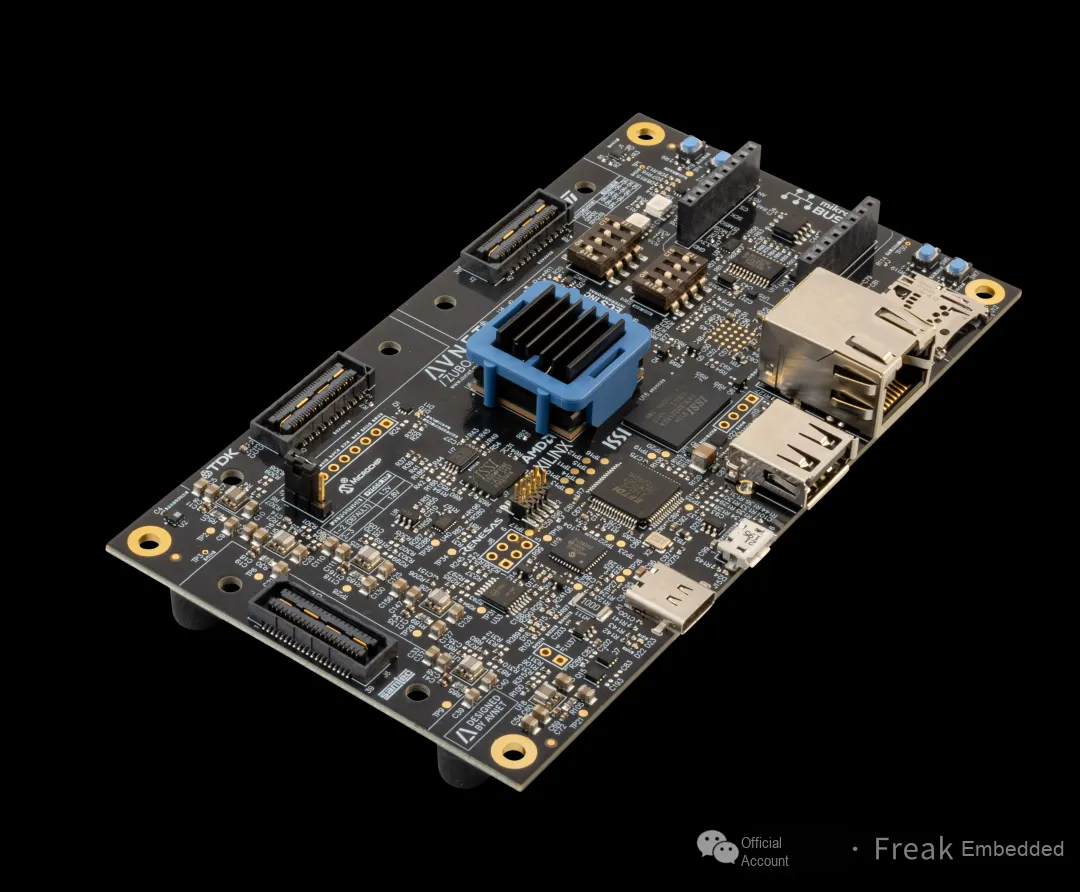
Its main features include:
Based on AMD Zynq UltraScale+ architecture:
The ZUBoard 1CG gives engineers flexibility and versatility to experiment with and learn the AMD Zynq UltraScale+ architecture.
Powerful processing performance:
The board carries 81K programmable logic cells, a dual-core Arm Cortex-A53, and a dual-core Arm Cortex-R5F processor.
It is equipped with caches and on-chip memory, providing strong computing performance for applications.
Rich storage and interfaces:
1GB LPDDR4 memory and a 256Mb QSPI Flash or microSD card slot provide flexible storage options.
10/100/1000 Ethernet, a USB 2.0 host interface, and a JTAG/UART interface give developers a variety of connection options.
Complete power and clock management:
The board can be powered through the USB-C port and is equipped with a Microchip controller and a TDK power module.
A Microchip oscillator and an ECS crystal provide stable clock sources for the core devices.
Rich peripherals and user interaction:
Slide switches, buttons, LEDs, and so on allow users to interact with the board.
The onboard temperature and pressure sensors provide environmental data.
High expandability:
Through the Samtec connectors and the Click Board interface, the ZU+ PS GTR transceivers, PS MIO, and PL I/O pins can be accessed, supporting high-speed expansion.
Development environment support:
Board definition files supported by Vivado and a PetaLinux BSP allow developers to get started quickly.
It is suitable for various application scenarios such as bare-metal, Linux, and Vitis AI accelerators.
Overall, the ZUBoard is a development board based on the open RISC-V architecture, with flexibility, expandability, and rich peripheral support, widely used in embedded and IoT fields. It provides developers with a powerful hardware platform and rich development support.
1. Application Areas
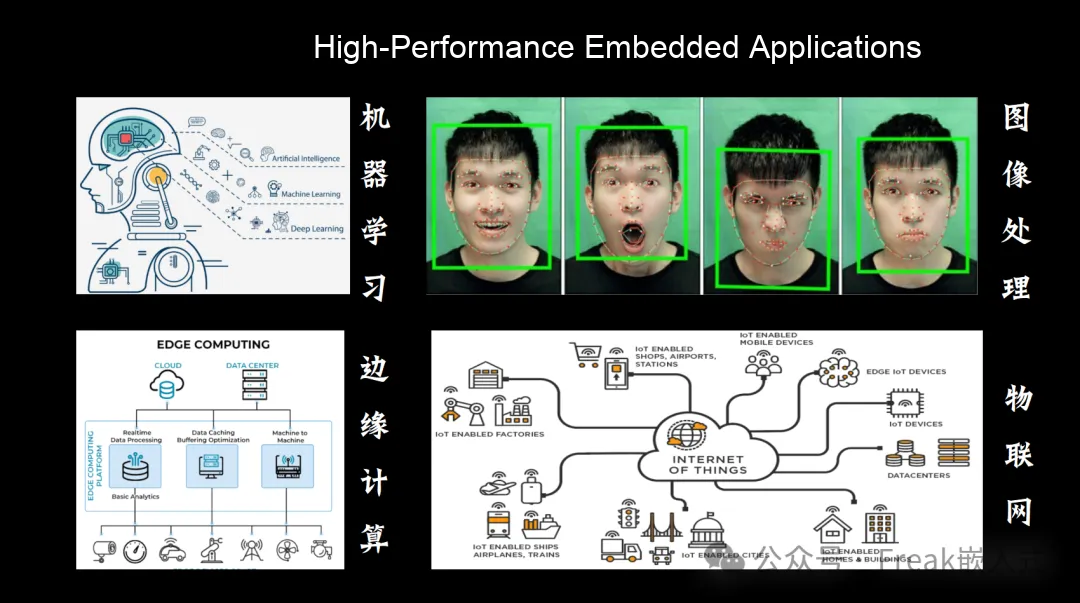
In the market, the ZUBoard 1CG is positioned for high-performance embedded applications, and is especially suitable for application scenarios that require strong processing power and flexibility, such as machine learning, image processing, edge computing, and IoT.
2. Development Board Hardware Units
2.1 Processor
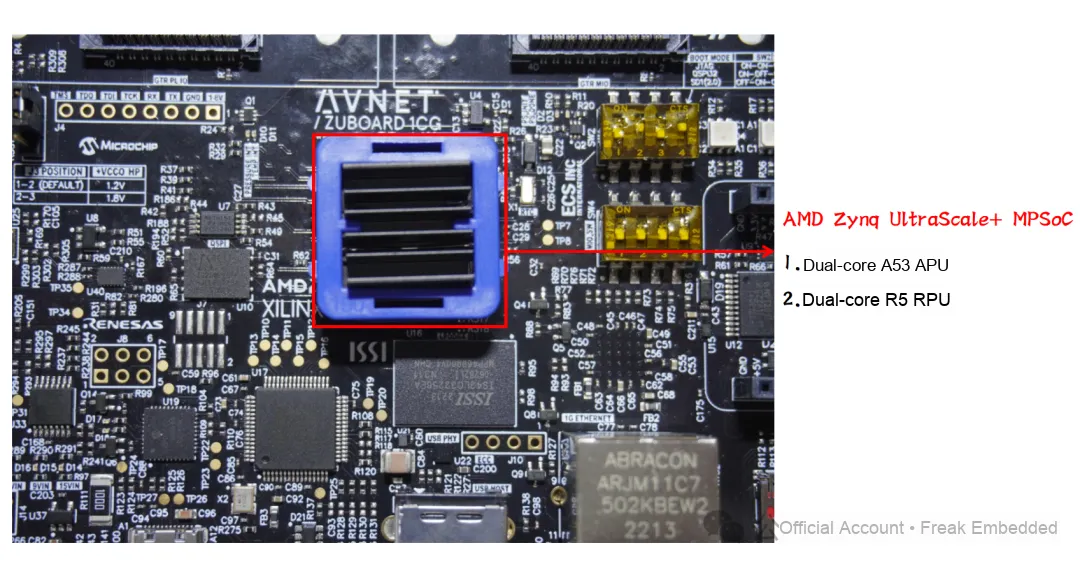
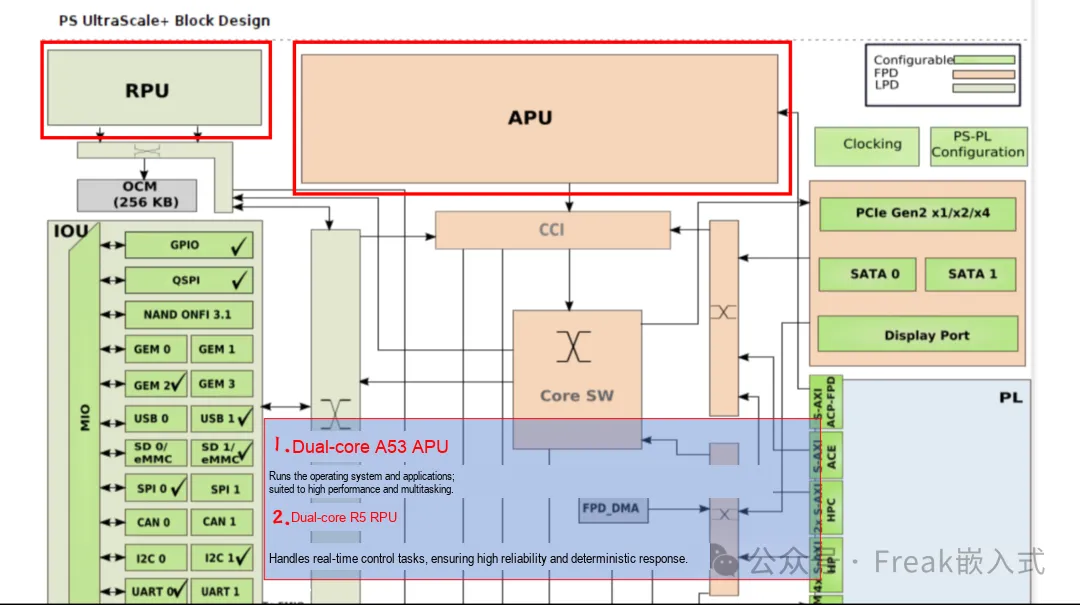
The large chip in the center is the "heart" of the board, the AMD Zynq UltraScale+ MPSoC, which integrates a dual-core A53 APU and a dual-core R5 RPU. It handles most of the computing tasks.
2.2 Memory and Storage
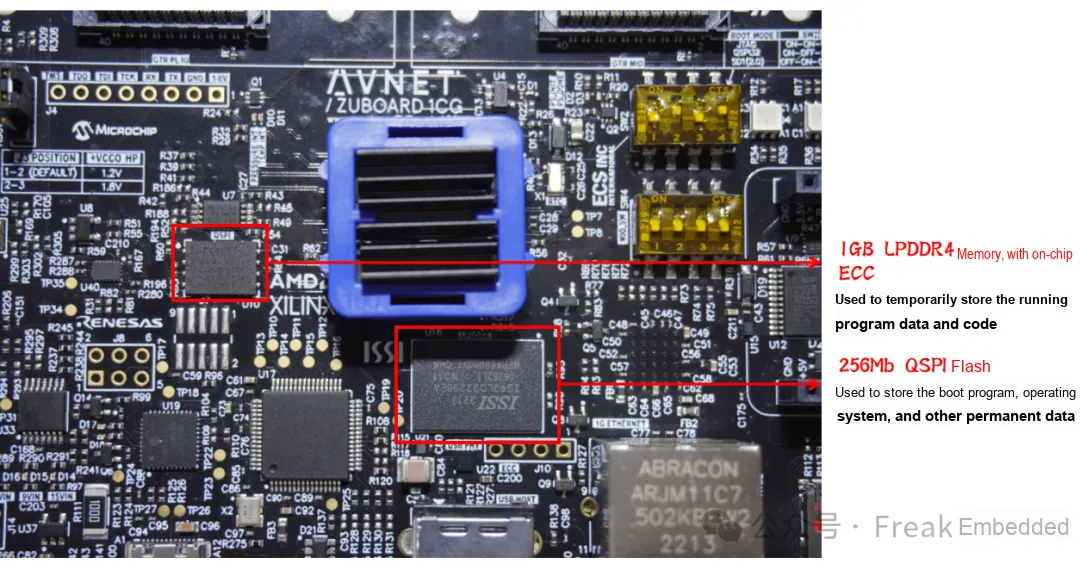
The chips next to it include the DDR4 memory and the QSPI flash, which are used to store data and the operating system.
The board has 1GB of LPDDR4 memory with on-chip ECC, ensuring data integrity and security.
A 256Mb QSPI flash is provided, which can be booted from, and booting from a microSD card is also supported, giving high flexibility.
2.3 Peripheral Interfaces
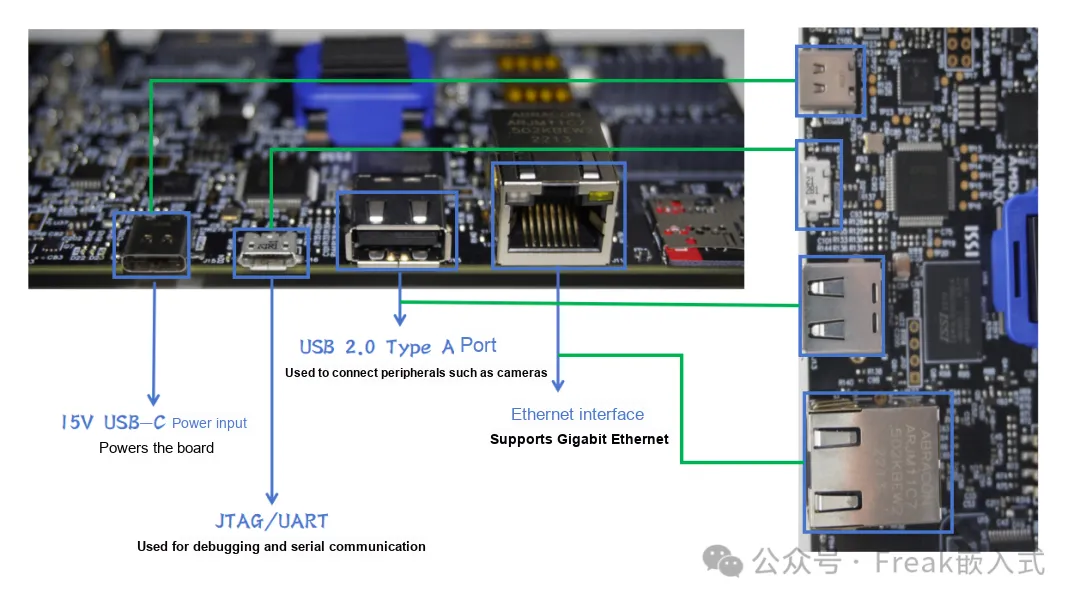
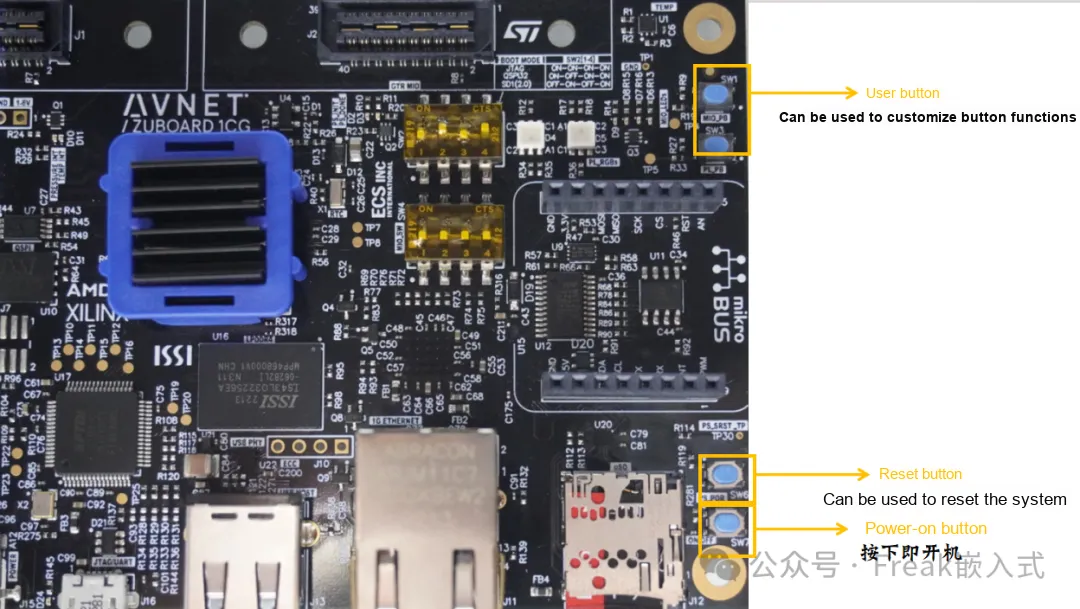
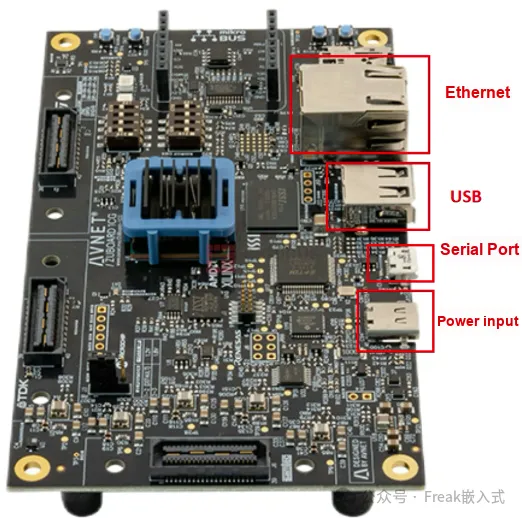
JTAG/UART (J11): Used for debugging and serial communication
USB 2.0 Type APort (J13): Can connect peripherals, such as a mouse, keyboard, or storage device
15V USB-CPower input (J15): Powers the board
Ethernetinterface (J11): Supports Gigabit Ethernet
2.4 User Buttons and Switches
User buttons (SW1, SW3): User-defined buttons that can be used to control the behavior of programs
User slide switch (SW4): 4-bit MIO user switch; the user can set the switch states as needed
Reset button (SW6): Used to reset the system
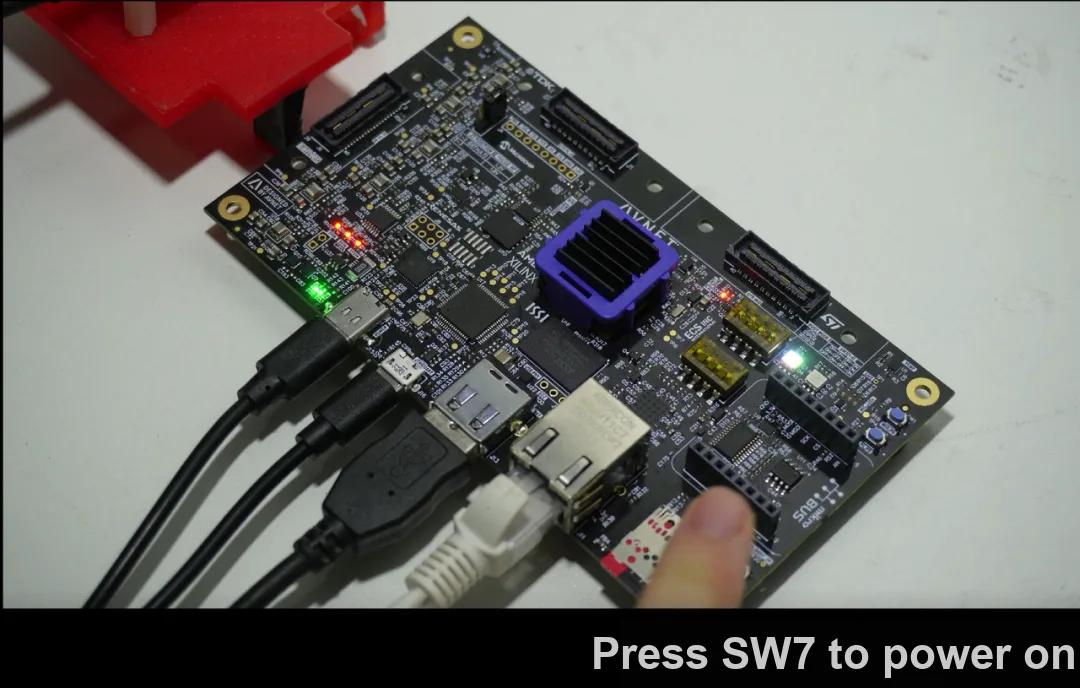
Power switch (SW7): Controls powering the board on and off
3. Demo Section
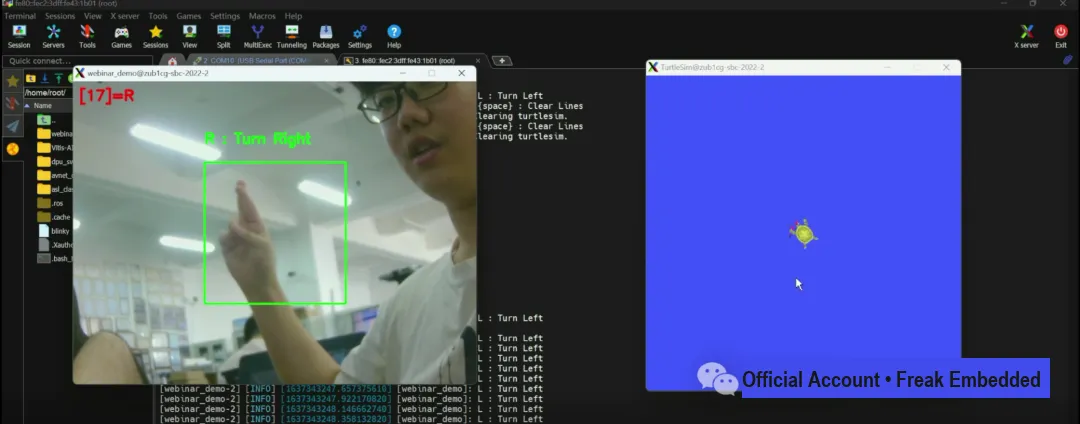
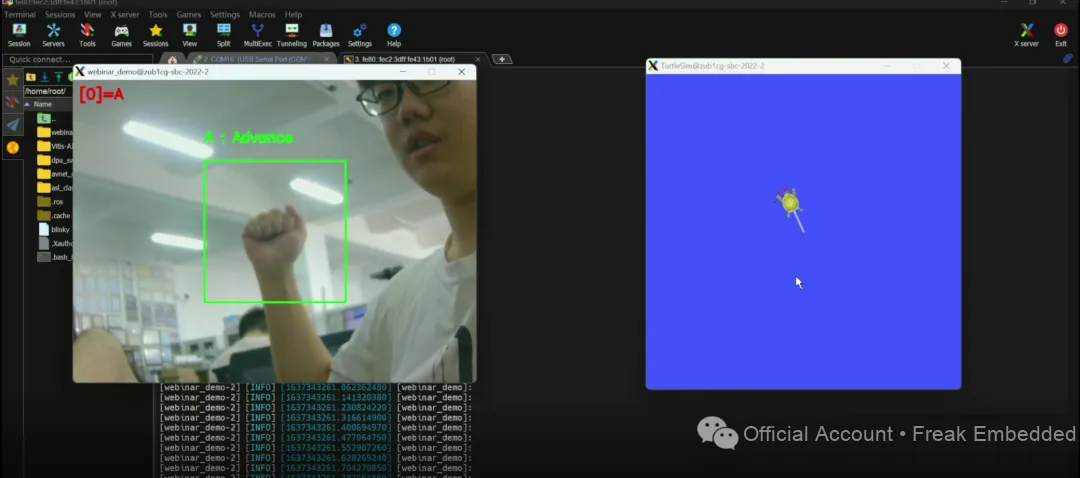
Next we will show you how to get started with the ZUBoard in 2 minutes. Two demos are prepared here: the first is gesture digit recognition for image processing, and the second is a gesture-controlled software robot(Both examples come from Hackster)Before running the demos, we first set up the environment and connect to the development board over Ethernet.
3.1 Environment Setup
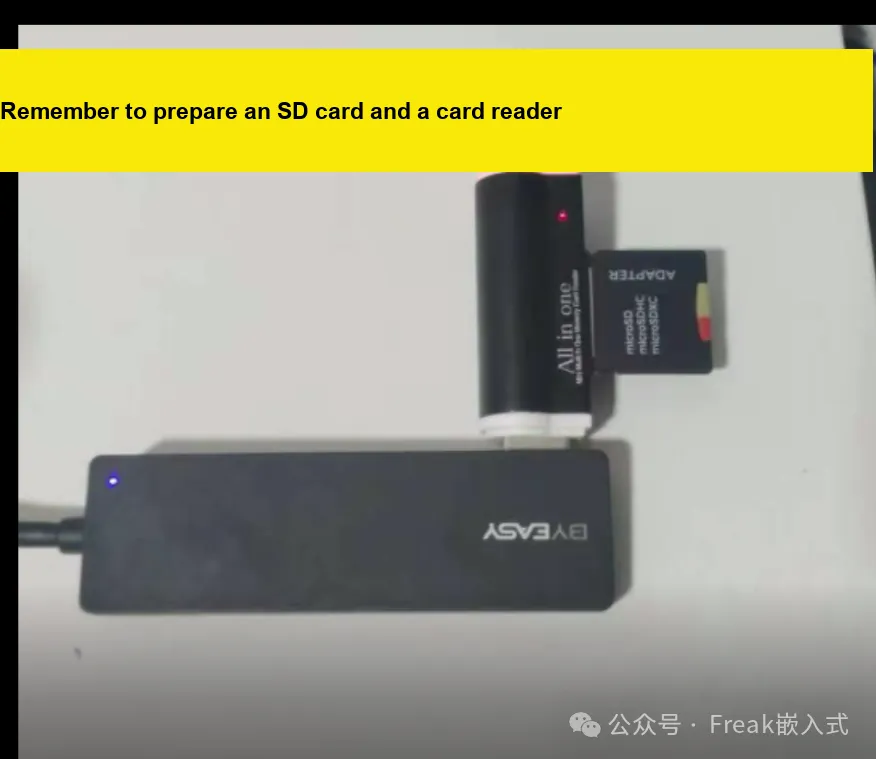
First, connect the SD card to the computer with a card reader:
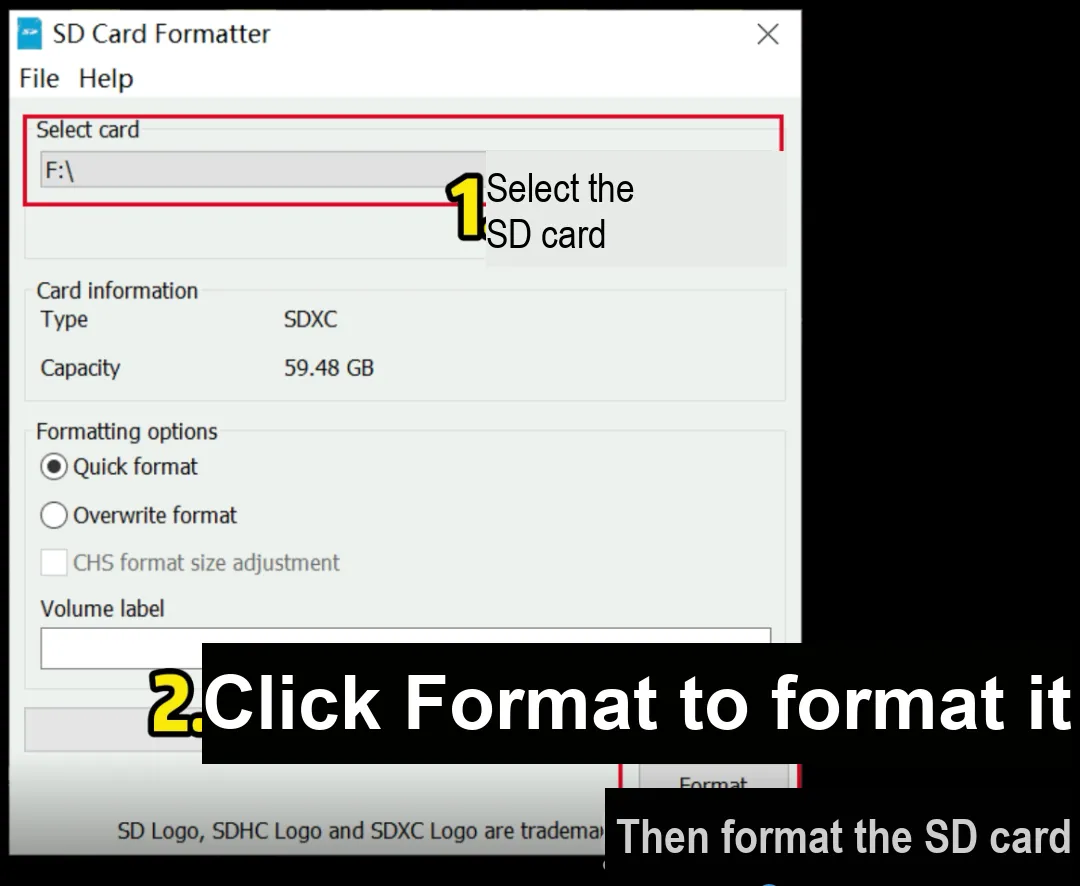
Format the SD card:
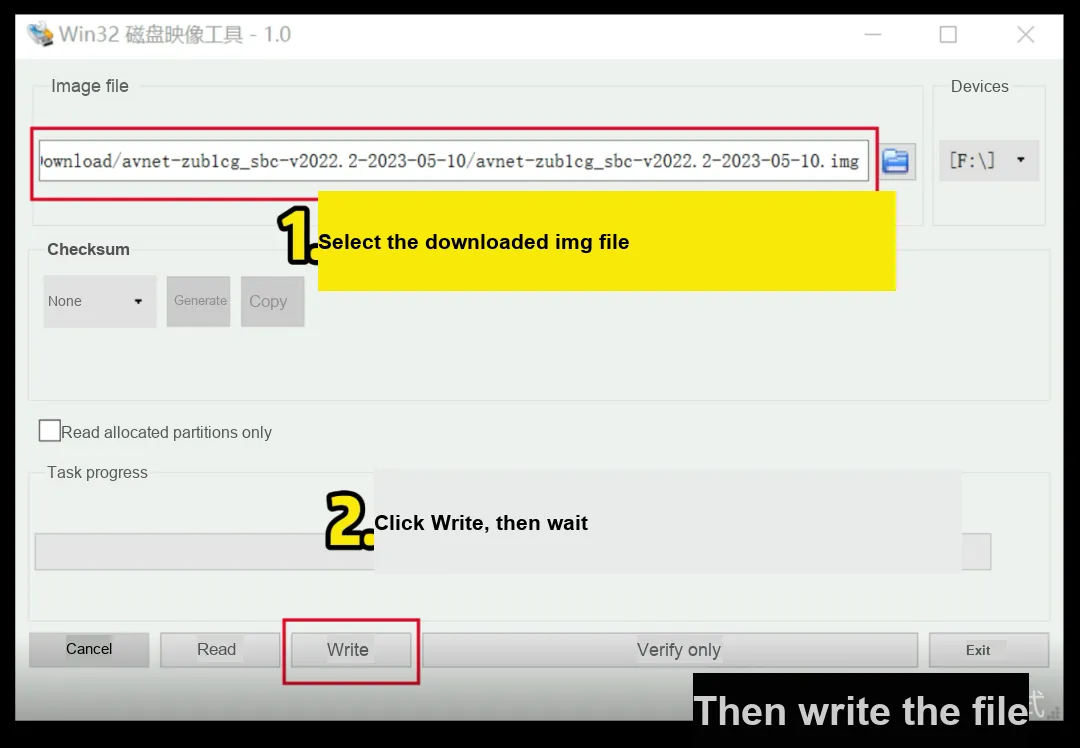
Write the image file (the image file can be downloaded from the Baidu Netdisk link in the references section):
3.2 Connecting to the Development Board over Ethernet
Connect the cables to the computer; the main power input is 15V:
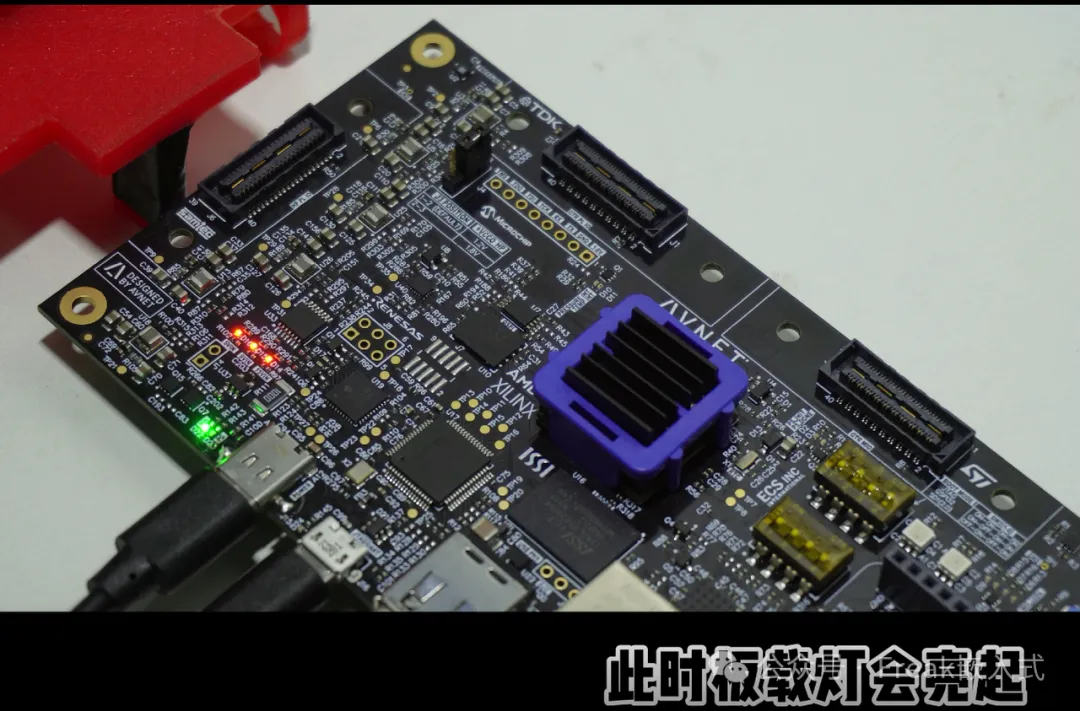
After power-on, the onboard LED lights up:
Press the SW7 power button; the white light turns on and the board starts booting:
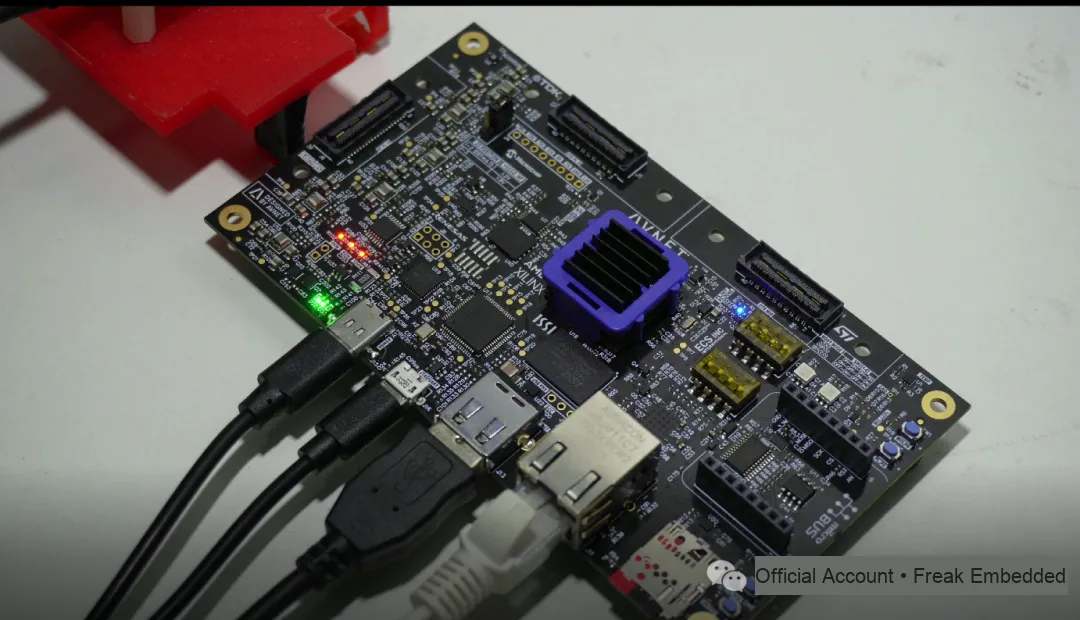
The blue light turns on, indicating that the board has booted successfully:
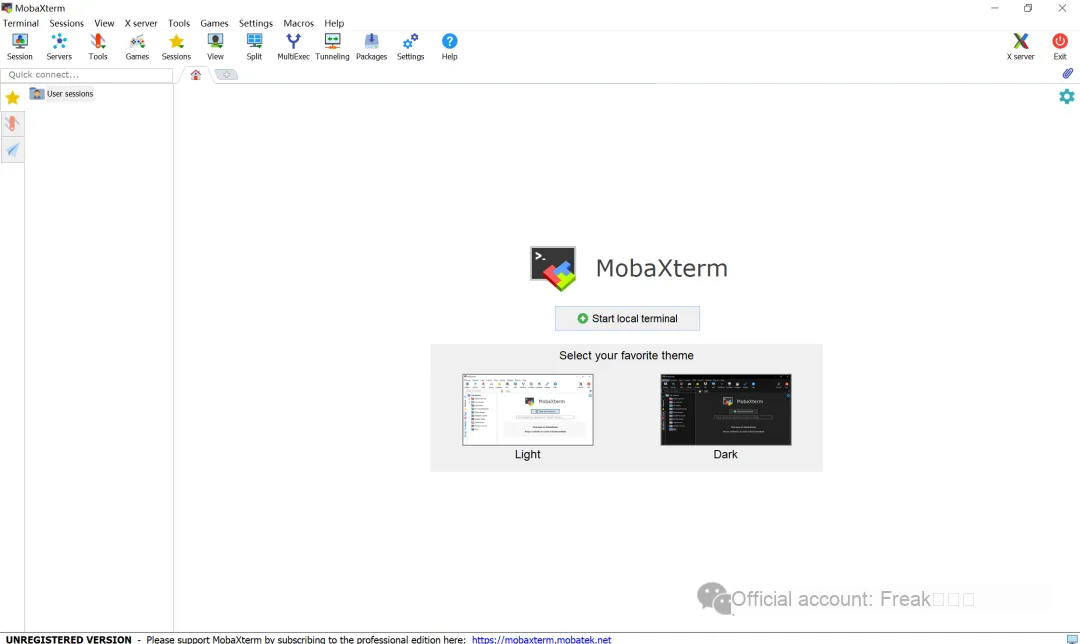
Download the MobaXterm software (the download URL is given at the end of the article):
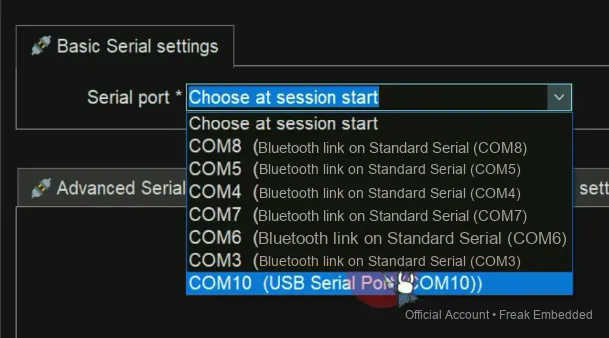
Select the USB-connected serial port:
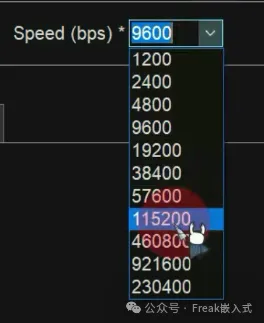
Set the baud rate to 115200:
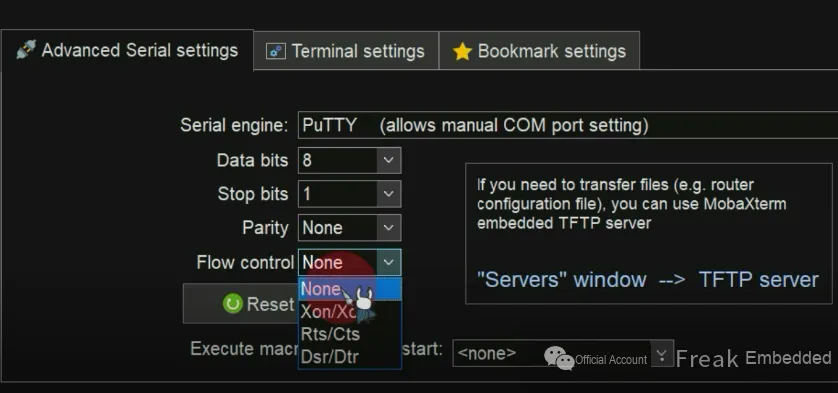
Turn off flow control:
Useifconfigto view the network IP address:

Configure the SSH service to enter the internal system automatically. After logging in, we will be inside the system and can begin programming and configuration work. Copy the network IP address into the remote host box:
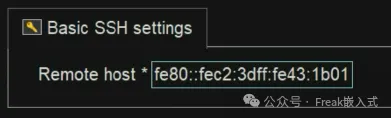
Select Sprcify username and enter root:


The following page will then pop up automatically; we have now successfully connected to the development board over Ethernet:
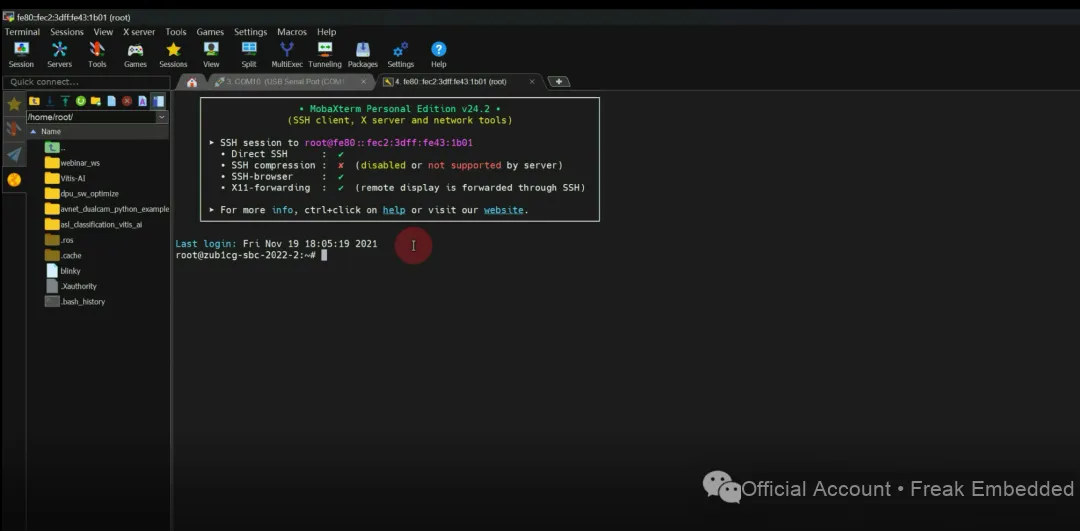
3.3 ASL Gesture Digit Recognition Demo
Switch to the project directory:Use the
cd asl_classification_vitis_aicommand to switch to the project directoryRun the real-time gesture digit recognition script:Execute the
python3 asl_classify_live.py --model=./model_mobilenetv2/B{#}/asl_classifier.xmodelcommand to run the real-time gesture digit recognition script
Next, we can recognize gesture digits!
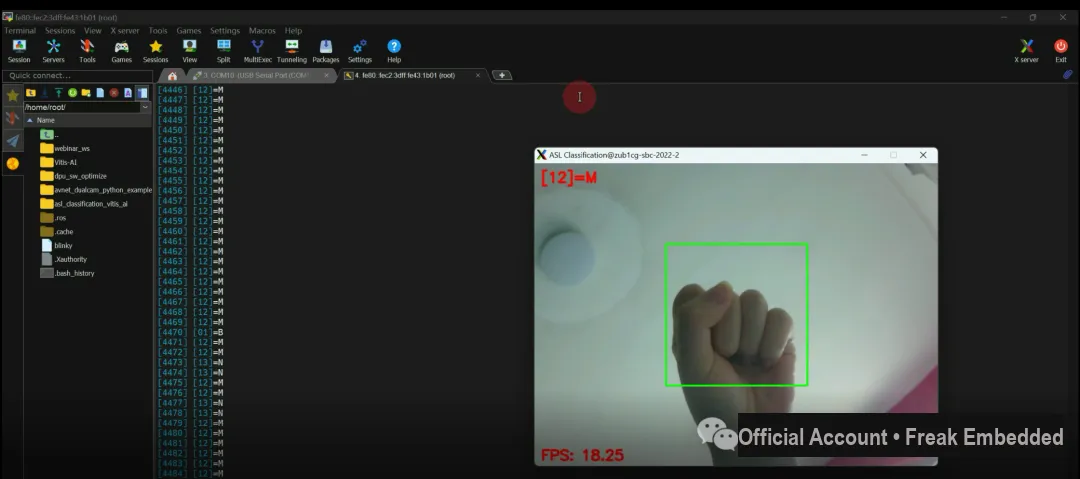
3.4 Gesture-Controlled Software Robot Demo
Follow these steps:
Confirm the application is active: Execute the command
xmutil listapps, and confirmavnet-{platform}-benchmarkwhether the application is active. The{platform}here should be replaced according to your hardware platform (ZUBoard or Ultra96-V2)QueryDPUarchitecture: Use the command
xdputil query | grep DPUto query the DPU architecture loaded in the programmable logic (PL). Note down the architecture information; it should be B2304 for the Ultra96-V2 platform and B512 for the ZUBoard platformCreate the workspace directory:
mkdir -p webinar_ws/srcSwitch to the workspace directory:
cd webinar_wsSet upROSenvironment: Execute the command
source /usr/bin/ros_setup.shto set the ROS environment variablesCompileROSworkspace: Use the command
colcon buildto compile the packages in the ROS2 workspace.Set up the local environment: Execute the command
source ./install/local_setup.shto set up the environment for the compiled packages.List executables: Use the command
ros2 pkg executables | grep py_visionto listpy_visionthe executables in the package.Launch the ROS2 demo: Execute the command
ros2 launch py_vision webinar_demo_launch.pyto launchpy_visionthe demo in the package. This demo may be the main program for controlling a robot with sign language recognition.
As you can see, the related demo has started:
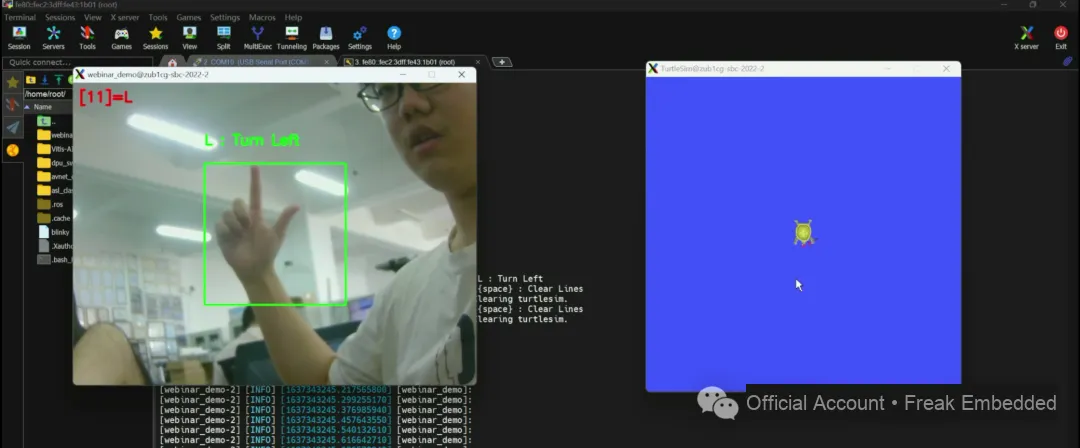
4. User Experience
The ZUBoard 1CG is designed to be an ideal platform for exploring bare-metal programs, Linux, or the Vitis AI accelerator. Its powerful processing capability and rich interface resources allow developers to easily implement complex embedded applications. The temperature and pressure sensors integrated on the board add environmental data acquisition to the system, which broadens its range of applications. In addition, through its rich expansion interfaces, the ZUBoard 1CG can be conveniently connected to various peripherals, which further improves its flexibility and expandability.
References
American Sign Language (ASL) recognition: https://www.hackster.io/AlbertaBeef/asl-classification-with-vitis-ai-025765#toc-executing-the-demo-with-remote-display--mobaxterm-5
Gesture-controlled software robot: https://www.hackster.io/AlbertaBeef/controlling-robots-with-zuboard-b6d13b
MobaXterm software download URL: https://mobaxterm.mobatek.net/download-home-edition.html
Cloud drive link for the software and img files to download:https://pan.baidu.com/s/1fMm9uYWYPWTFoMahdneFlg?pwd=1234