Contents
- I. Module Introduction
- II. Introduction to Major Chips
- 2.1 Chip Overview
- 2.2 Pin Definition
- 2.3 Functional Block Diagram
- 2.4 Performance Parameters
- 2.5 Reference Circuit
- 2.6 Chip Configuration
- 2.7 Communication Interfaces and Related Protocols
- 2.8 PCB Routing Precautions
- III. Instructions for Circuit Engineering and Module Usage
- 3.1 Circuit Source Engineering
- 3.2 Module Usage Instructions
- 3.3 Application Experiment
- IV. Drivers
- 5. BOM & Recommended Alternative Parts
- VI. Revision History
- VII. Relevant Materials
- 7.1 Chip Datasheet
- 7.2 Unique Icons for PCB Silkscreen
I. Module Introduction
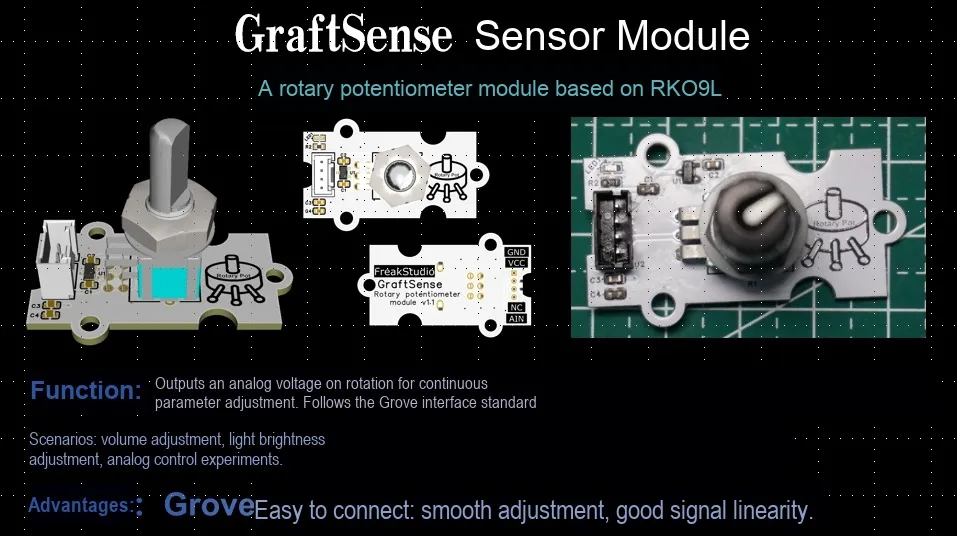
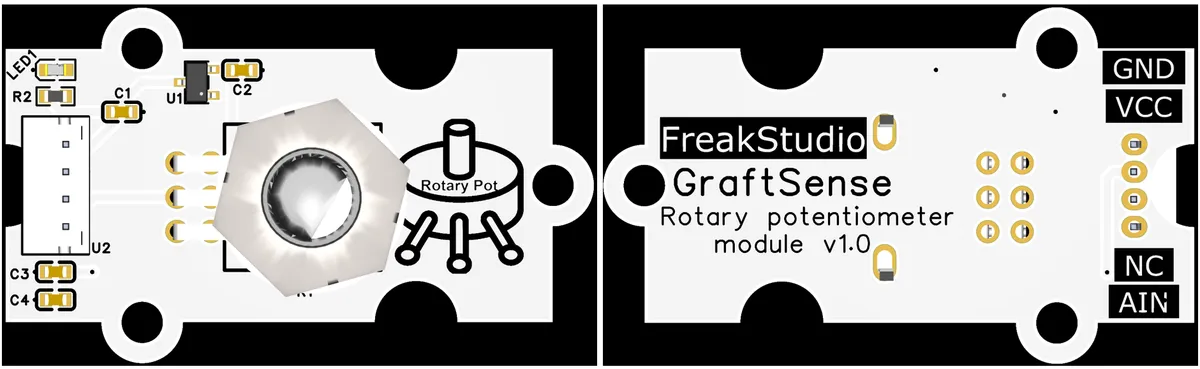
Rotary Potentiometer Module Based on RK09L Based on RK09L rotary potentiometer design, it integrates a DC-DC 5V to 3.3V converter circuit (XC6206P302MR), LED indicator lights and filtering circuits, and realizes functions via the GND, VCC, NC, and AIN interfaces. It can convert the rotation angle into a continuous analog voltage signal, which is suitable for scenarios such as parameter adjustment and signal control in embedded systems, and provides a precise analog input solution for devices.
II. Introduction to Major Chips
2.1 Chip Overview
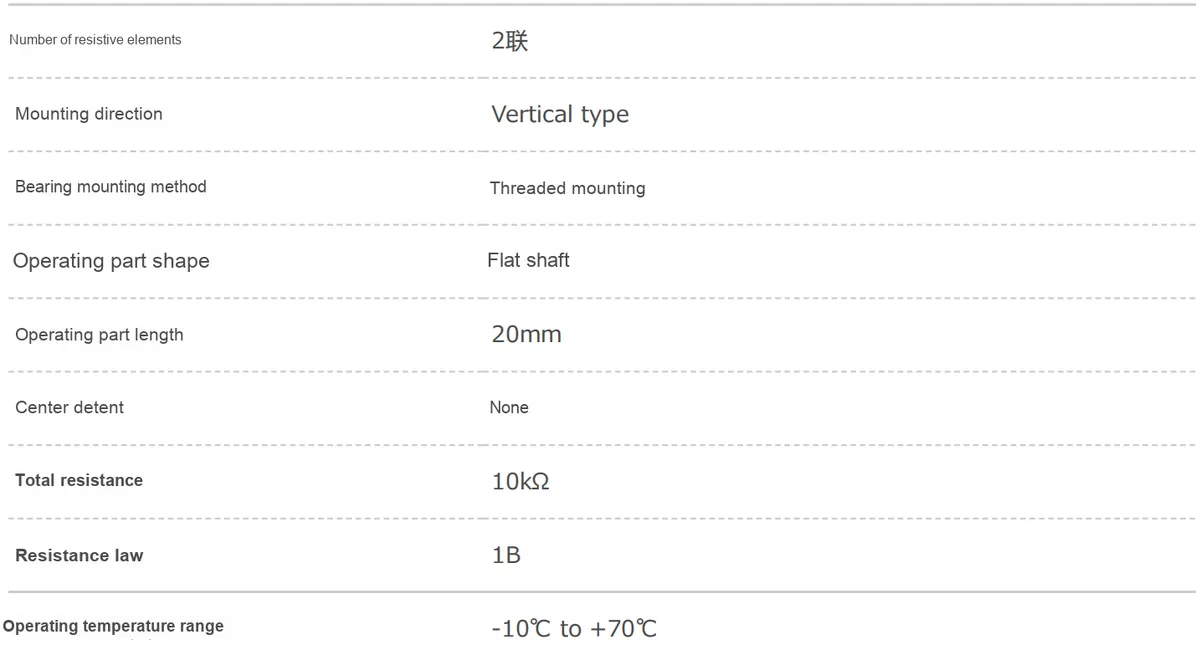
RK09L rotary potentiometer is a 9-type metal shaft articulated series product launched by ALPS ALPINE, which adopts a 2-unit resistor, is vertically mounted and fixed via M9×0.75 threads, and features a 20mm flat shaft for the operating part;Total resistance: 10kΩ(resistance law 1B), full rotation angle: 300°±5°, operating life: 15,000 cycles, operating temperature range: -10°C to + 70°C. It features excellent electrical properties (rated power 0.05W, maximum operating voltage 50V AC / 10V DC, etc.) and mechanical properties (rotation torque 2~25mN·m, etc.), and is suitable for scenarios requiring precise analog adjustment such as audio equipment and industrial control.
2.2 Pin Definition
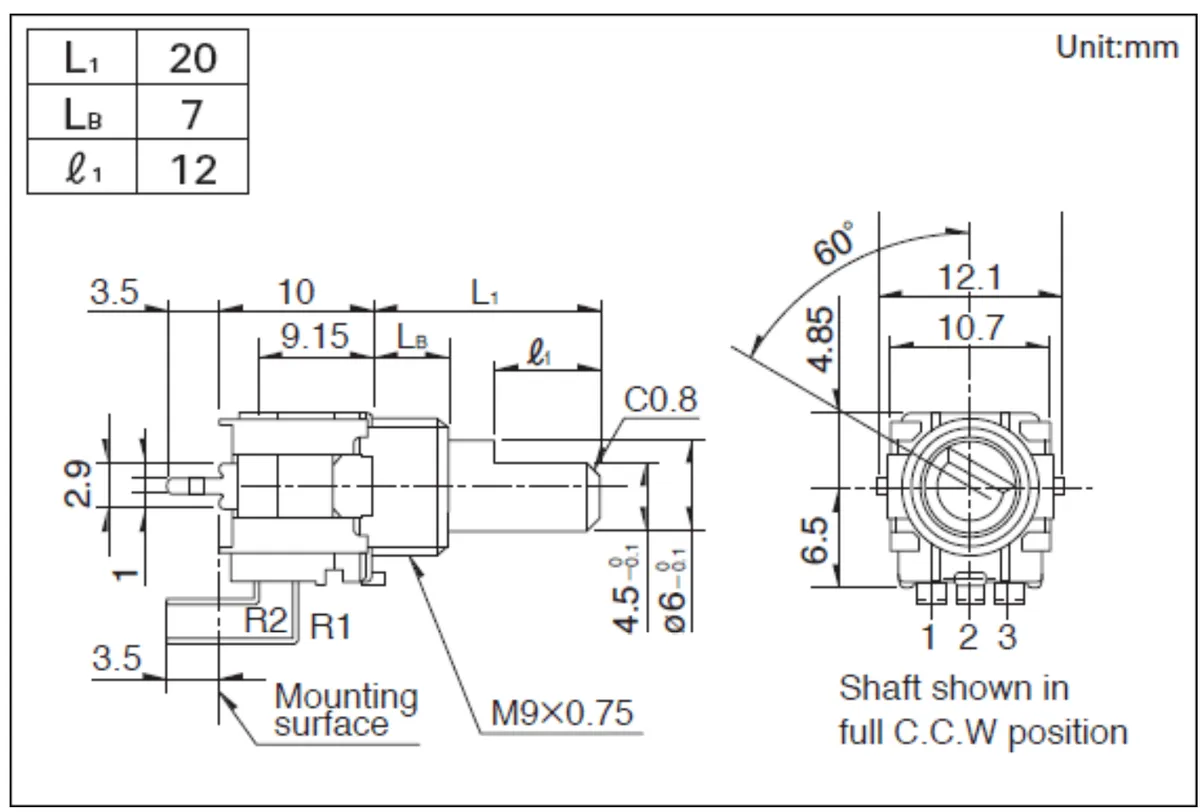
This RK09L rotary potentiometer has 3 pins: pins 1 and 3 are the fixed resistor terminals, and pin 2 is the sliding end (tap). When the shaft of the rotary potentiometer is rotated, the relative position of the sliding end 2 between pin 1 and pin 3 changes, which makes the resistance between 1-2 and 2-3 vary continuously, so as to convert the mechanical rotation action into an analog electrical signal and provide a continuously adjustable resistance/voltage input for the circuit.
2.3 Functional Block Diagram
None.
2.4 Performance Parameters
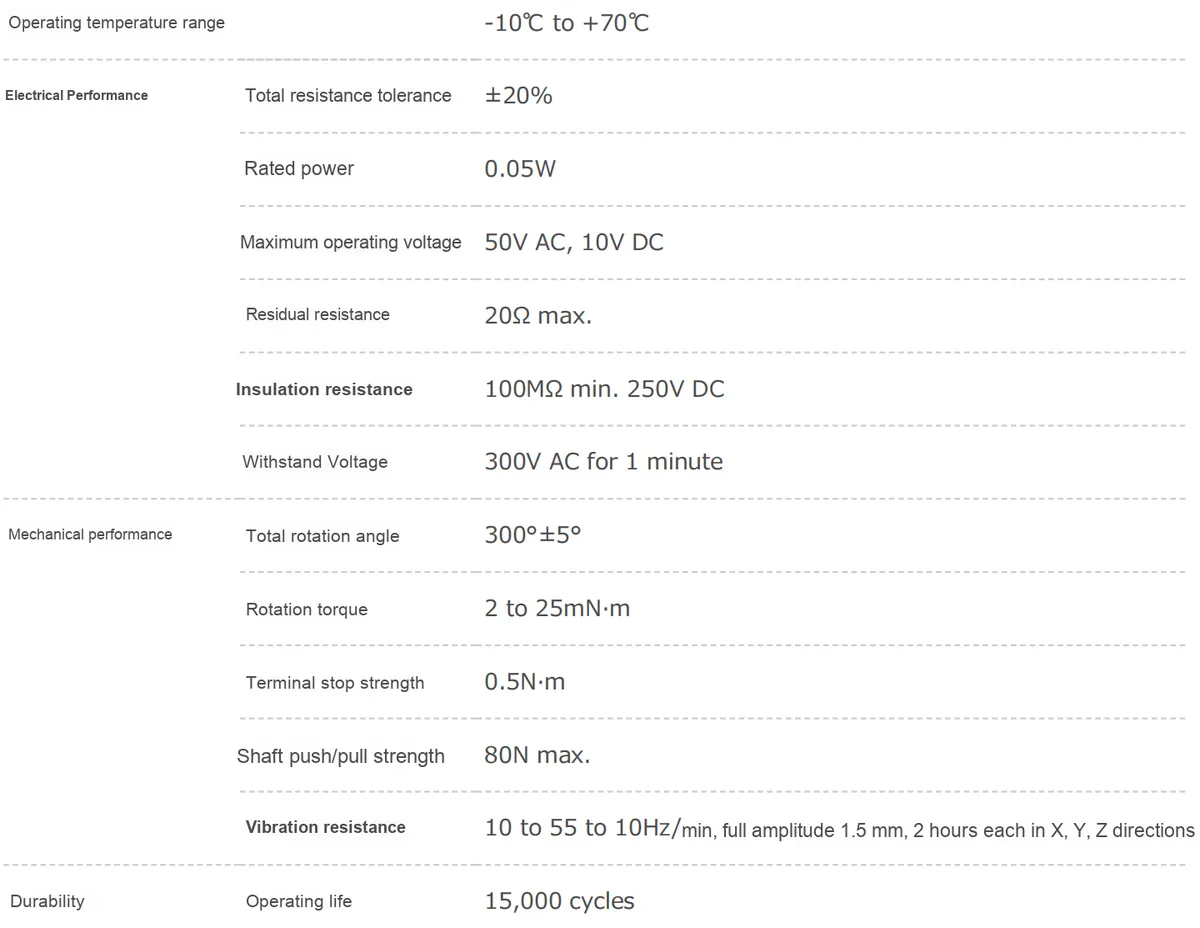
2.5 Reference Circuit
None.
2.6 Chip Configuration
None.
2.7 Communication Interfaces and Related Protocols
None.
2.8 PCB Routing Precautions
No special requirements.
III. Instructions for Circuit Engineering and Module Usage
3.1 Circuit Source Engineering
To obtain the source project of the circuit, please follow the official account [Freak Embedded]
3.2 Module Usage Instructions
The schematic diagram of this module is shown below:
SCH_RK09L-Based Rotary Potentiometer Module_v1.0_2025-09-15.pdf 2.1 MB
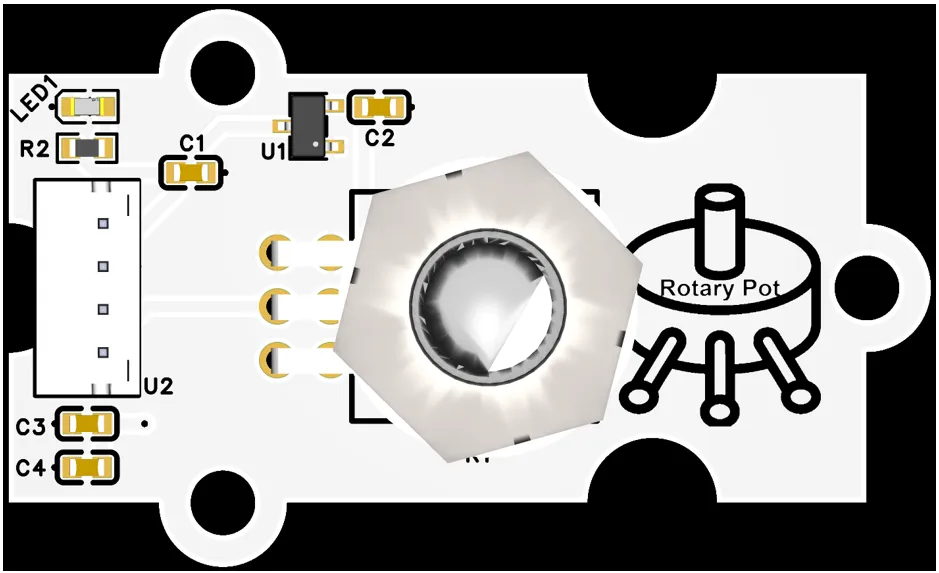
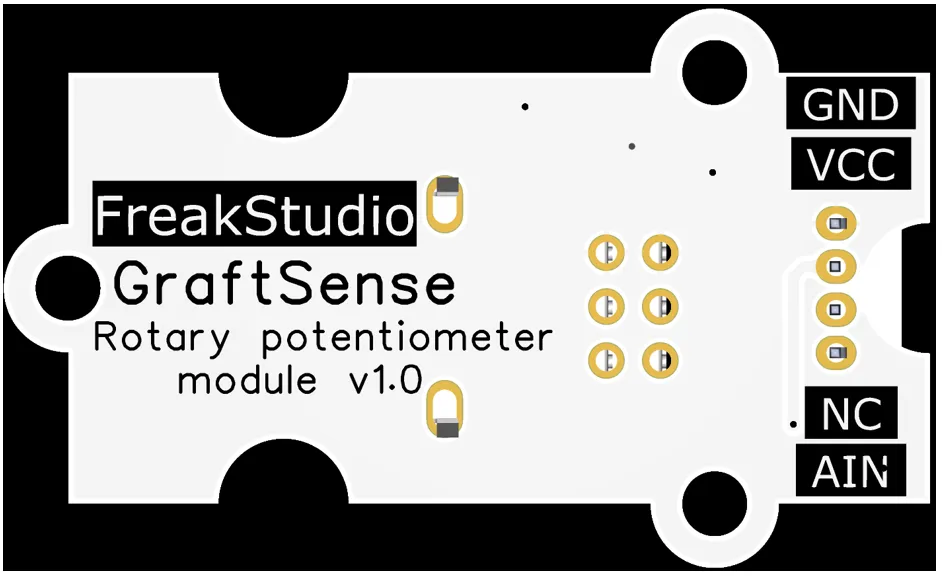
This module provides an analog output interface AIN: its output voltage varies continuously with the rotation angle of the RK09L rotary potentiometer, ranging from 0 to 3.3V. Users can directly connect it to the ADC (Analog-to-Digital Converter) pin, and obtain the rotation position information of the potentiometer by collecting this analog voltage value, so as to realize the quantitative detection of angle changes.
3.3 Application Experiment
Here, we use the GraftPort-RP2040 development board for testing, and connect the RK09L-based rotary potentiometer module to communicate with the main controller via the AIN interface.
Here, we first use the HY2.0-4P cable to connect the module to the GraftPort-RP2040 development board's AIN0 interface:
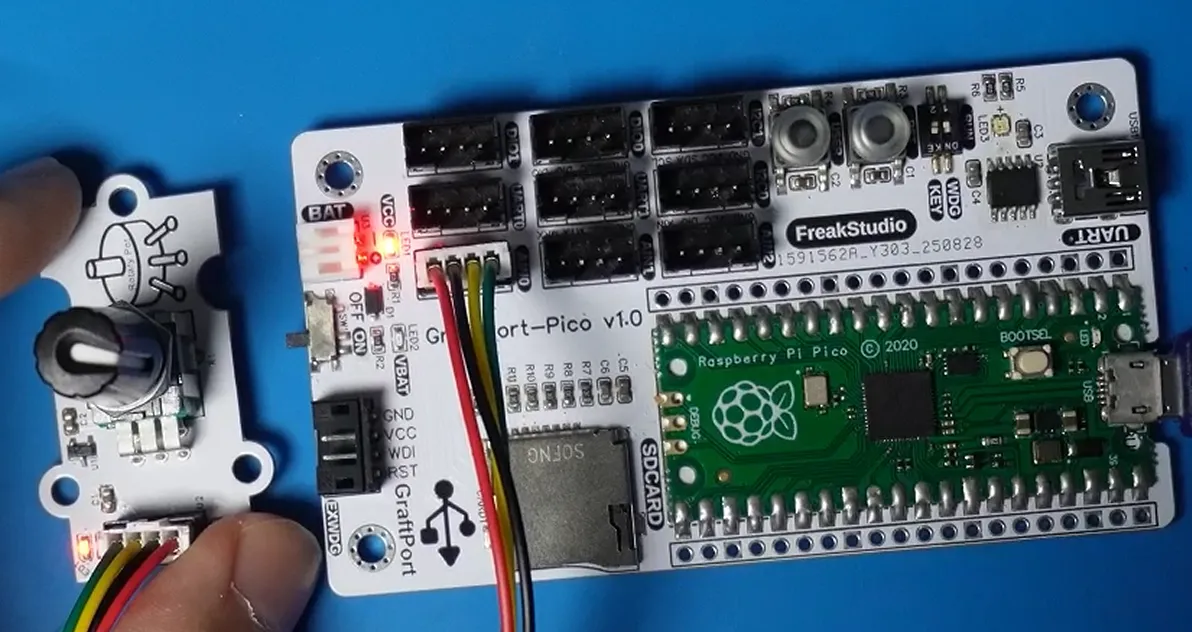
The module connections are shown in the following table:
Development Board Pins | Module Pins | Description |
Pin 26 |
| The input interface of the sliding rheostat voltage signal on the MCU |
Pin 19 |
| - |
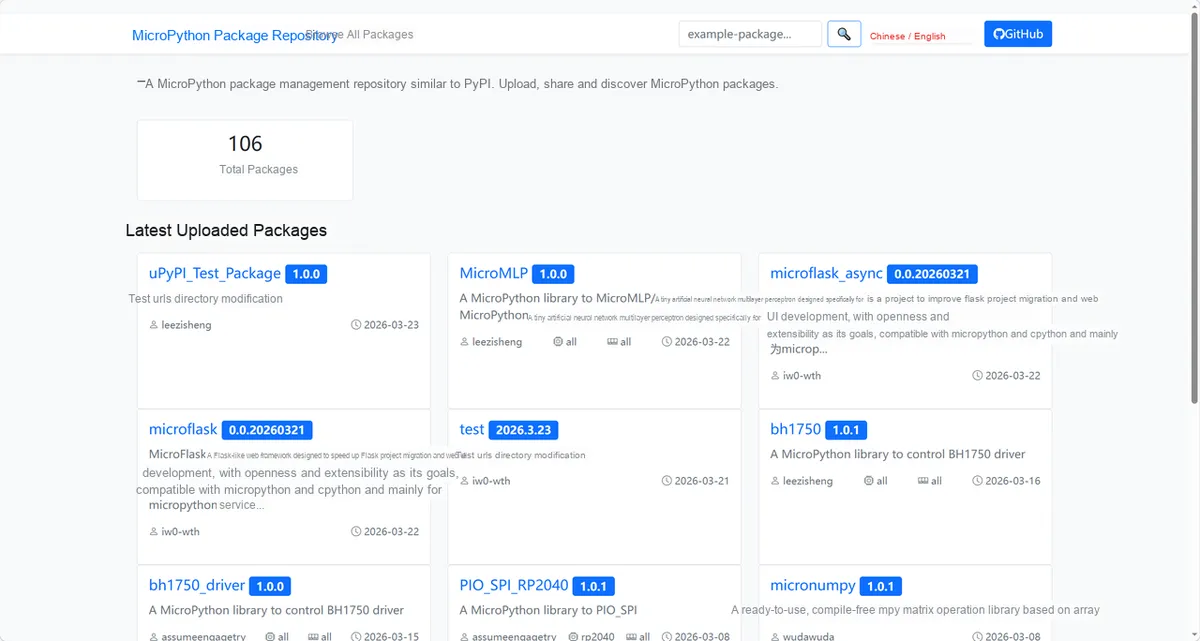
Here, we need to search for the relevant driver packages on uPyPI: https://upypi.net/zh/
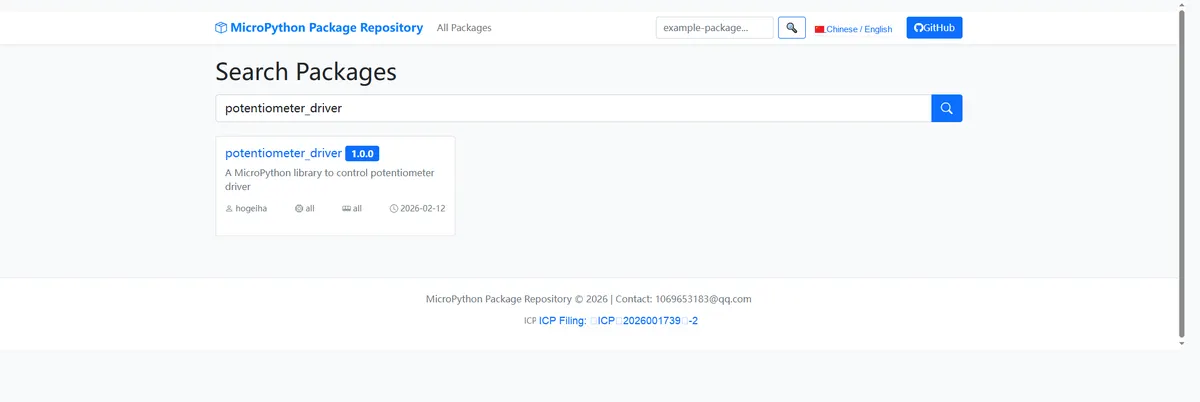
Enter potentiometer_driver to search, and the following will be displayed:
Click to copy the local installation command:
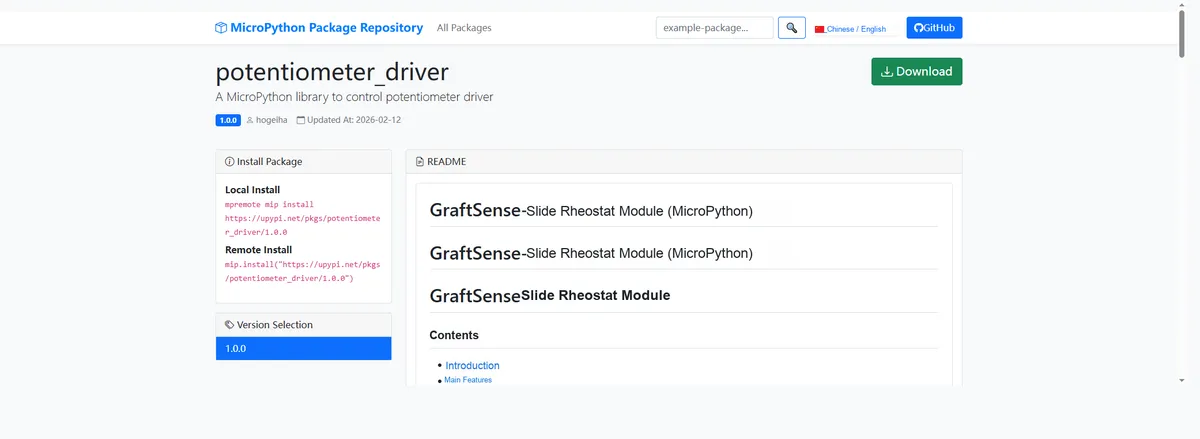
Import the module driver library code via the mip tool. Below are the usage commands for the mpremote tool:
mpremote mip install https://upypi.net/pkgs/potentiometer_driver/1.0.0After importing the sliding rheostat module - MicroPython driver code, copy the following main.py code into our project:
# Python env   : MicroPython v1.23.0
# -*- coding: utf-8 -*-
# @Time    : 2025/8/28 3:19 PM
# @Author  : 缪贵成
# @File    : main.py
# @Description : Sliding rheostat test file

# ======================================== Import Modules =========================================

import time
from machine import ADC
from potentiometer import Potentiometer

# ======================================== Global Variables ============================================

# ======================================== Functions ============================================

# ======================================== Custom Classes ============================================


# ======================================== Initialization configuration ===========================================

time.sleep(3)
print("FreakStudio:Sliding rheostat module testing")
# Voltage output connected to ADC0
adc = ADC(26)
pot = Potentiometer(adc)

# ========================================  Main Program  ============================================

interval = 0.5
try:
    while True:
        # Get the current status dictionary
        state = pot.get_state()
        # Print the current status
        print(f"State: raw={state['raw']}, voltage={state['voltage']:.3f} V, ratio={state['ratio']:.3f}")
        # Wait for the next read
        time.sleep(interval)

except KeyboardInterrupt:
    print("\nTest terminated by user.")
Burn the code, open the terminal, and use the mpremote tool to connect to the main controller. The output is as follows:
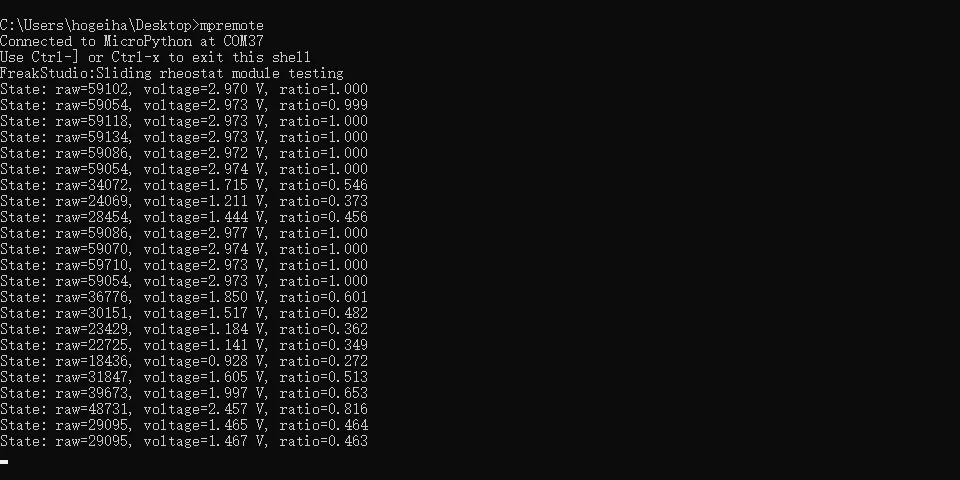
It can be seen that as we turn the rotary potentiometer, the voltage value and the rotation proportion value displayed on the terminal change accordingly:
IV. Drivers
5. BOM & Recommended Alternative Parts
None.
VI. Revision History
Document Version | Date of Modification | Modifier | Modified Content |
v1.0 | 2025-09-04 | ben0i0d | Initialize the document |
v1.1 | 2025-11-04 | Li Zisheng | Added PCB routing precautions for Version 2.8 Revised Section 3, Instructions for Circuit Source Project and Module Usage, and added a secondary heading: 3.1 Circuit Source Engineering, 3.2 Module Usage Instructions, 3.3 Application Experiments The BOM sheet has not been finally checked, the driver has not been re-verified, and the 3.3 application experiment Not yet specified. |
v1.2 | 2025-12-29 | Li Zisheng | Added application experiments and production files |
v1.3 | 2025-12-31 | Xin Ruili | Create an open version of the document based on the internal document version v1.2. |
v1.4 | 2026-03-29 | Xin Ruili | Modified the application experiment section |
VII. Relevant Materials
7.1 Chip Datasheet
C380211_9F1B13B0308C84D15021826C3C64418F.pdf 799 KB
7.2 Unique Icons for PCB Silkscreen