
Contents
- 0. Preface
- I. Introduction to the Plugin
- II. Plugin Installation
- 2.1 Install from PyPI
- 2.2 Install from Local File
- 2.3 Installation Precautions
- III. Plugin Usage
- 3.1 Open the plugin management interface
- 3.2 Device Connection
- 3.3 Package Search and Download/Installation
- 3.4 View Installation Logs and Verification Results
- Attachment: Local Installation Package
- Version Record
0. Preface
In the development process of MicroPython, third-party driver libraries are the core dependencies for implementing functions such as sensor interaction, Communication Protocol, and interface control. To provide developers with a centralized and standardized package sharing platform, our team maintains the uPyPi repository — which currently includes 173 various MicroPython packages covering multiple scenarios such as sensor drivers, communication modules, and human-computer interaction, solving the long-standing problem of "difficult and chaotic package searching" for developers.
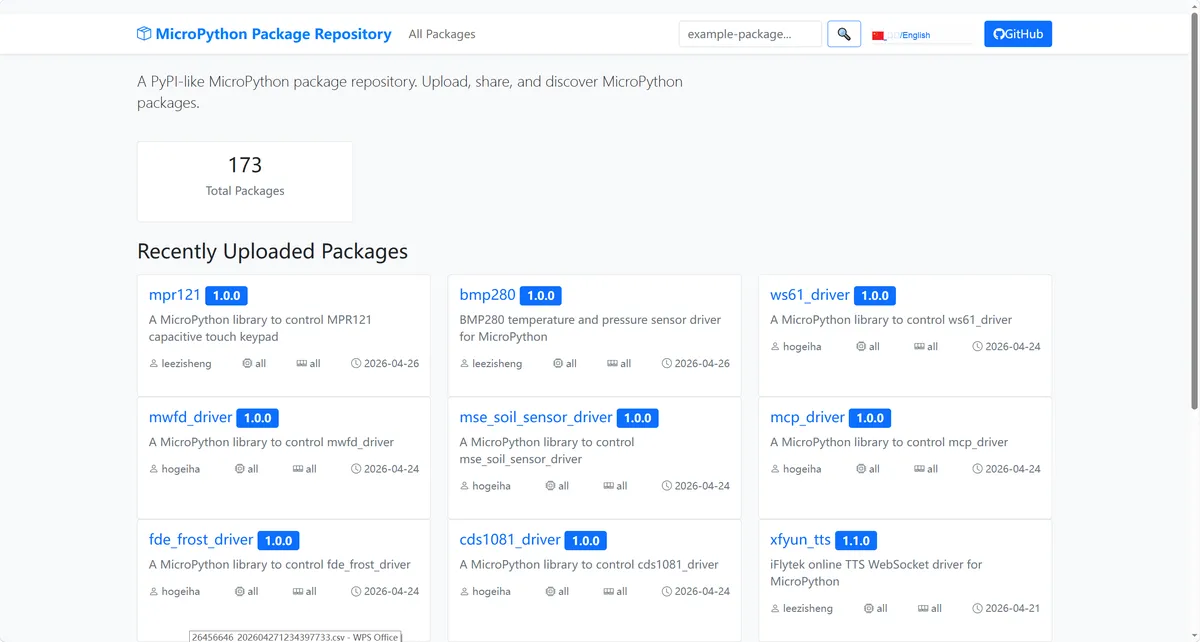
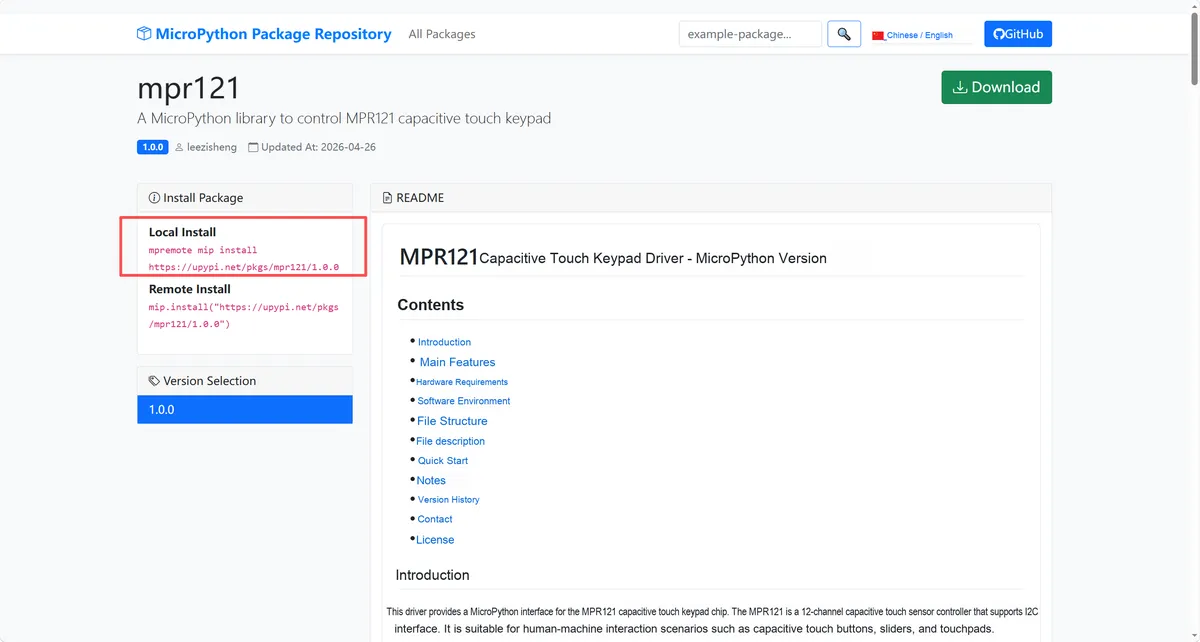
However, at present, most developers still use the uPyPi package by copying the command from the repository page mpremote mip install, then manually pasting it into the terminal to execute the installation. This process not only requires handling serial port connections and command formatting, but also troubleshooting dependency issues on their own, which is extremely unfriendly to beginners and also reduces development efficiency.
To thoroughly address this pain point, we have developed thonny-upypi-manager, a plugin for the Thonny IDE. It directly integrates the package management functionality of the uPyPi repository into Thonny, eliminating the need to open webpages to copy commands or manually handle dependencies. The entire process from searching, viewing, caching to one-click installation can all be completed within the IDE.
I. Introduction to the Plugin
thonny-upypi-manager is a third-party plugin we have developed exclusively for the Thonny IDE, whose core function is to interface with the uPyPi (MicroPython-style package repository) maintained by our team, enabling visualized end-to-end management of MicroPython packages, and it is compatible with Thonny 4.1.7 and later versions.
Simply put, it is the "Thonny Client" for the uPyPi repository, allowing you to handle all package management operations right within the IDE without having to switch to a web page or copy terminal commands.
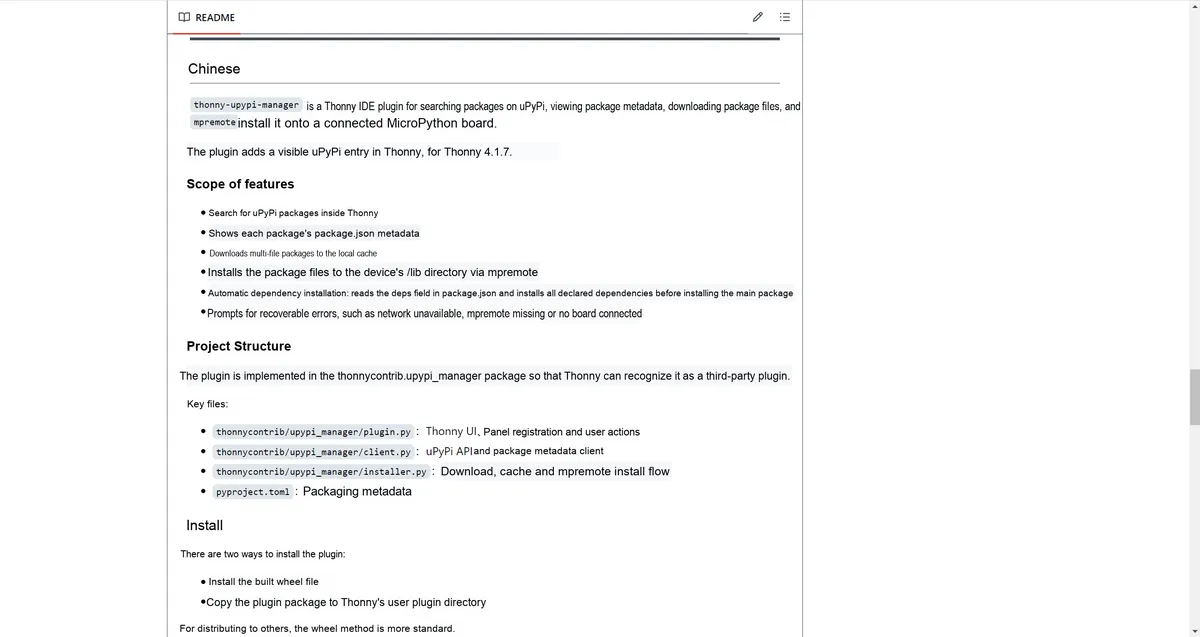
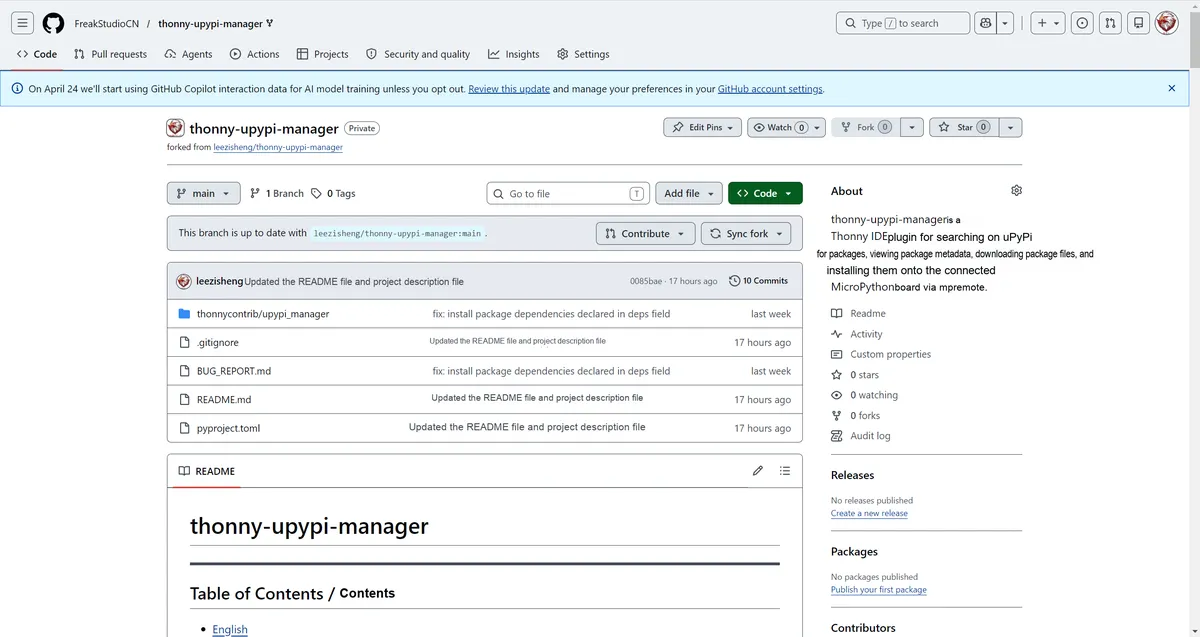
Github Source Code Repository: https://github.com/FreakStudioCN/thonny-upypi-manager
Its functions cover the entire workflow of package management and can address multiple pain points in development:
- ✅ Package Search and Metadata Viewing: Directly search all packages on uPyPi within Thonny, and view the
package.jsoninformation (version, author, dependencies) of each package without switching to the web interface for queries. - ✅ Local Cache Management: Supports local caching of multiple file packages. Downloaded packages will be automatically saved locally, eliminating the need for re-download when reused.
- ✅ One-click installation to development board: Via the
mpremotetool, the package can be directly installed to the/libdirectory of the connected MicroPython development board, eliminating the need for manual file copying. - ✅ Automatic Dependency Handling: Reads the
package.jsonfile'sdepsfield to automatically install all dependencies before installing the main package, eliminating the need to manually locate and install each dependency one by one. - ✅ User-friendly error prompts: When encountering issues such as network disconnection,
mpremotenot being configured, or the development board not being connected, clear prompts will be provided to help you quickly identify and resolve the problem.
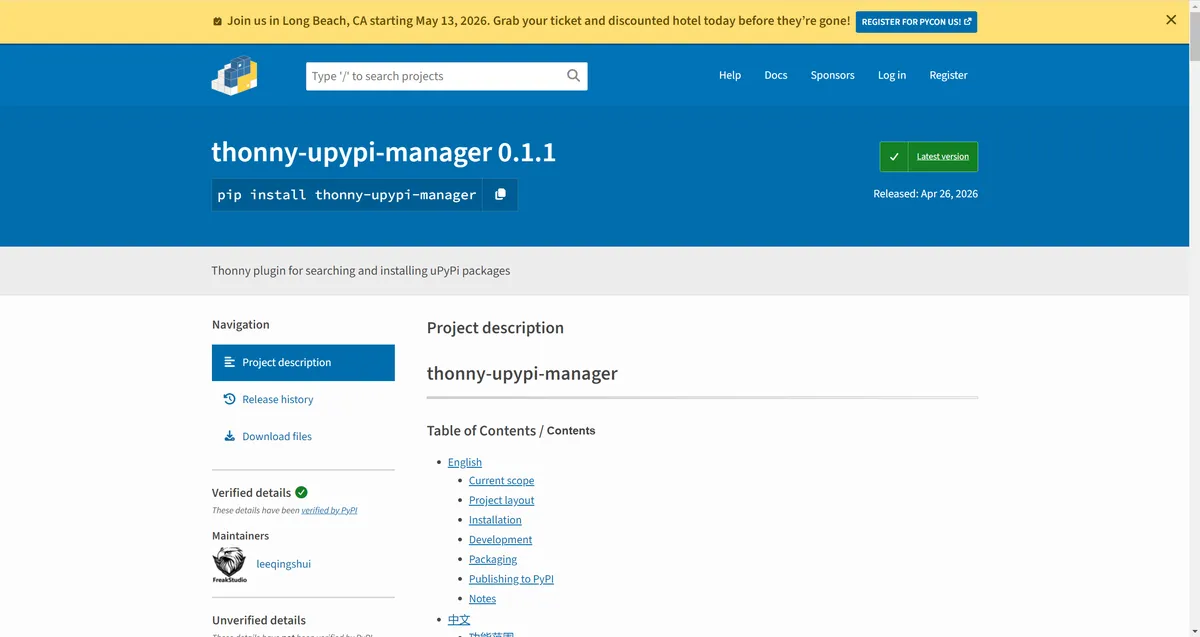
PyPI Address: https://pypi.org/project/thonny-upypi-manager/
The source code of this plugin is maintained by Freak Embedded Studio and hosted on a GitHub repository. It is currently one of the most convenient MicroPython package management tools for the Thonny platform, and will continue to be updated and maintained in the future to optimize its functions and compatibility.
II. Plugin Installation
Before installing the plugin, we first need to set up the basic Python environment, for which we recommend using the miniconda environment manager:
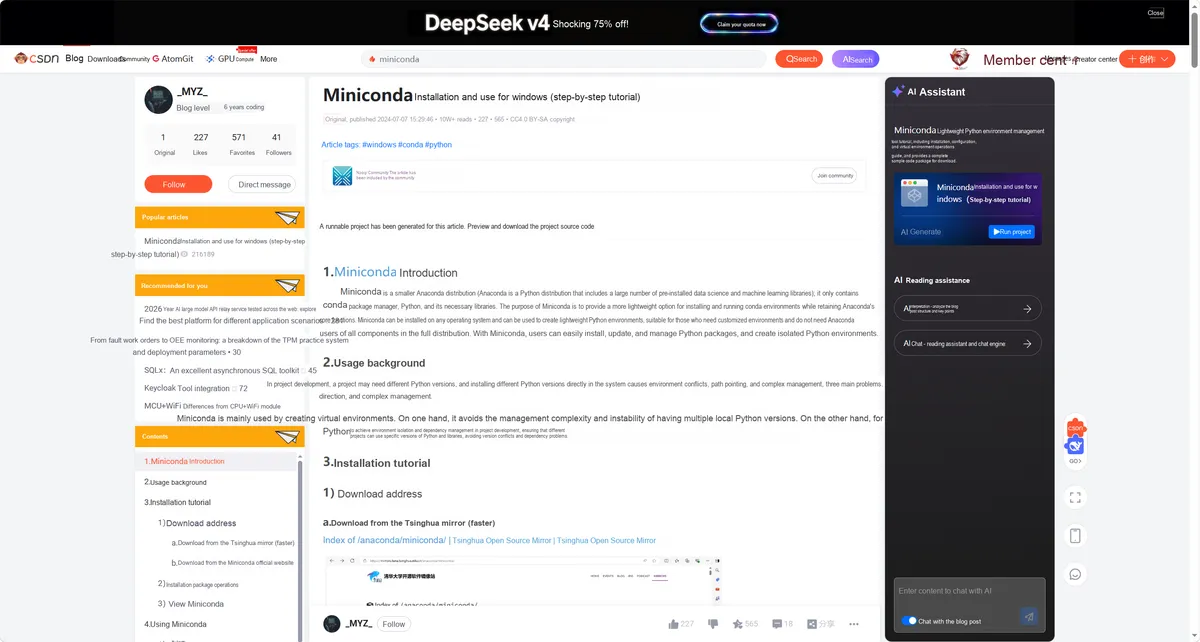
For a detailed tutorial, please refer to: https://blog.csdn.net/ming12131342/article/details/140233867
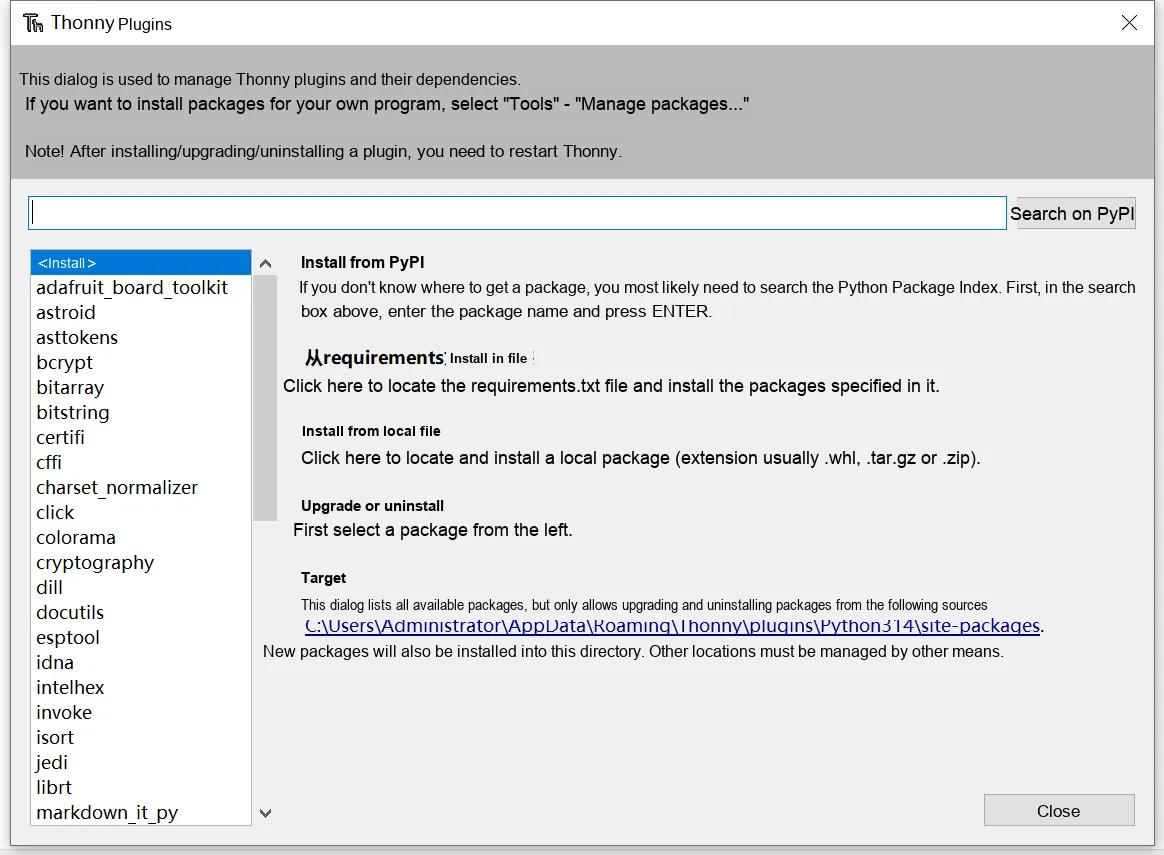
The plugin offers two installation methods: online installation from PyPI (simple and fast, suitable for normal network environments) and local file installation (suitable for network-restricted scenarios, requiring pre-downloaded installation packages); you can choose either one based on your actual situation.
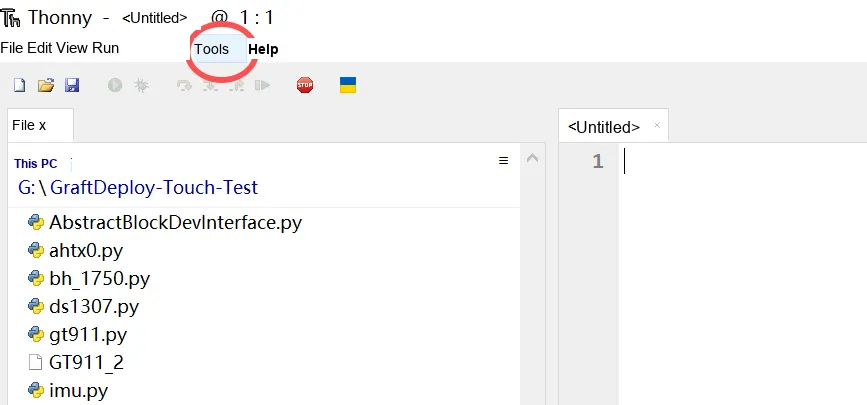
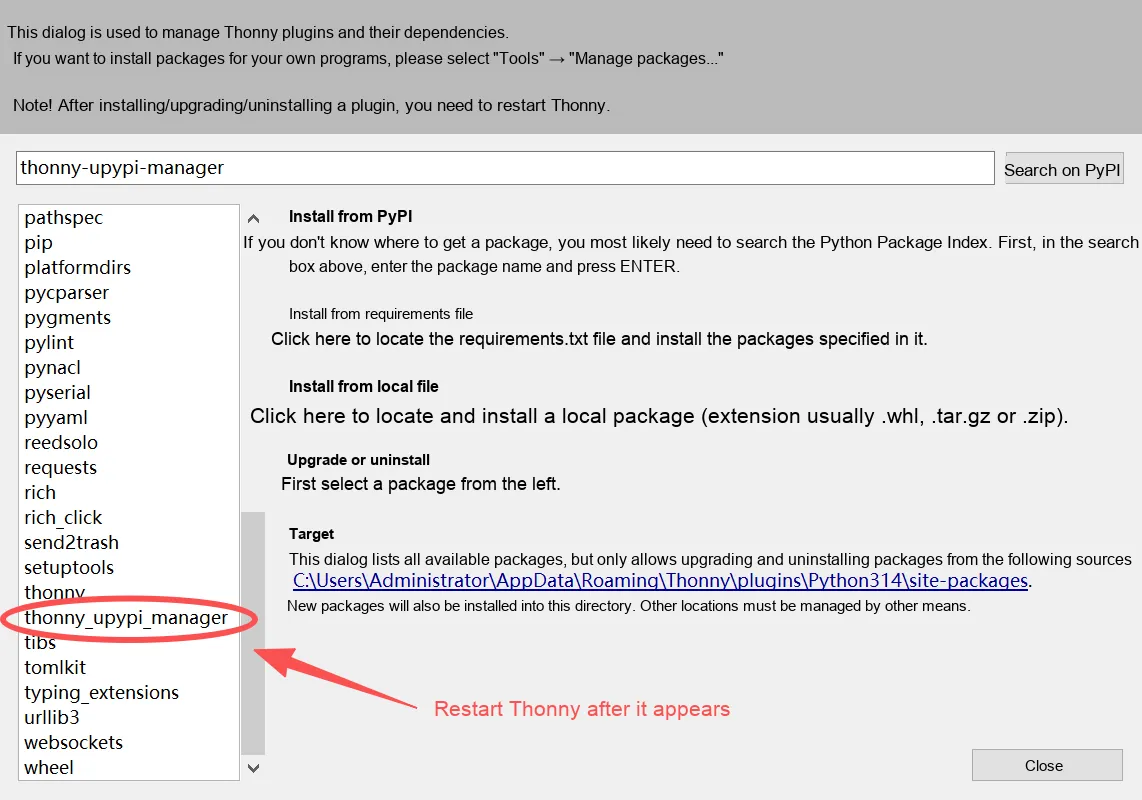
First, launch the Thonny IDE, click **Tools** in the top menu bar, and select **Manage Plugins. ..**(translated as "Manage Packages" in some versions) to open the plugin management window.
2.1 Install from PyPI
This is the most recommended installation method, which only requires a few simple steps throughout the process and eliminates the need for manual file handling:
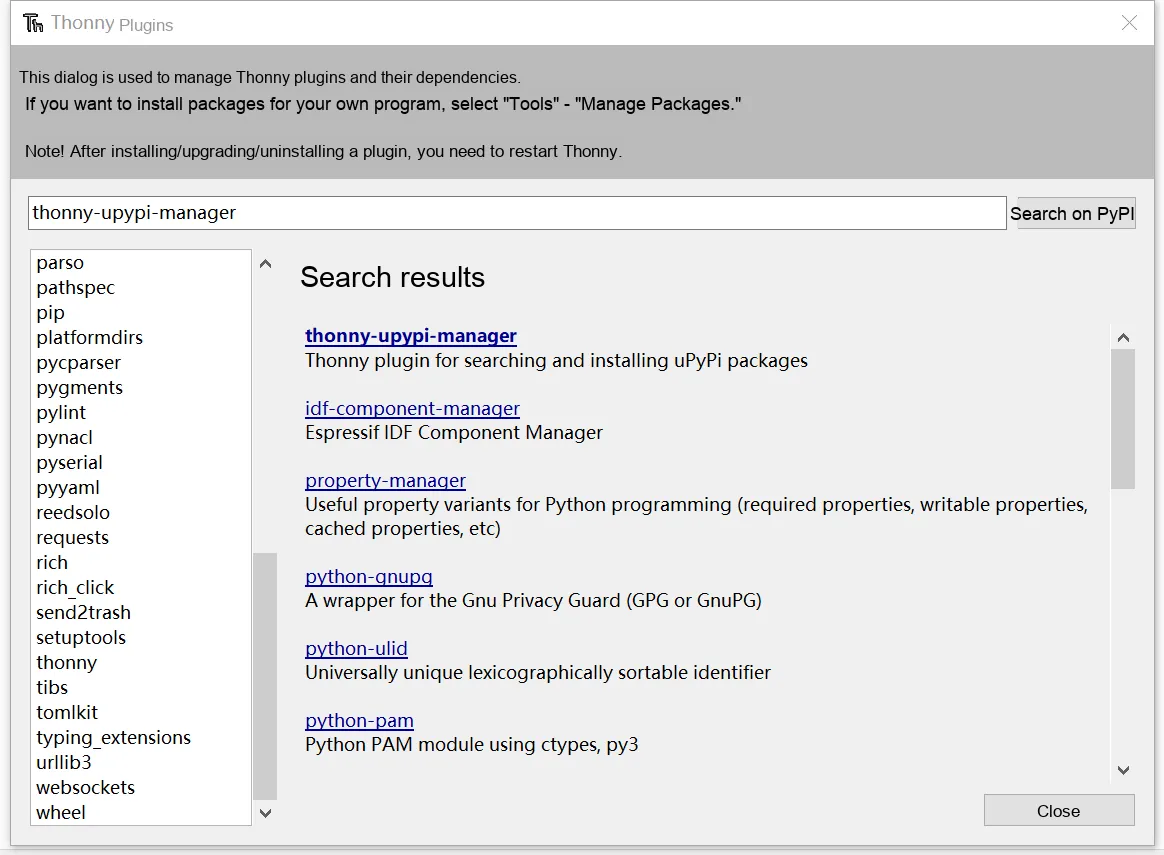
In the search box of the plugin management window, enter the plugin name thonny-upypi-manager, click the [Search on PyPI] button on the right, and wait a moment to see the search results.
Note: Sometimes search failures may occur due to network issues. You can try searching again after a few minutes; if it still doesn't work, please install it locally.
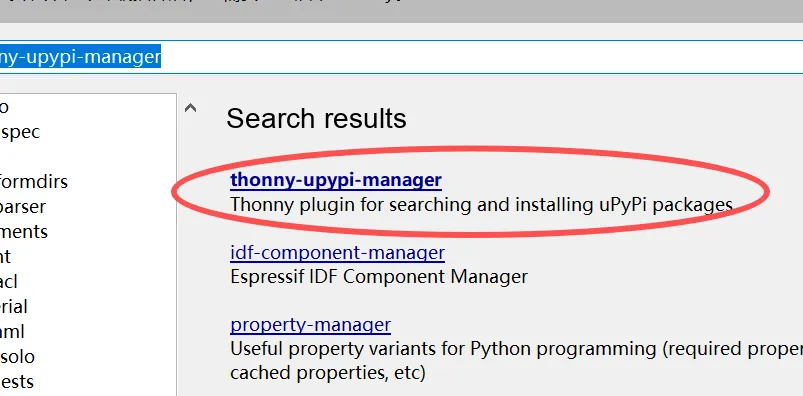
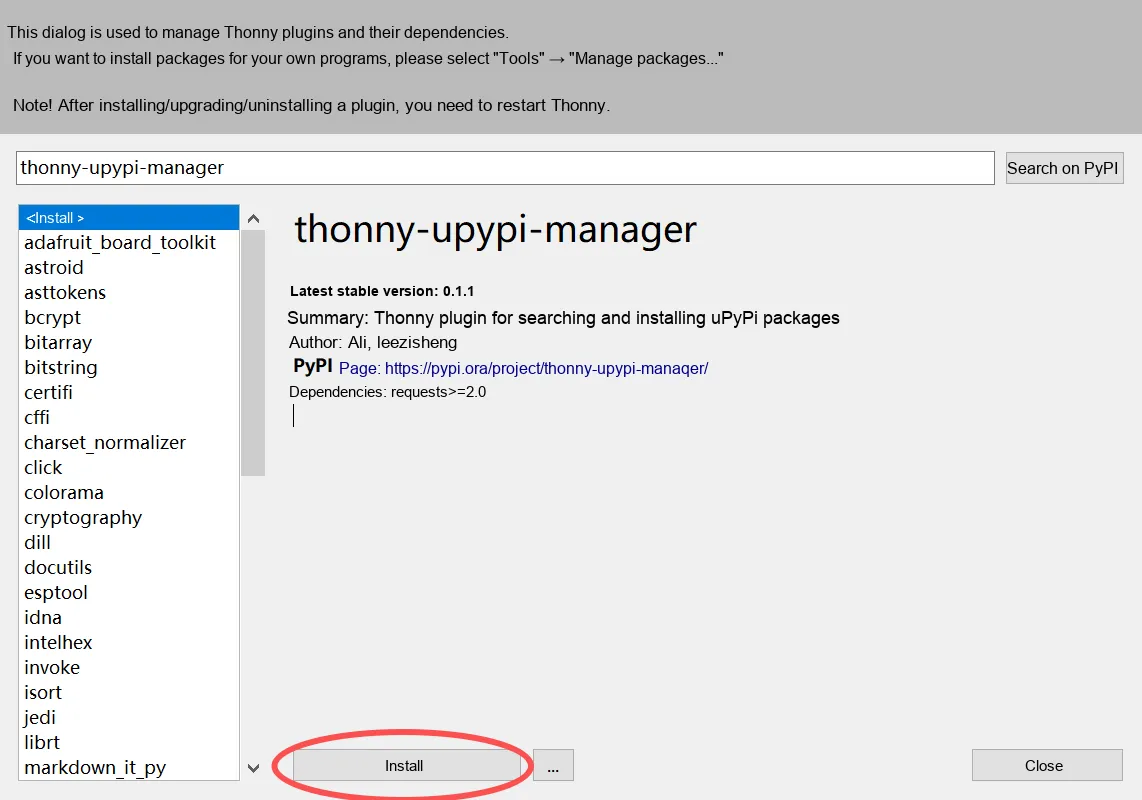
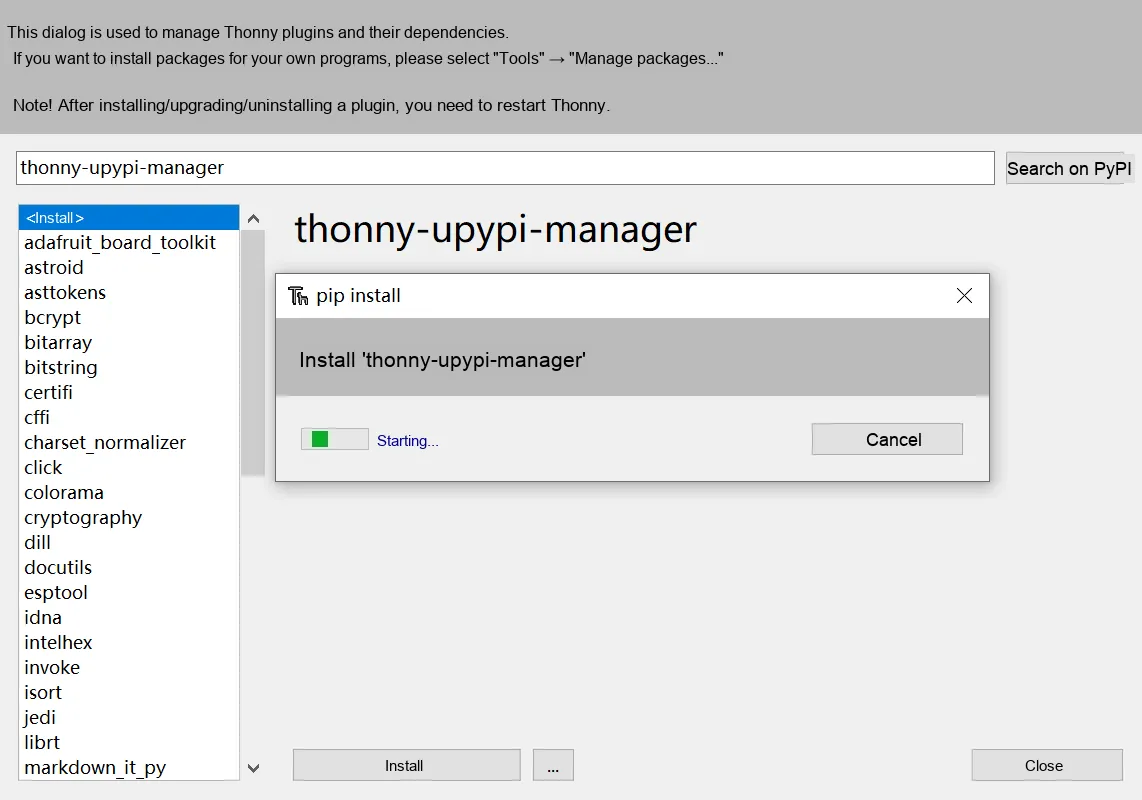
Locate thonny-upypi-manager in the search results list, click on it to display the plugin's details (version, author, dependency requirements, etc.), then click the [Install] button at the bottom of the window to automatically complete the download and installation.
After the installation is complete, thonny_upypi_manager will appear in the left list of the plugin management window. At this point, you must close and reopen Thonny for the plugin to take effect properly.
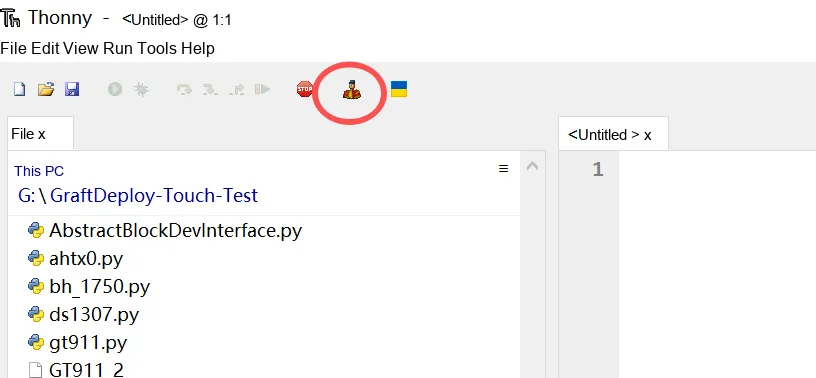
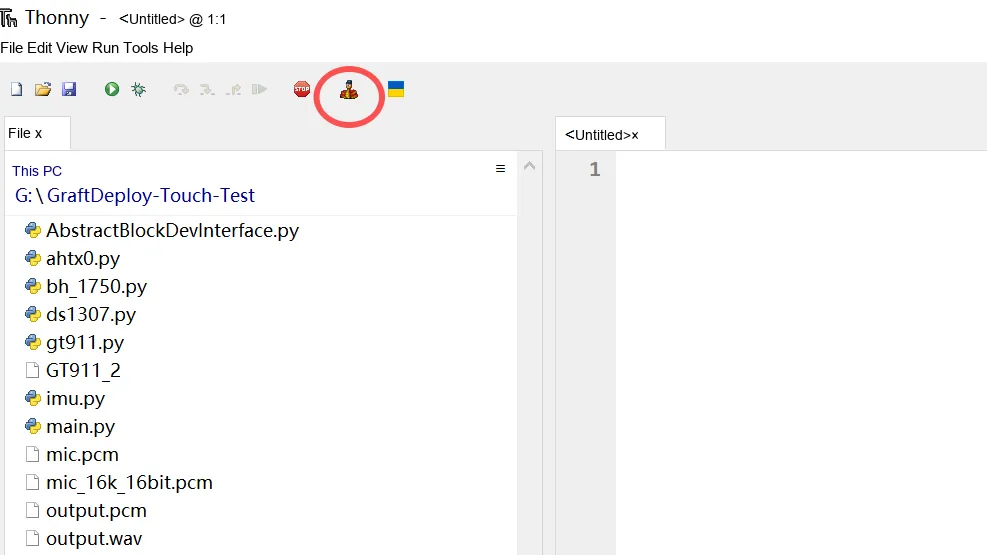
After restarting, you will see the dedicated icon for the plugin in the toolbar of Thonny, which indicates that the installation is successful.
2.2 Install from Local File
If your computer has restricted network access and cannot download directly from PyPI, you can choose to download the installation package in advance and install it via a local file:
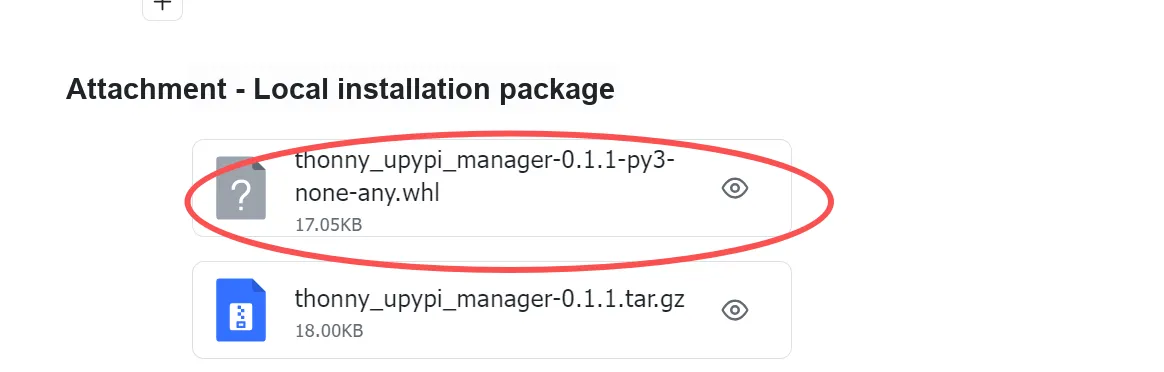
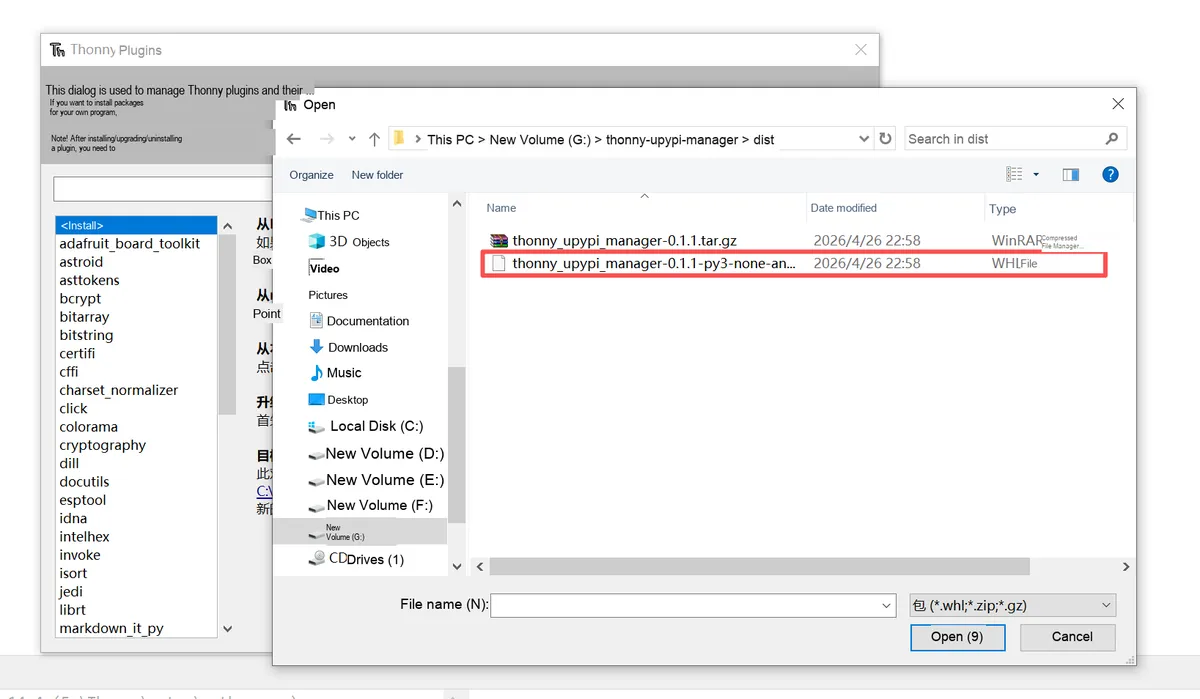
First, go to [Attachment - Local Installation Package] to download the. whl file:
- Main Installation Package:
thonny_upypi_manager-0.1.1-py3-none-any.whl(stable version, priority for use) - Alternate Package:
thonny_upypi_manager-0.1.1.tar.gz(source code package, for special scenarios)
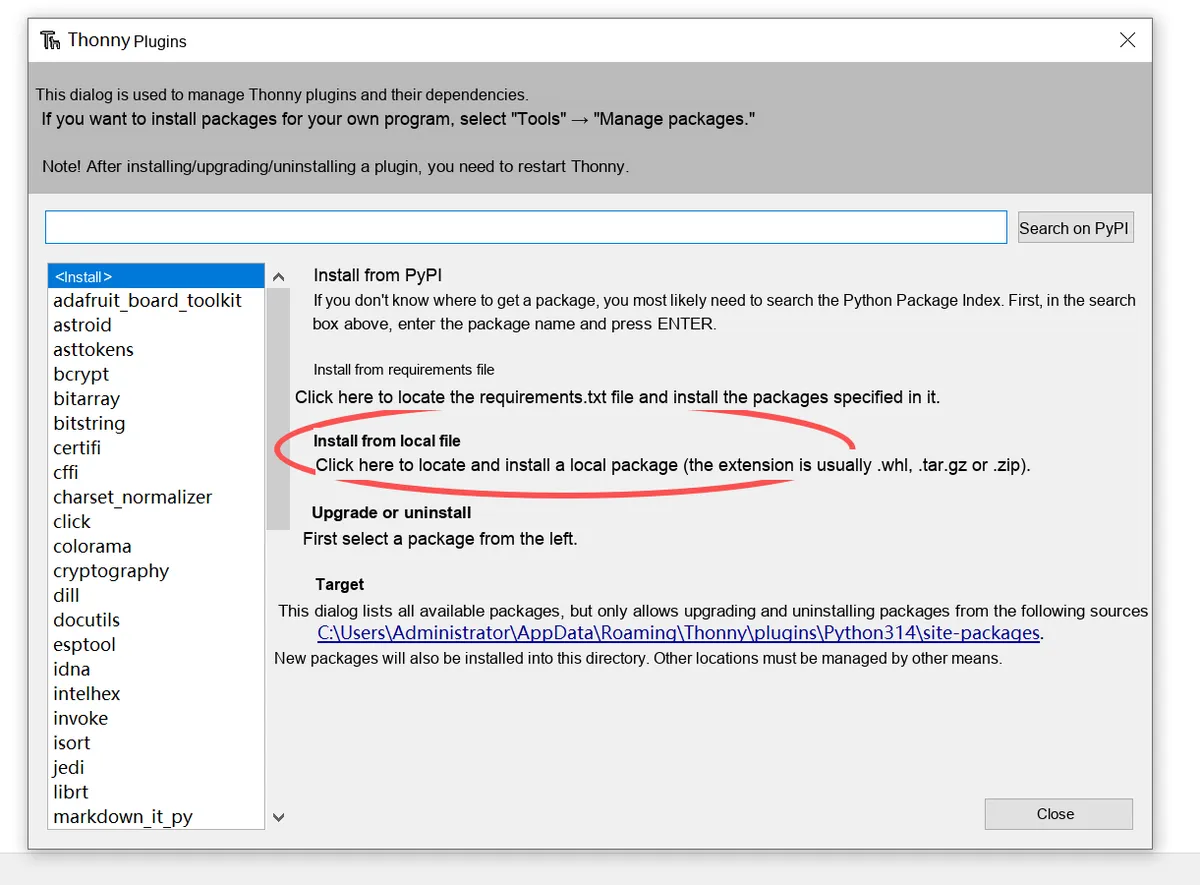
Open Thonny's **Tools** → **Manage Plugins. ..**, locate the **Install from local file** option in the selection area on the right side of the window, and click the corresponding link to open the file selection window.
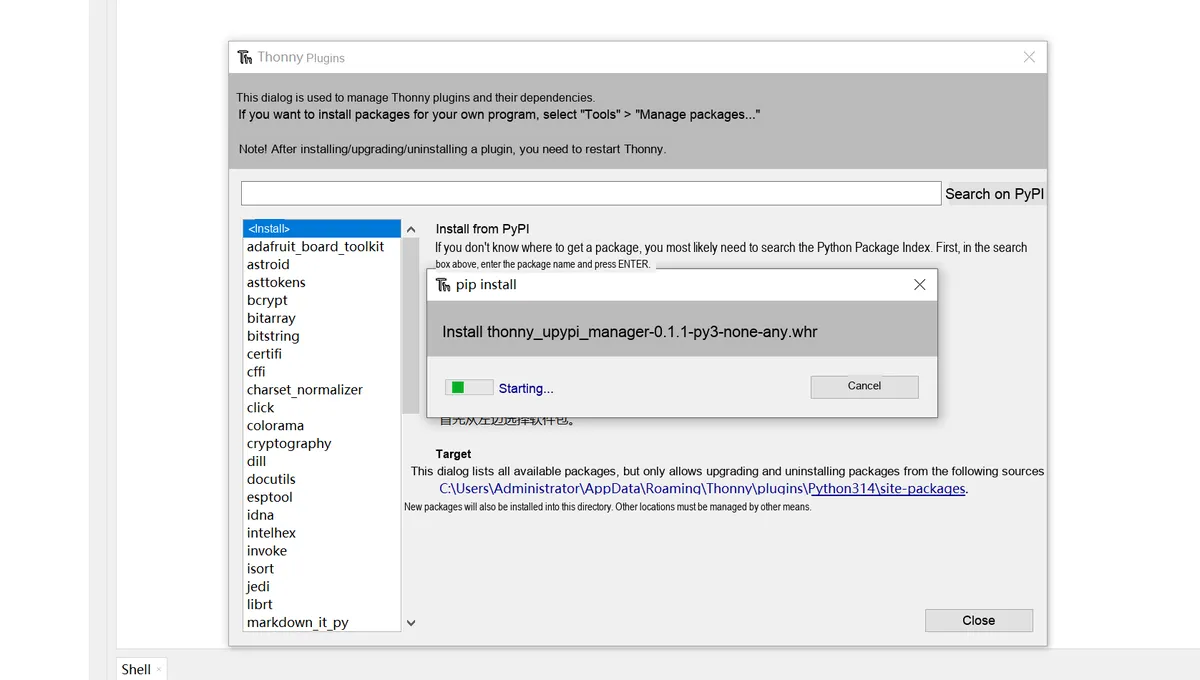
After the installation is complete, you also need to close and restart Thonny for the plugin to be loaded and take effect; after restarting, you can see the plugin icon in the toolbar.
After restarting, click again:
2.3 Installation Precautions
- You must restart Thonny: After installing, upgrading or uninstalling a plugin, you need to restart Thonny for the changes to take effect.
mpremotePreliminary Preparation: After the plugin is installed, you need to ensure that the computer has thempremotetool (the official serial port tool for MicroPython) installed and configured in the system environment variables; otherwise, packages cannot be installed onto the development board. You can enter the following in the command line to verify whether the configuration is successful:mpremote --version- Dependency Auto-handling: Plugin dependency
requests>= 2.0, which will be automatically installed by Thonny's plugin manager with no manual operation required.
III. Plugin Usage
We have already completed the plugin installation earlier. Now, just follow the steps to get started with using it to manage MicroPython packages. The whole process is extremely simple — you can finish searching for, downloading and installing packages in just a few steps, and there is no need to manually copy files at any point during the process, which is both hassle-free and efficient.
3.1 Open the plugin management interface
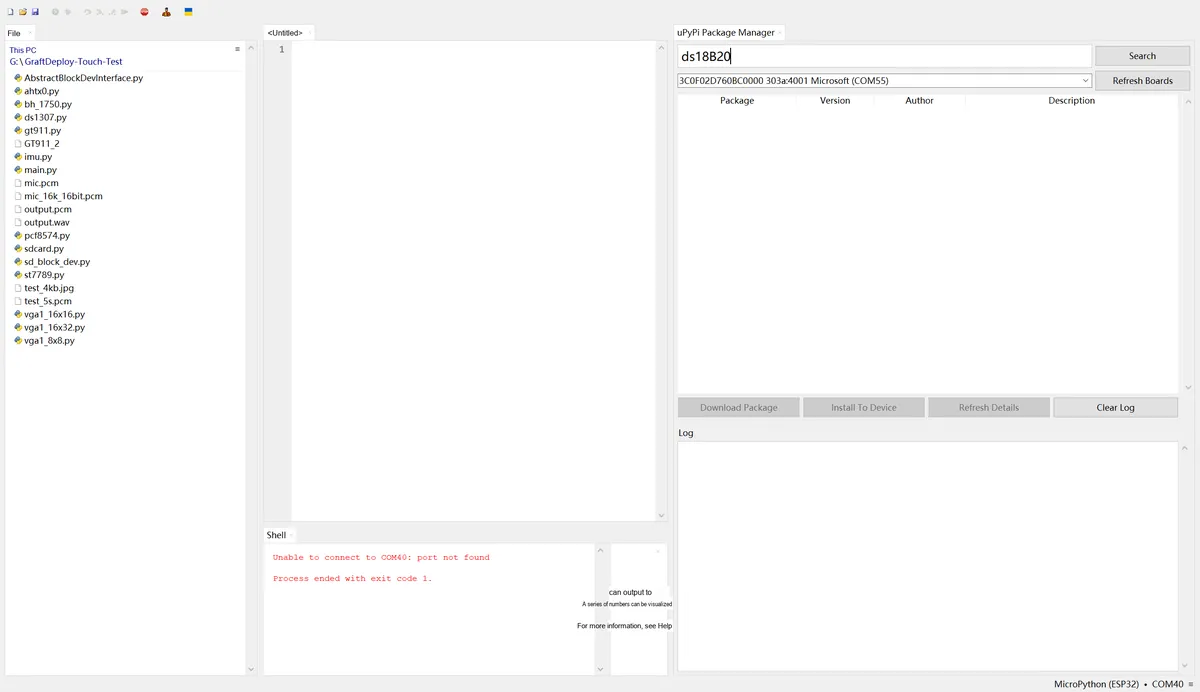
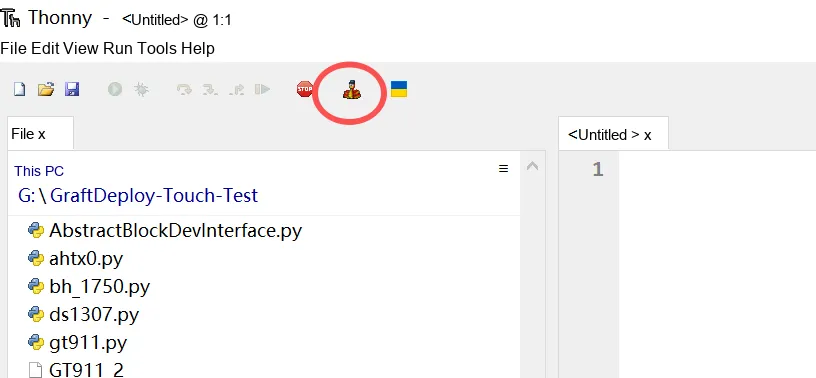
After restarting Thonny, you will see a new plugin icon on the top toolbar (the one marked in the red circle). Click it to open the uPyPi Package Manager panel, which will be fixed on the side of the IDE for convenient subsequent operations.
3.2 Device Connection
Before you start using it, there are two preparation steps that you must complete properly, otherwise installation failures will easily occur.
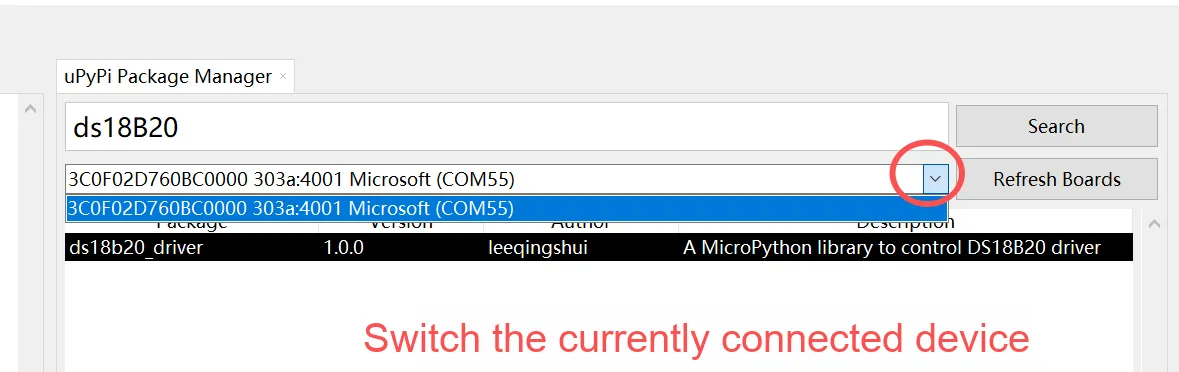
Connect your MicroPython development board (e. g., ESP32, ESP8266) to your computer via a USB cable. The plugin will automatically detect the serial device, and the corresponding COM Port Number will be displayed in the device dropdown (e. g., COM55 in the example). If the device is not detected, click the adjacent "Refresh Boards" button to refresh, and the connected device will then appear.
Note: When using this plugin, the terminal of Thonny cannot connect to the device!
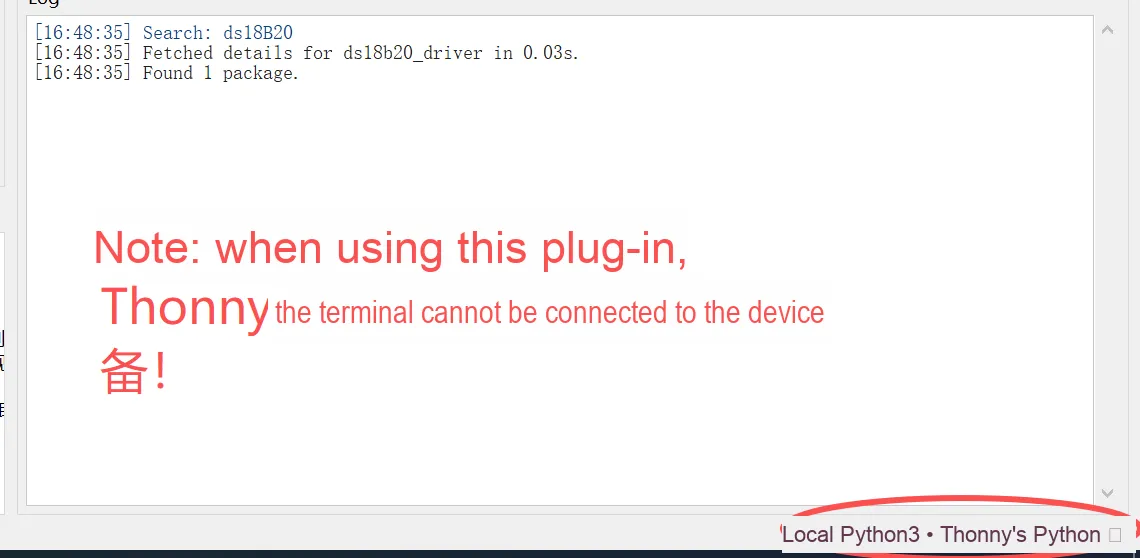
This is the pitfall that beginners are most likely to fall into: When using the plugin installation package, Thonny's terminal cannot connect to the development board! A serial port device can only be occupied by one program at a time. If the terminal is connecting to the device, the plugin will not be able to communicate with the device via mpremote, and an error will be reported directly.
The solution is straightforward: check the interpreter selection in the bottom-right corner of Thonny, switch it from "MicroPython (device connected status)" to "Local Python3", ensure the terminal is in a disconnected state, and then proceed with the subsequent operations.
3.3 Package Search and Download/Installation
Once the preparations are complete, you can start looking for the packages you need:
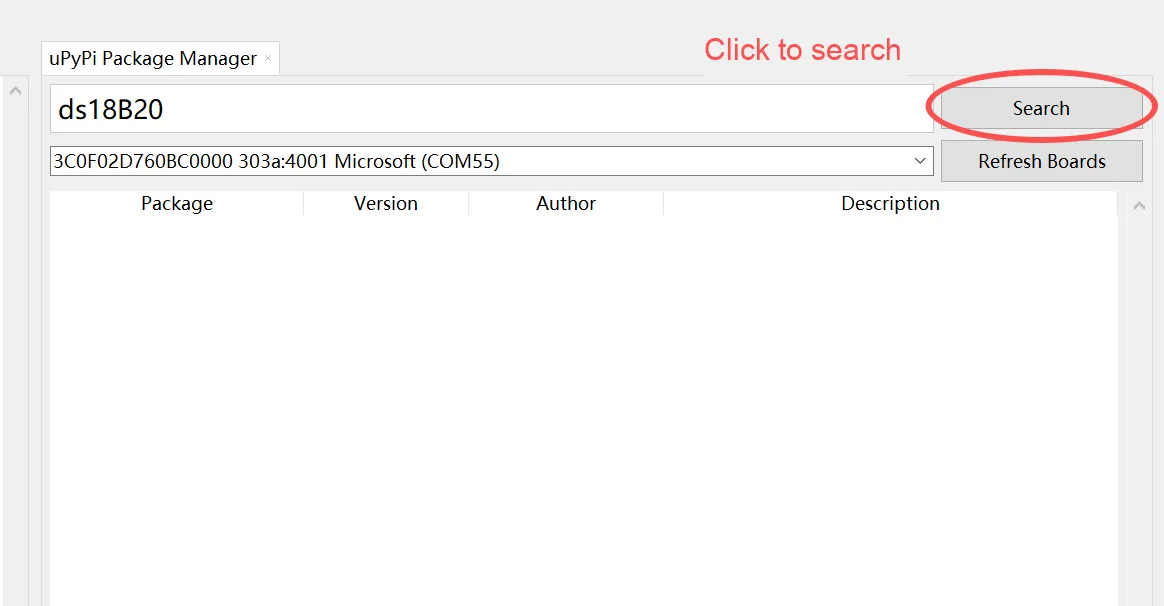
- Enter the package name in the search box at the top of the panel, for example, the temperature sensor driver in the sample
ds18B20; - Click the "Search" button on the right, and the list below will display all matching packages, including the package name, version, author, and function description, making it easy for you to confirm whether it is the package you need.
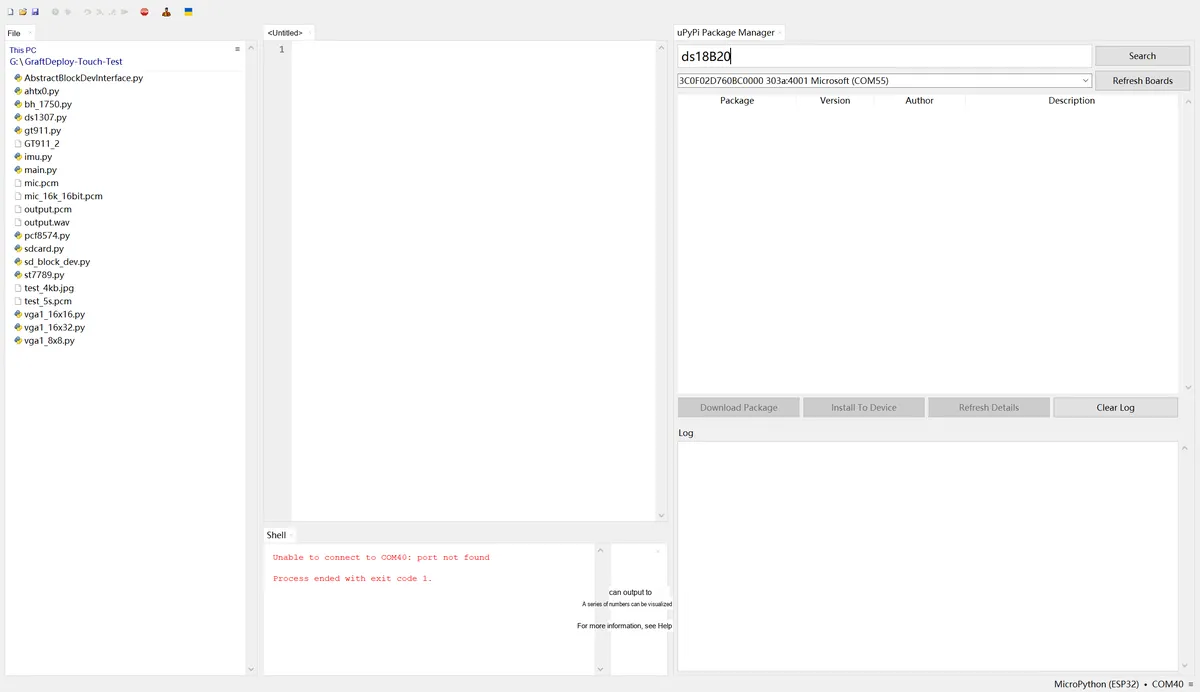
After finding the required package, the plugin provides two processing methods for you to choose from according to your own needs:
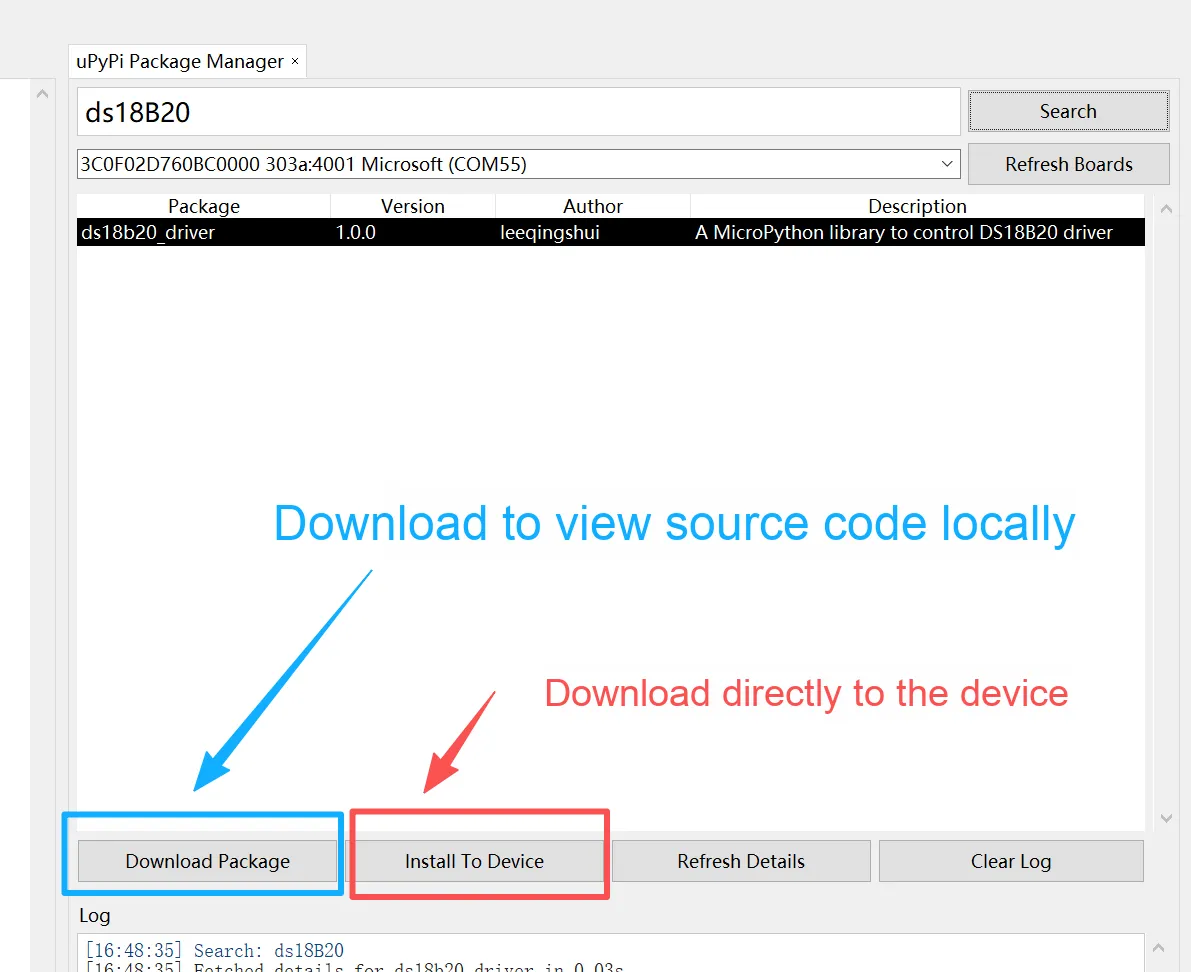
- Download to Local to View Source Code (Download Package): If you want to check the source code of the package first, or need to modify the driver later, you can click the "Download Package" button. The package will be downloaded to the local cache directory, where you can directly view and edit the code on your computer, then manually transfer it to the development board.
- One-click Installation to Development Board (Install To Device): This is the most recommended method with full-process automation: after clicking "Install To Device", the plugin will automatically complete the following operations:
- Download the package file (including all files in the multi-file package);
- Automatically read
package.jsonfor dependencies and install all dependency libraries first; - Use the
mpremotetool to upload all files to the/libdirectory on the development board. You don't need to perform any manual steps throughout the entire process, which is extremely hassle-free.
Fuzzy search is also supported:
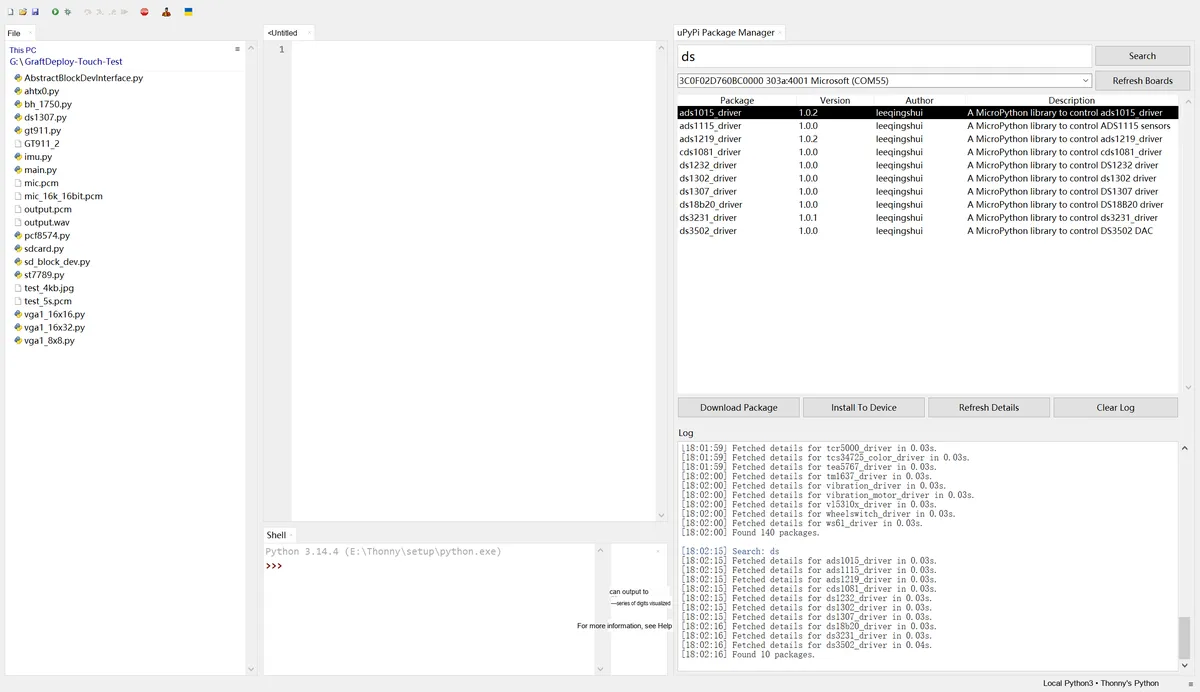
The plugin supports fuzzy search. Even if you can't recall the complete package name, you can still find relevant packages by entering only keywords. For example, simply entering " ds " will display all driver packages related to the DS series of sensors. There's no need to memorize package names by rote, making package searching much easier.
3.4 View Installation Logs and Verification Results
During the installation process, the "Log" area below will display the operation progress in real time, and you can check the current status through the log:
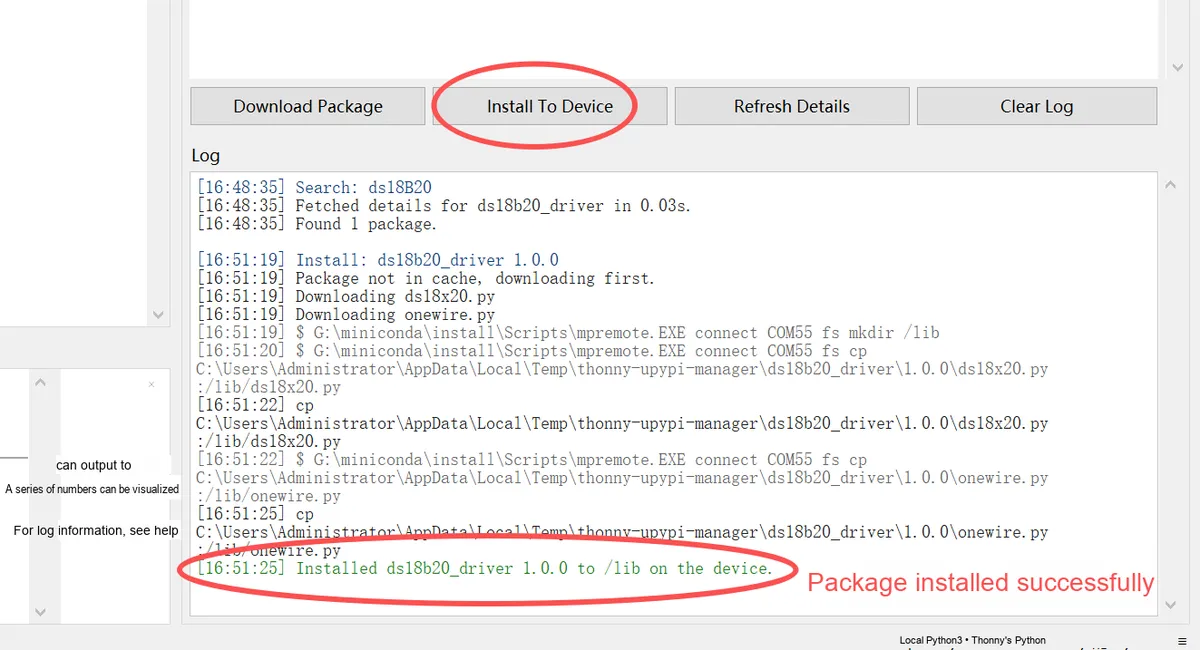
- For example, if you see messages like
Searching: ds18B20and "Downloading files", it means the plugin is working properly; - When the prompt
Installed xxx to /lib on the deviceappears, it indicates that the package has been successfully installed on the development board.
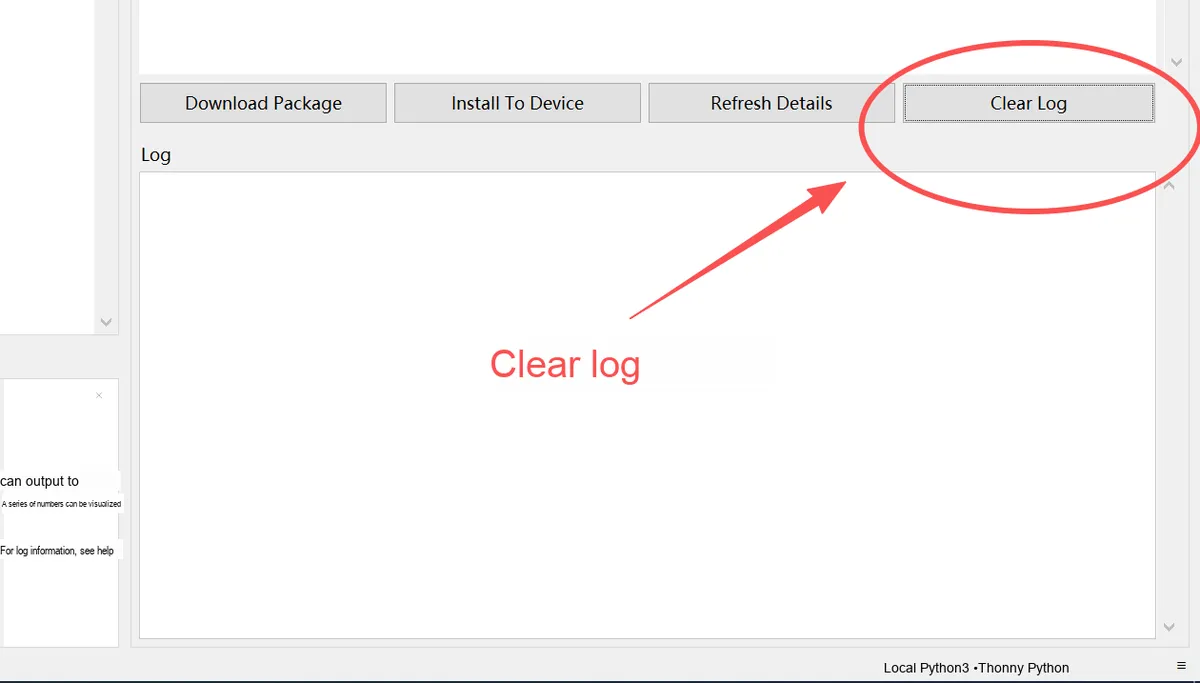
If the log content is too extensive to hinder viewing new information, you can click the "Clear Log" button to empty the log for the convenience of subsequent operations.
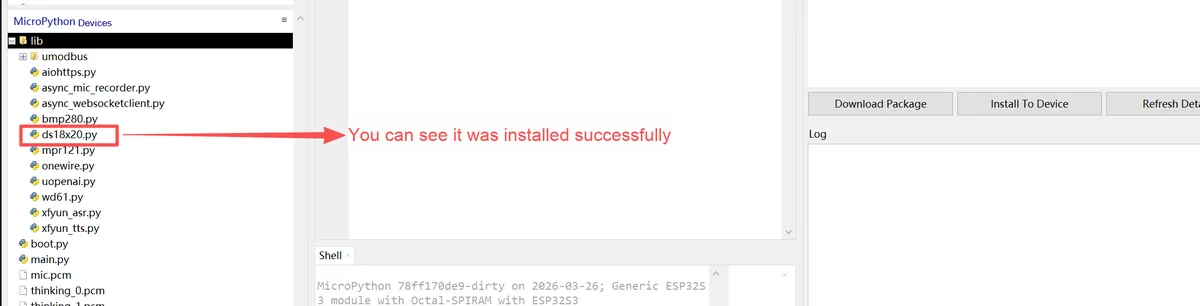
After the installation is complete, switch Thonny's interpreter back to MicroPython, open the file system of the development board, and you will find the newly installed package files in the /lib directory, which can then be directly used in your code via import.
Attachment: Local Installation Package
thonny_upypi_manager-0.1.1-py3-none-any.whl 17 KB
thonny_upypi_manager-0.1.1.tar.gz 18 KB
Version Record
Version Number | Revision Date | Modifier | Modified Content |
v1.0 | 2026-04-27 | Lee Eonyong | Initialization version. |
v1.2 | 2026-04-28 | Lee Eonyong | Added the installation instructions for Miniconda. |