
4.2 Position and Dimension Settings
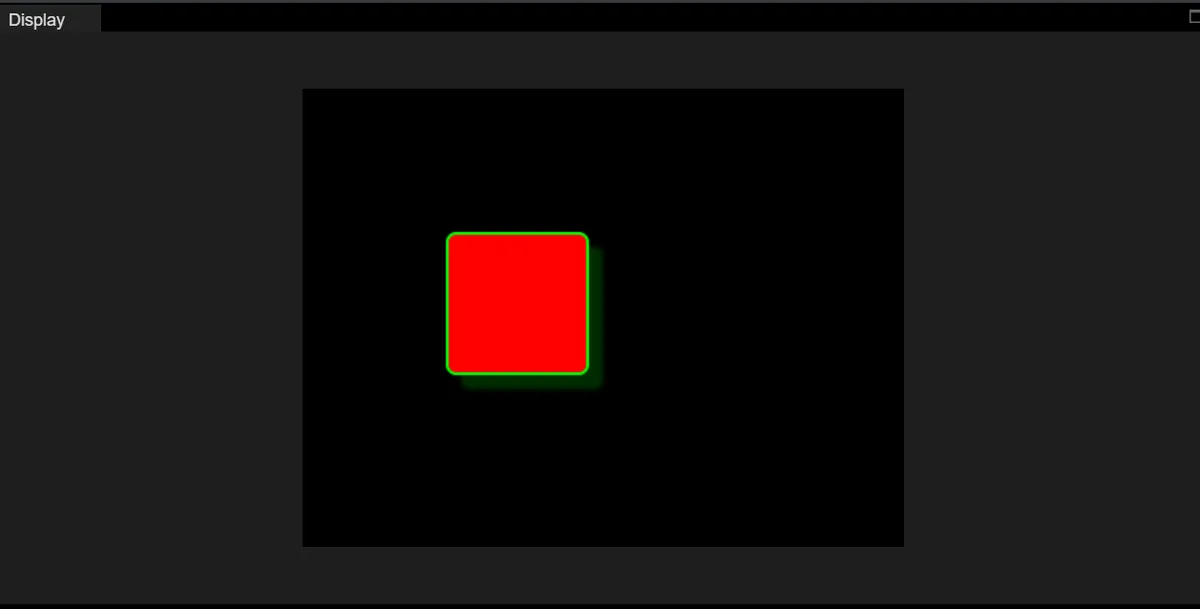
In the following code, a rectangular control with a custom visual style is implemented: after initializing LVGL, set the screen background to black, create a 100×100 pixel square object at the screen coordinate (100,100), configure styles such as red background, green border, and green translucent shadow for this object, and finally load the screen to complete the rendering. Eventually, a red square with green border and shadow will be displayed on the screen:
import display_driver
import lvgl as lv

lv.init()

#Get the currently active screen object
scr = lv.screen_active()
#Set the screen background color to black
scr.set_style_bg_color(lv.color_hex(0x000000), 0)

#Create the object
obj = lv.obj(scr)
#Set the object position and size
obj.set_pos(100, 100)   #Set the top-left coordinates of the object
obj.set_size(100, 100)  #Set the width and height of the object

#Create a style
style_obj = lv.style_t()
#Border and background
style_obj .set_pad_all(10)    #Set padding in all four directions
#style_obj  .set_pad_left(10)   #Set left padding
#style_obj .set_pad_right(10)  #Set right padding
#style_obj .set_pad_top(10)    #Set top padding
#style_obj  .set_pad_bottom(10) #Set bottom padding
style_obj .set_bg_opa(255)  #Set background opacity; 0 is fully transparent
style_obj .set_bg_color(lv.color_hex(0xFF0000))   #Set background color
style_obj .set_border_color(lv.color_hex(0x00FF00))   #Set border color
style_obj  .set_border_width(2)   #Set border width
style_obj .set_border_opa(255)   #Set border opacity; 0 is fully transparent
#Shadow style
style_obj .set_shadow_color(lv.color_hex(0x00FF00))#Set shadow color
style_obj .set_shadow_width(10)#Set shadow width (shadow spread range)
style_obj .set_shadow_opa(50)#Set shadow opacity
style_obj .set_shadow_offset_x(10)#Set shadow horizontal offset
style_obj .set_shadow_offset_y(10)#Set shadow horizontal offset
#Apply the style
obj.add_style(style_obj , lv.STATE.DEFAULT)

# Load the screen
lv.screen_load(scr)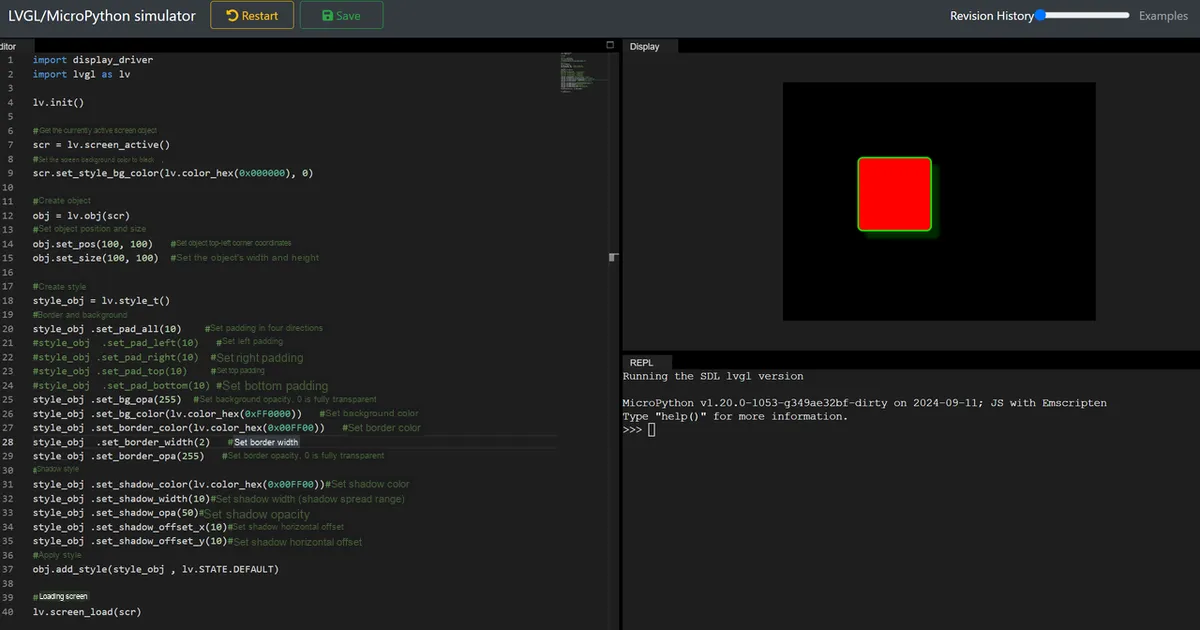
4.2.1 Modify Object Position and Dimensions
We can use the following methods to modify the position and size of an object:
#Set the object position and size
obj.set_pos(150, 150)   #Set the top-left coordinates of the object
obj.set_size(120, 120)  #Set the width and height of the object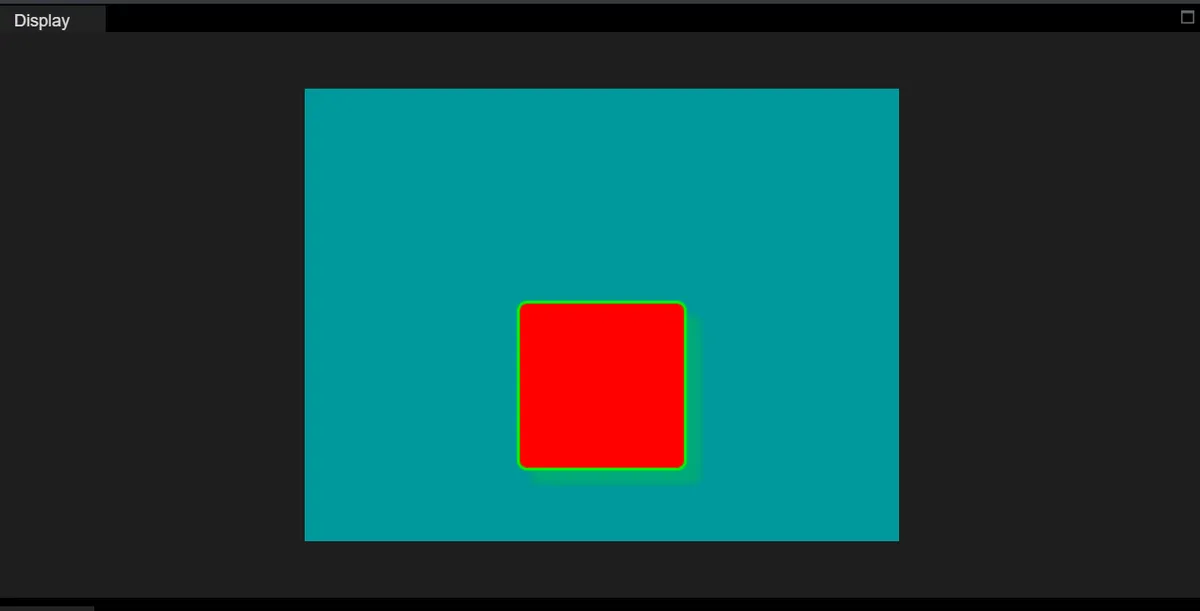
4.2.2 Internal Alignment (Typesetting within the Parent Container)
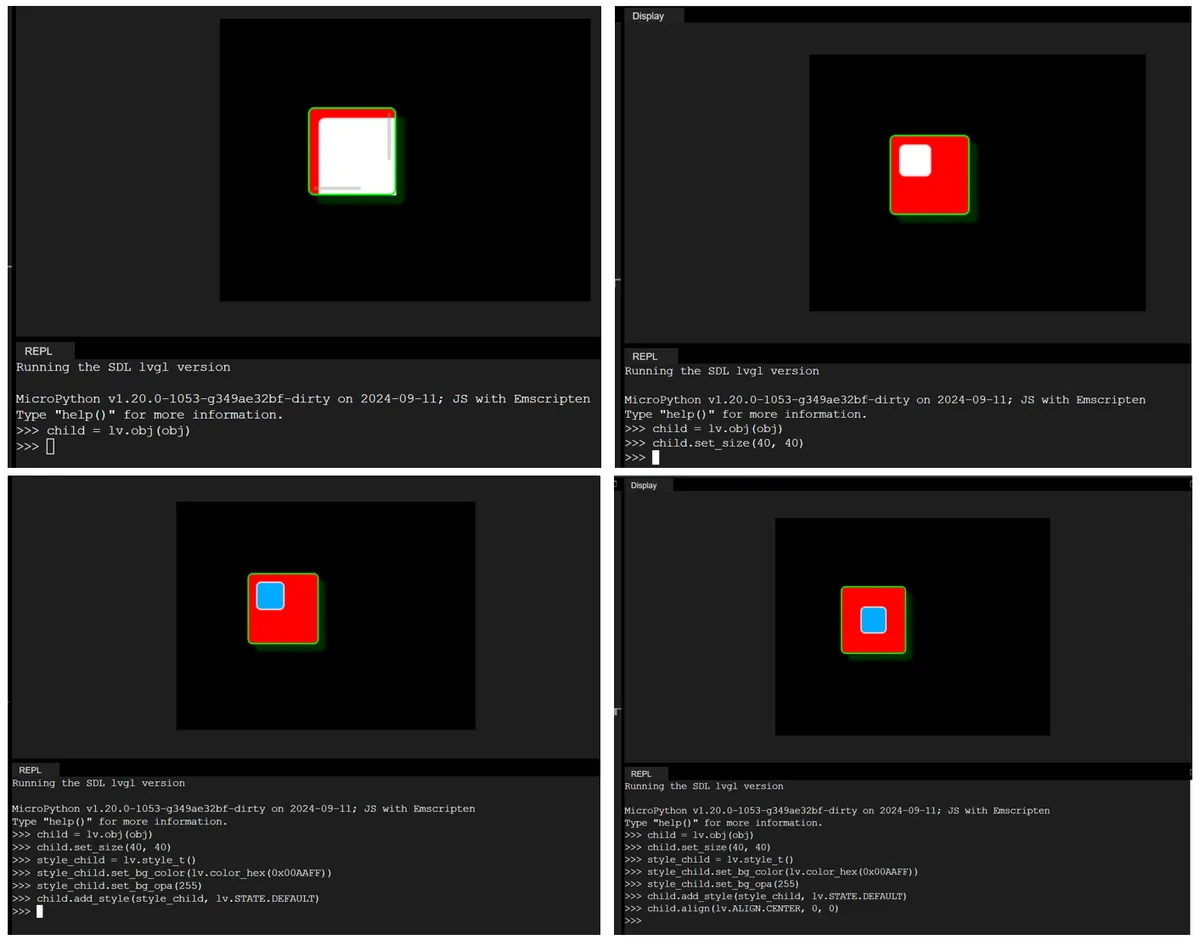
Here is an example of internal alignment:
# ============== Internal alignment: auto layout inside the parent container obj ==============
# 1. Create child widget (placed inside obj)
child = lv.obj(obj)
child.set_size(40, 40)  # Child widget size

# 2. Give the child widget a blue style (for easy distinction)
style_child = lv.style_t()
style_child.set_bg_color(lv.color_hex(0x00AAFF))
style_child.set_bg_opa(255)
child.add_style(style_child, lv.STATE.DEFAULT)

# 3. ✅ Core: internal alignment API (run any one line to see different effects)
child.align(lv.ALIGN.CENTER, 0, 0)          # Exact center of the parent container (no offset)
# child.align(lv.ALIGN.TOP_LEFT, 5, 5)       # Top-left of the parent container, offset inward by (5,5)
# child.align(lv.ALIGN.BOTTOM_RIGHT, -5, -5) # Bottom-right of the parent container, offset inward by (-5,-5)
# child.align(lv.ALIGN.LEFT_MID, 5, 0)      # Left-center of the parent container, offset 5px to the right
4.2.3 External Alignment (Align to Other Controls)
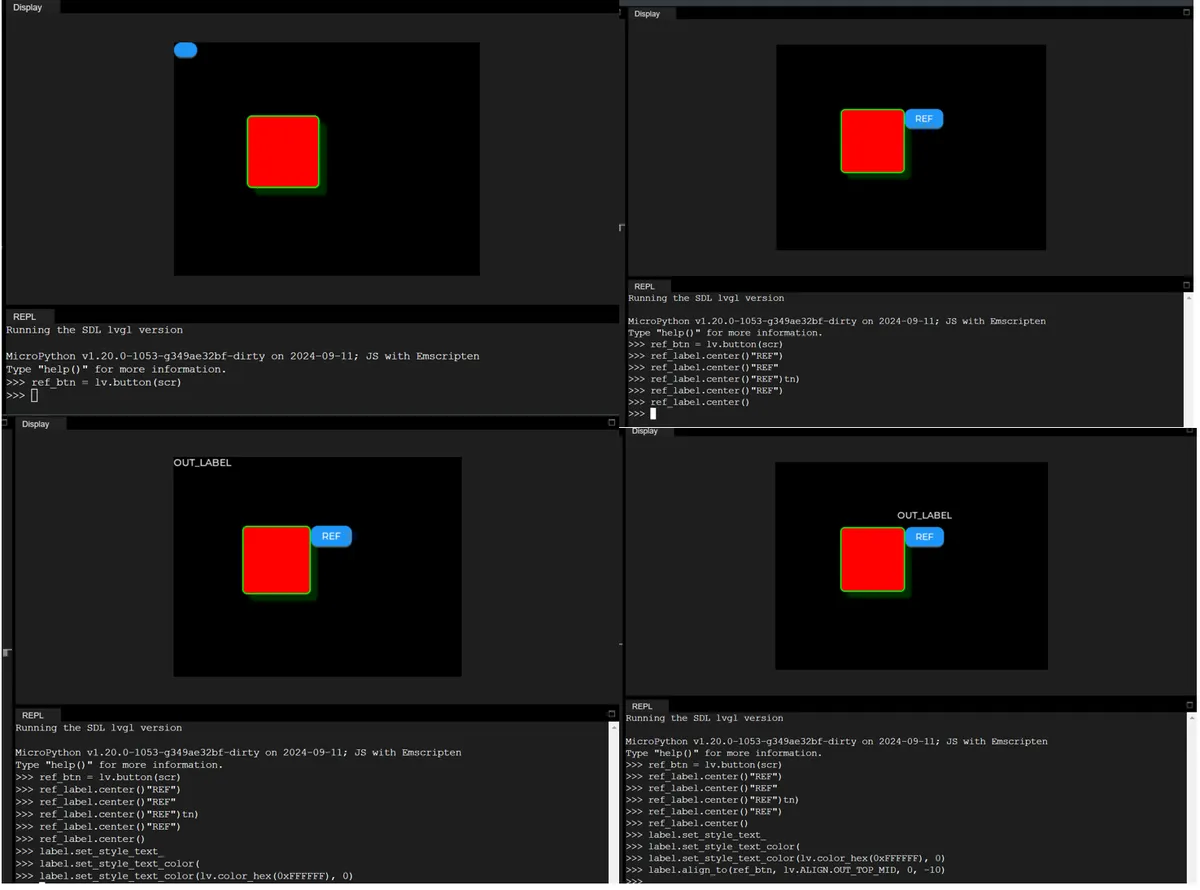
# ============== External alignment: align outside the obj widget ==============
# 1. First create a reference widget (a button here; it can be any other widget)
ref_btn = lv.button(scr)
ref_btn.set_pos(200, 100)
ref_btn.set_size(60, 30)
ref_label = lv.label(ref_btn)
ref_label.set_text("REF")
ref_label.center()

# 2. Create the label widget to be aligned
label = lv.label(scr)
label.set_text("OUT_LABEL")
label.set_style_text_color(lv.color_hex(0xFFFFFF), 0)  # White text

# 3. ✅ Core: external alignment API (run any one line to see different effects)
label.align_to(ref_btn, lv.ALIGN.OUT_TOP_MID, 0, -10)    # Top-center of the reference button, offset 10px upward
# label.align_to(ref_btn, lv.ALIGN.OUT_RIGHT_MID, 10, 0) # Right-center of the reference button, offset 10px to the right
# label.align_to(ref_btn, lv.ALIGN.OUT_BOTTOM_LEFT, 0, 10) # Bottom-left of the reference button, offset 10px downward
Version Record
Version Number | Modifier | Time | Content |
v1.0 | Li Zisheng | 2026/03/24 | Initialize the document. |