Contents
1. Programming Website Links
To facilitate quick learning, the core resource links are compiled as follows:
Operation website link: https://freakstudiocn.github.io/pages/ui/? lang= zh-hans
2. Assembly and Wiring Instruction Video
260113_Shell Assembly and Wiring Tutorial Video.mp4 60.0 MB
3. Expansion of Sensor Module
In this textbook, we will focus on teaching you how to use sensors to complete interesting programming tasks, and do not require prior mastery of complex electronic principles.
But if you are any of the following:
- Students who are interested in learning how sensors work internally
- Teachers who wish to prepare lessons and expand teaching content
- Parents who want to gain a more systematic understanding of sensor knowledge
You can check our Advanced Sensor Knowledge Base (Open Version):
👉 GraftSense Sensor Module Documentation (Open Version), This document is for extended reading
4. How to flash the firmware before using the main control board
Hardware: main control board, data transmission cable, computer (Windows 7 and above versions are all compatible).
Software: No additional driver installation is required (the Pico will be automatically recognized as a USB flash drive after being connected to a computer).
Firmware File: Download the corresponding firmware file in advance (it is recommended to save it to your computer desktop for convenient subsequent operations).
RPI_PICO-20240602-v1.23.0.uf2 644 KB
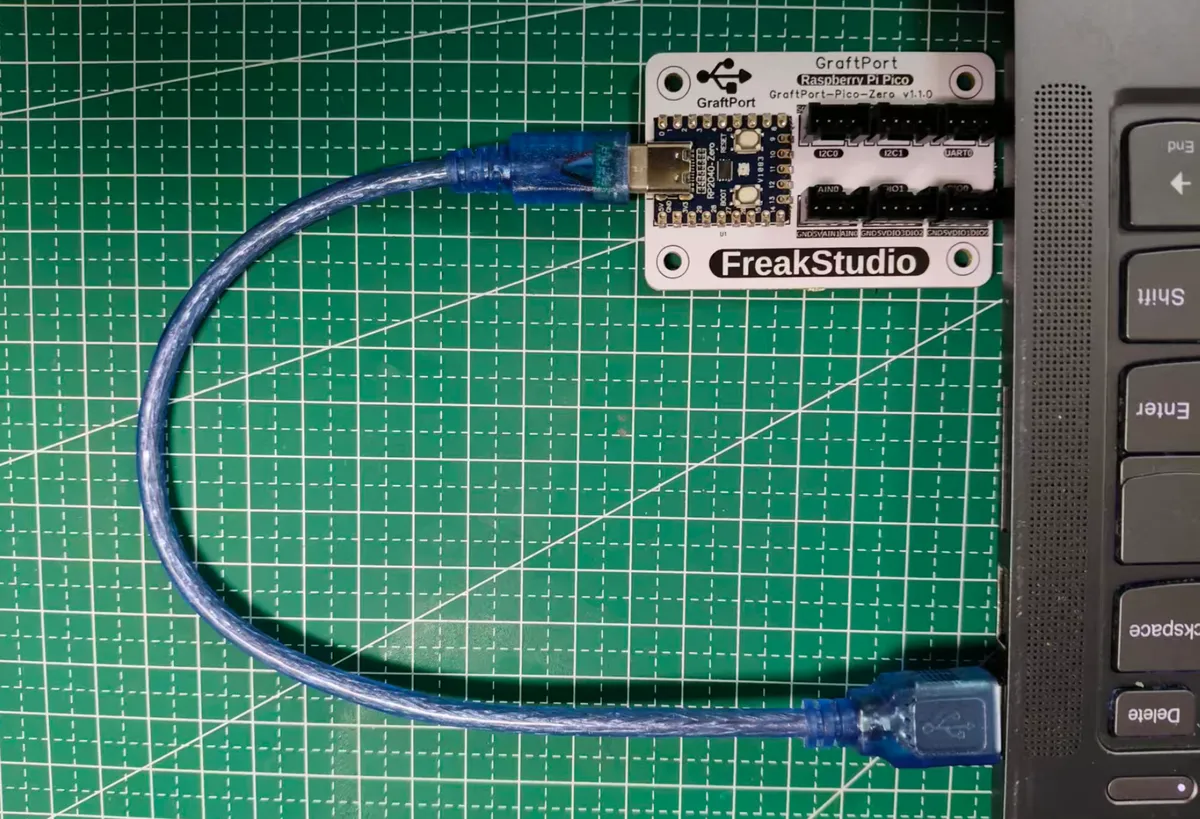
Step 1: Enter the USB flash drive mode of the Pico
- Press and hold the
BOOTbutton on the Pico main control board (the only physical button on the board) and do not release it; - Connect the Pico to the USB port of a computer using a data cable;
- After confirming the connection, release the
BOOTSELbutton.
Step 2: Identify the USB flash drive partition of the main control board
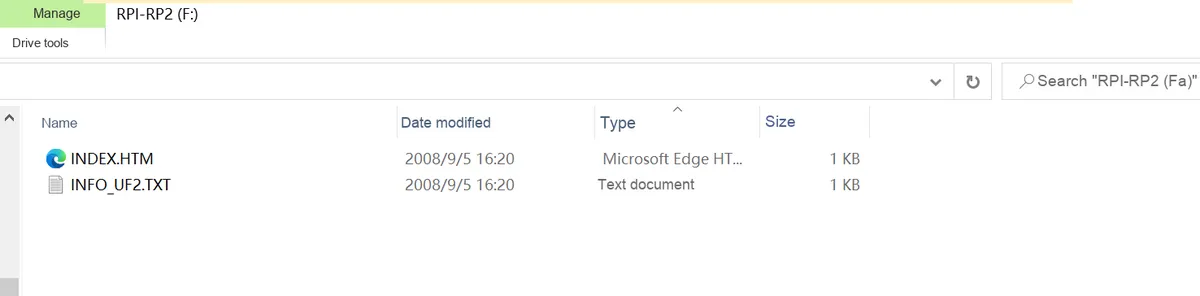
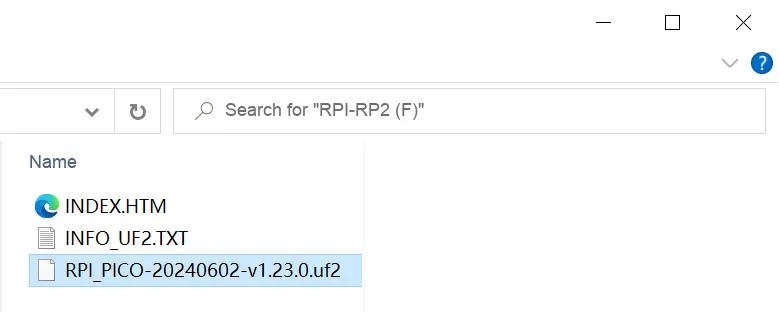
After the connection is successful, the computer will automatically recognize the Pico main control board as a removable USB flash drive (Windows will pop up a USB flash drive window, and the file manager will display the USB flash drive icon). The name of the USB flash drive is usually RPI-RP2, which indicates that the Pico has entered the programming mode.
Step 3: Flash the firmware
- Locate the firmware file you downloaded to your desktop in advance;
- Drag this file directly into the Pico's USB drive window/partition (no need to unzip, just drag it in directly);
- After the dragging operation is completed, the USB drive window of the Pico will disappear immediately, and the computer will also stop recognizing the USB drive. This is a normal phenomenon (indicating that the firmware flashing is completed);
- You can keep the data cable connected without unplugging it now, and get ready for the next step.
5. How to connect to the main control board and run the code
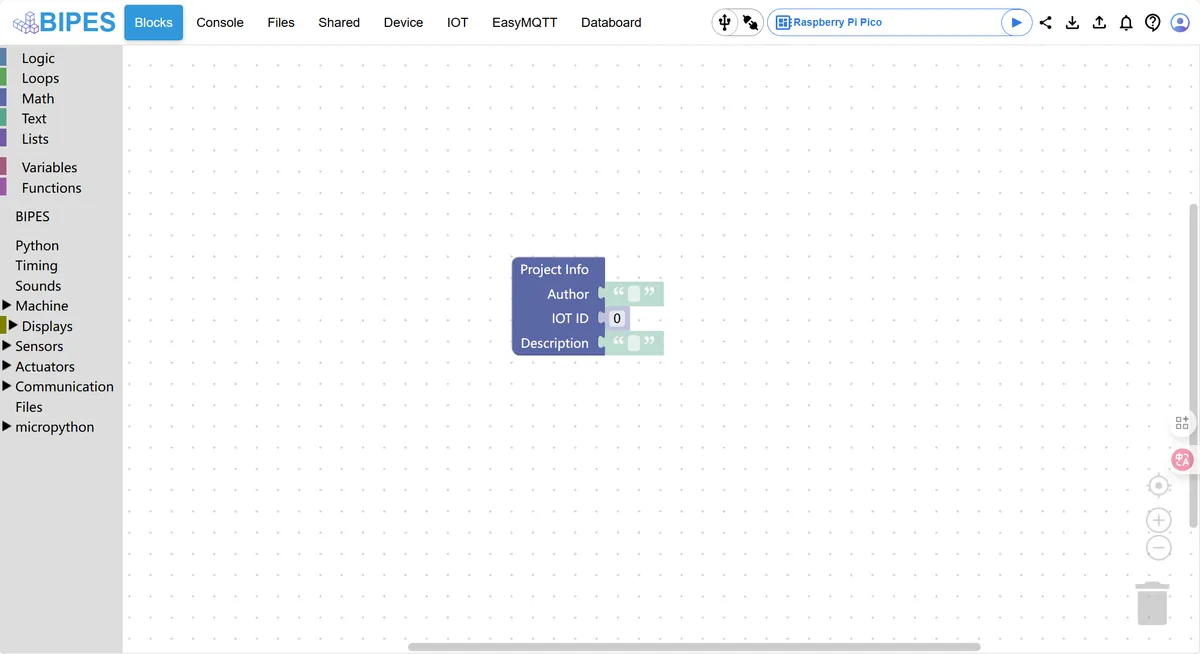
Step 1: Open the BIPES graphical programming website
Keep the data cable connecting the computer and the main control board connected, and open our programming website in the browser: https://freakstudiocn.github.io/pages/ui/? lang= zh-hans
(It is recommended to use Chrome/Edge/Firefox browsers to avoid compatibility issues).
Step 2: Select the main control board type
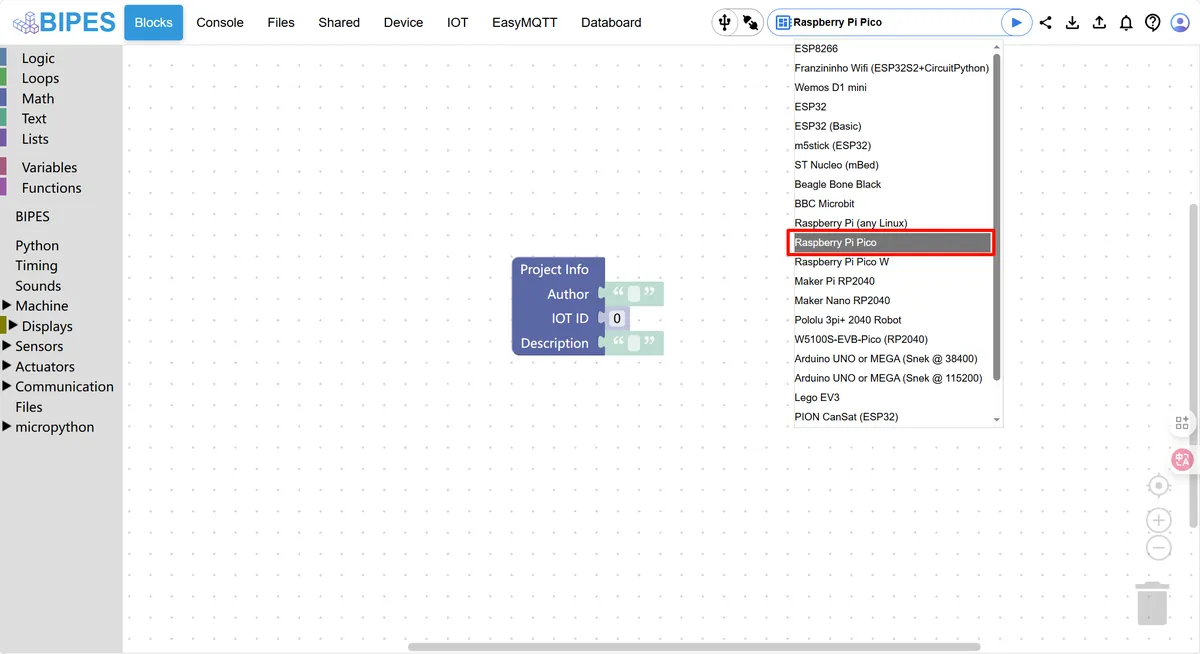
- After the website finishes loading, locate and select
Raspberry Pi Picoin the "Main Board Selection" area at the top/side of the page (you must select the correct model, otherwise connection will fail); - After confirming your selection, the page will load the graphical block components adapted for Pico.
Step 3: Connect the computer to the main control board
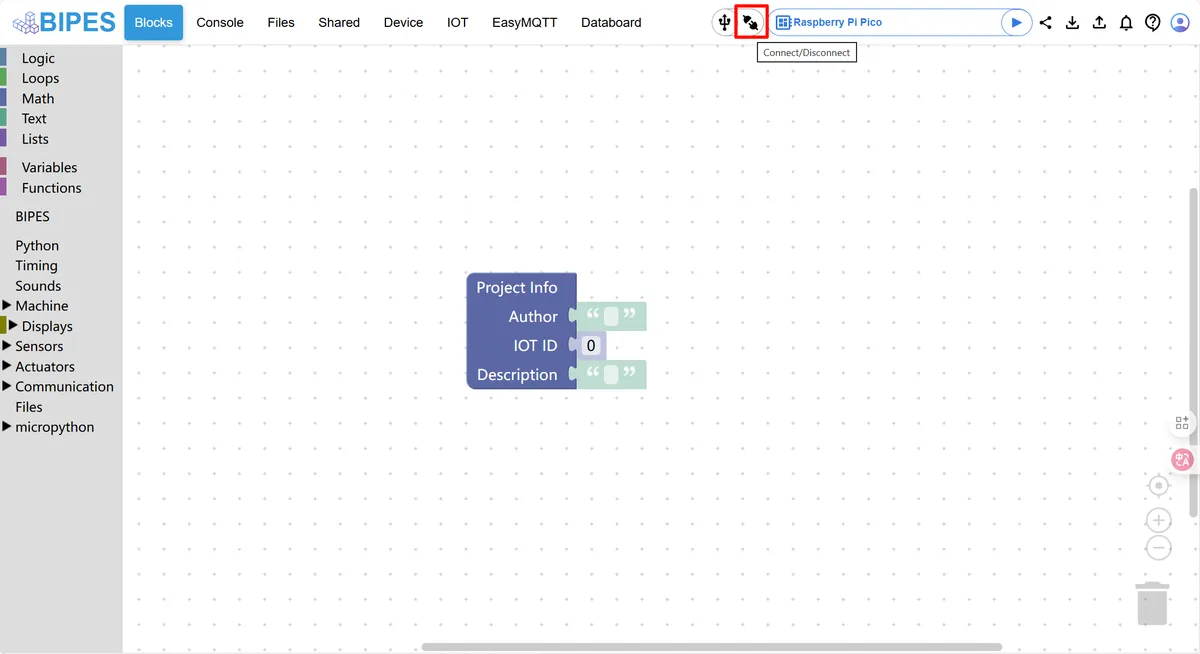
- Click the "Connect" button on the page (usually an icon/button labeled with the text "Connect");
- In the pop-up device selection window, locate and select the device whose name contains
Board CDC(this is the serial port device of the Pico); - Click "Connect" again, and wait until the page prompts "Connected successfully"(or there is no error prompt).
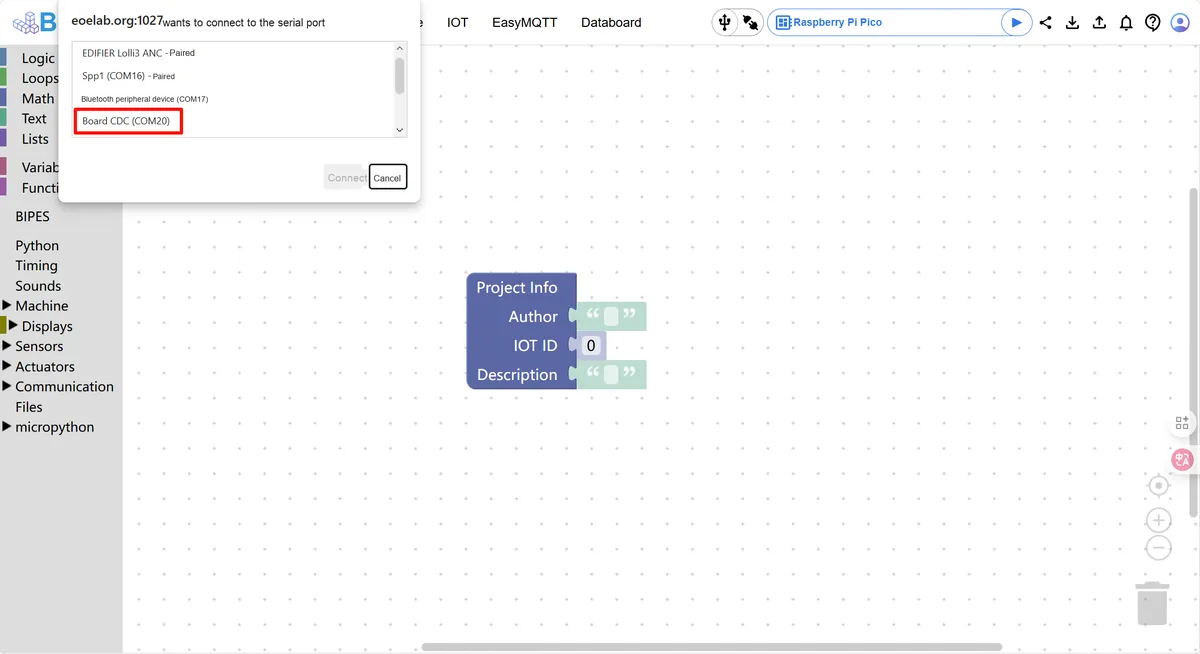
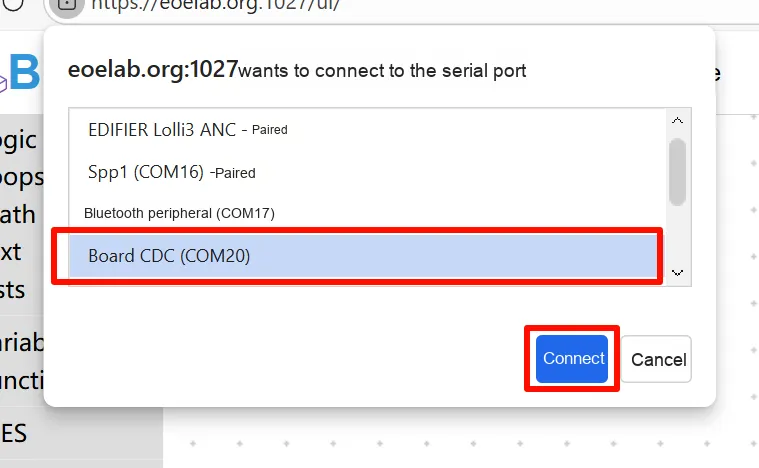
Step 4: Verify the connection (run the code and check the output)
- Ensure that there are basic blocks in the canvas (such as "print Hello World" or the default test block);
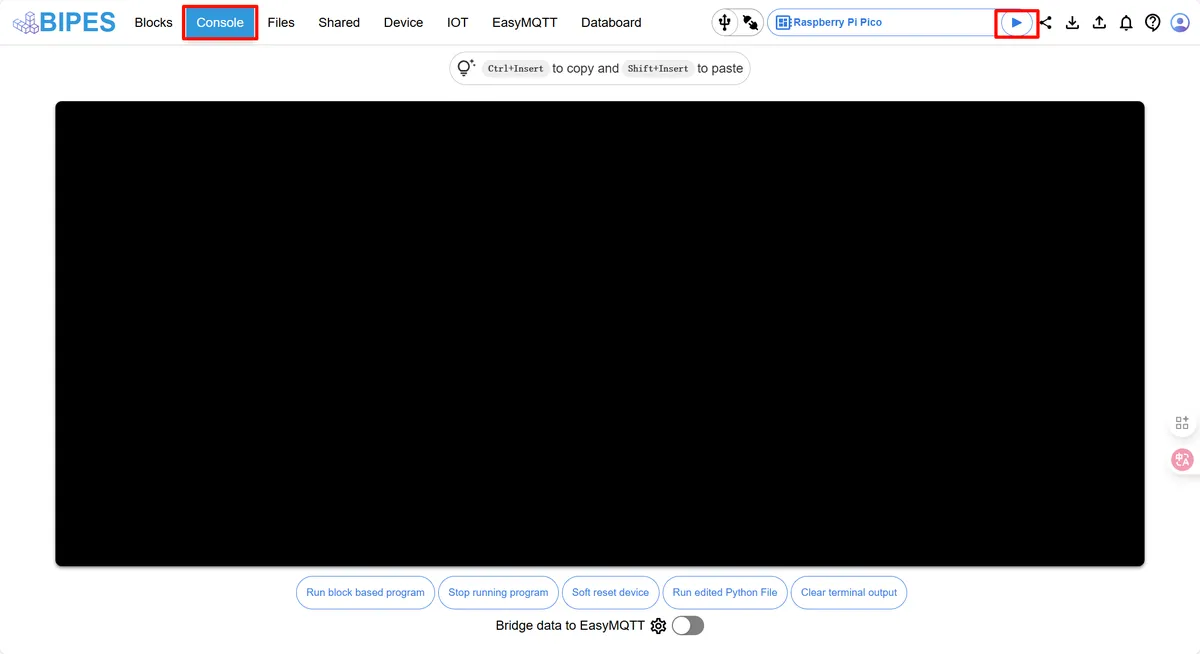
- Switch to the
Consoletab of the page (usually located at the bottom or on the right side of the page); - Click the "Run" button (or the "Upload and Run" button);
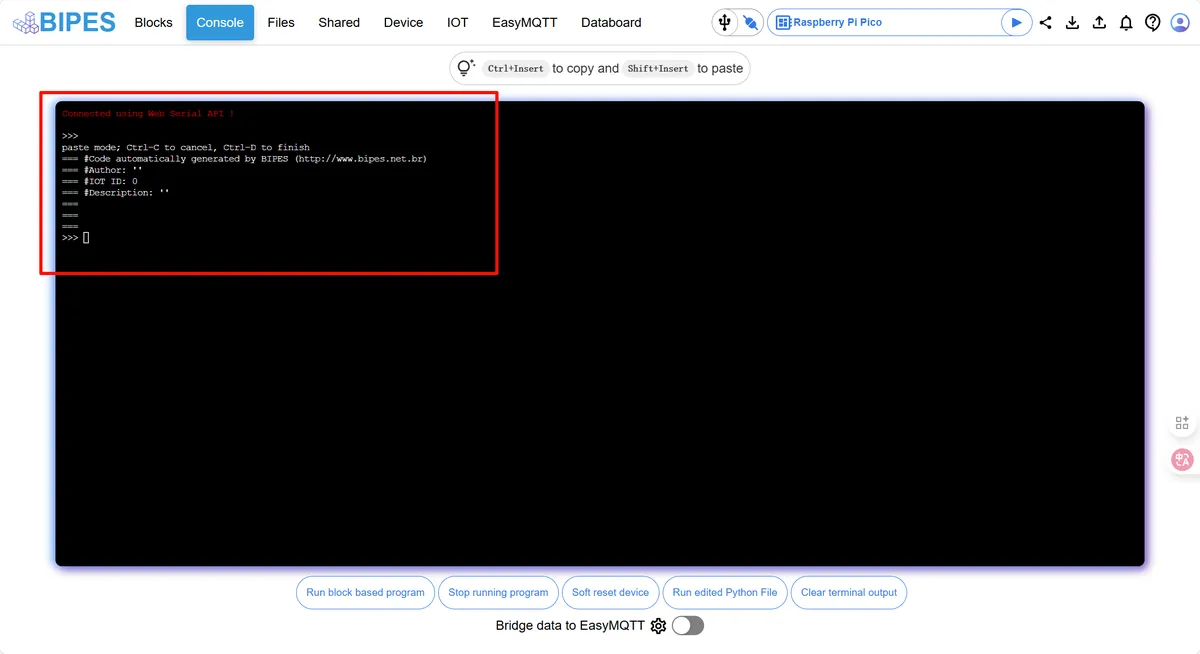
- If
Consoletab displays the corresponding output content (e. g., "Hello World", numbers, or sensor values), it indicates that:- Firmware burning succeeded;
- The computer is properly connected to the main control board;
- Can run / transfer programs normally.