
Contents
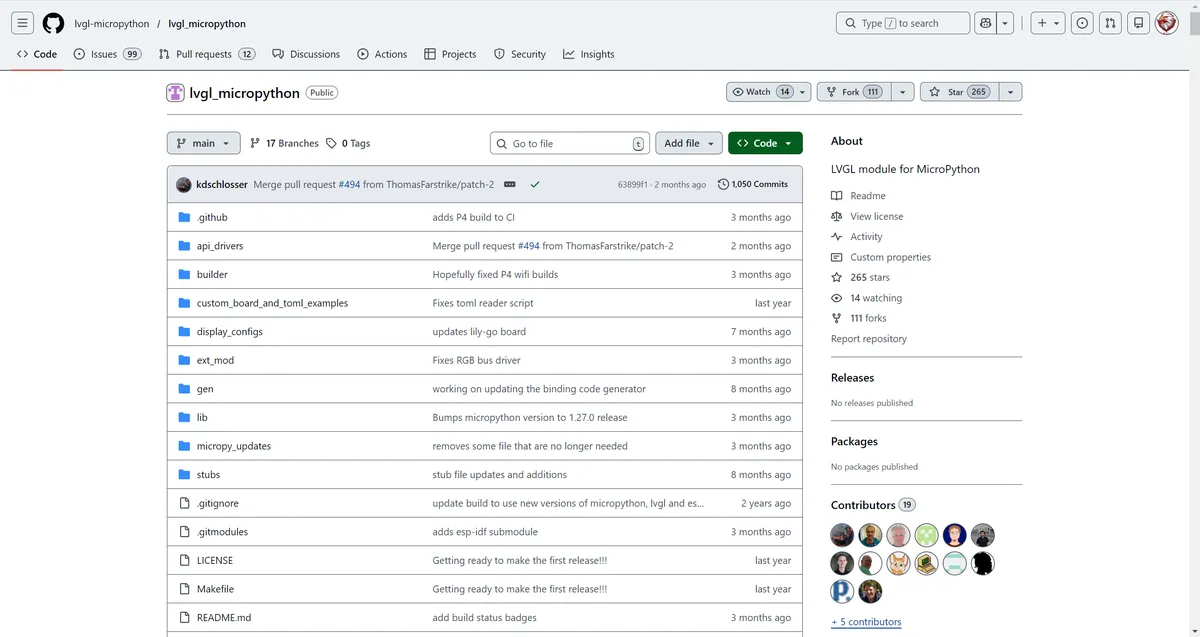
Repository Address: https://github.com/lvgl-micropython/lvgl_micropython
1. Project Overview
This is an open source project that binds the LVGL embedded GUI library to MicroPython , a derivative version of lv_micropython and lv_binding_micropython . Its core goal is to enable developers to use the Python language to develop graphical interfaces on microcontrollers, while simplifying the compilation process, unifying APIs, and expanding hardware support.
- Binding (Binding) can be understood as a "language translator": LVGL is an embedded GUI framework written in C language, and this project encapsulates the C language LVGL API into a Python callable interface through "glue code", allowing MicroPython developers to directly operate all functions of LVGL using Python without writing low-level C code.
- MicroPython: A lightweight version of the Python language, designed specifically for resource-constrained microcontrollers (MCUs), with extremely low memory footprint while retaining Python's concise and user-friendly syntax and hardware access capabilities.
- LVGL: is one of the most popular open-source GUI frameworks in the embedded field, implemented in C99, optimized for low-resource devices, providing rich UI components such as buttons, labels, lists, animations, etc., and supporting touch interaction and complex interface layouts.
The project's objectives are as follows:
- Simplify the compilation process of LVGL + MicroPython and lower the entry barrier.
- Unify API specifications to facilitate developers in adding new display/input device drivers.
- Supports more hardware connection topologies and adapts to different embedded product forms.
- Optimized Performance: Underlying optimizations have been made for scenarios such as RGB buses, improving GUI rendering frame rates while reducing memory usage.
1.1 Key Architectures and Features
The project has refactored the dependency logic: Instead of being a subsidiary component of MicroPython, it now makes MicroPython a dependency of this project . This change has greatly simplified the adaptation work for MicroPython version upgrades, requiring only minor modifications to support the new version of MicroPython and avoiding the hassle of frequent refactoring of binding code in the past.
The project provides make.py Python script to handle compilation uniformly, supporting mainstream embedded platforms:
- Target platforms: ESP32, STM32, RP2 (Raspberry Pi Pico), Renesas RA, nRF, i.MX RT, SAMD, etc., while also supporting Unix/macOS desktop simulation (for easy debugging).
- Build dependencies: Requires Python ≥ 3.10 and a C compiler (gcc/clang/msvc), and different platforms need to install the corresponding toolchain (e.g., ESP32 requires
build-essential,cmake, etc.). - Note: Windows platform is not yet supported, and macOS/Unix versions need to be compiled locally and then run directly.
1.2 Support and Features
Supports most mainstream LCD driver chips and, including mainstream capacitive/resistive touch chips:
Classification | Project | Remarks |
Supported Display IC's | GC9A01 | |
Supported Display IC's | HX8357B | |
Supported Display IC's | HX8357D | |
Supported Display IC's | ILI9163 | |
Supported Display IC's | ILI9225 | |
Supported Display IC's | ILI9341 | |
Supported Display IC's | ILI9481 | |
Supported Display IC's | ILI9486 | |
Supported Display IC's | ILI9488 | |
Supported Display IC's | LT768x | WIP |
Supported Display IC's | R61581 | |
Supported Display IC's | RA8876 | WIP |
Supported Display IC's | RM68120 | |
Supported Display IC's | RM68140 | |
Supported Display IC's | S6D02A1 | |
Supported Display IC's | SSD1351 | |
Supported Display IC's | SSD1963_480 | |
Supported Display IC's | SSD1963_800 | |
Supported Display IC's | SSD1963_800ALT | |
Supported Display IC's | SSD1963_800BD | |
Supported Display IC's | ST7701S | WIP |
Supported Display IC's | ST7735B | |
Supported Display IC's | ST7735R_Red | |
Supported Display IC's | ST7735R_Green | |
Supported Display IC's | ST7789 | |
Supported Display IC's | ST7796 | |
Supported Touch IC's | CST816S | |
Supported Touch IC's | FT5x06 | |
Supported Touch IC's | FT5x16 | |
Supported Touch IC's | FT5x26 | |
Supported Touch IC's | FT5x36 | |
Supported Touch IC's | FT5x46 | |
Supported Touch IC's | FT6x06 | |
Supported Touch IC's | FT6x36 | |
Supported Touch IC's | GT911 | |
Supported Touch IC's | STMPE610 | |
Supported Touch IC's | XPT2046 | |
Special use drivers | SDL2 | Only for the unix and macOS ports |
WIPindicates that it is still under development;- Compatibility Solution: ICs not listed can be adapted through the generic
rgb_displaydriver. - SDL2: Only used for Unix/macOS desktop, it can simulate LCD display and input on a computer, allowing debugging of GUI code without burning to hardware.
2. Compilation Tutorial
⚠️ Core Mandatory Precautions (Must Read! Direct Compilation Failure if Violated)
This is the most critical rule of the project, officially marked in all capital letters, and must be strictly adhered to:
- Prohibit the use of any compilation information bound to the official LVGL
- Do not refer to the
lv_micropython/lv_binding_micropythonofficial tutorial. This project is an independent branch and is completely incompatible.
- Do not refer to the
- Prohibit the execution of any Git submodule initialization commands
- After cloning the repository and during the compilation process,neverrun
git submodule init/updateand other submodule-related commands.
- After cloning the repository and during the compilation process,neverrun
- The only way to update the version
- To upgrade to the latest
masterversion, you must delete the local old repository and re-clone it completely , andgit pullupdates are not supported.
- To upgrade to the latest
The architecture of this project has been refactored: MicroPython is a dependency of this binding, rather than the binding being a dependency of MicroPython, and the compilation logic has been completely simplified.
2.1 Project Cloning
Here, use the following command to clone the project:
# 1. Clone the repository (without any submodule parameters)
git clone https://github.com/lvgl-micropython/lvgl_micropython

# 2. Enter the project root directory
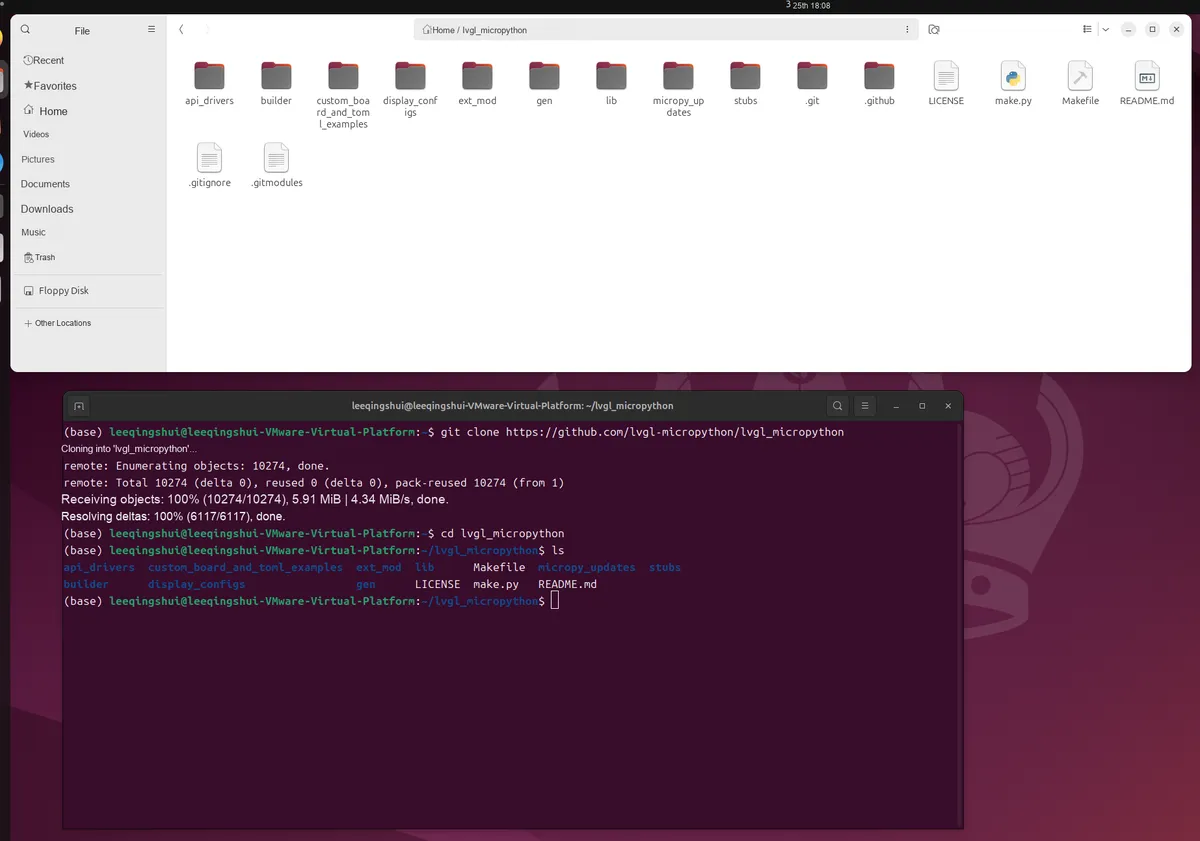
cd lvgl_micropython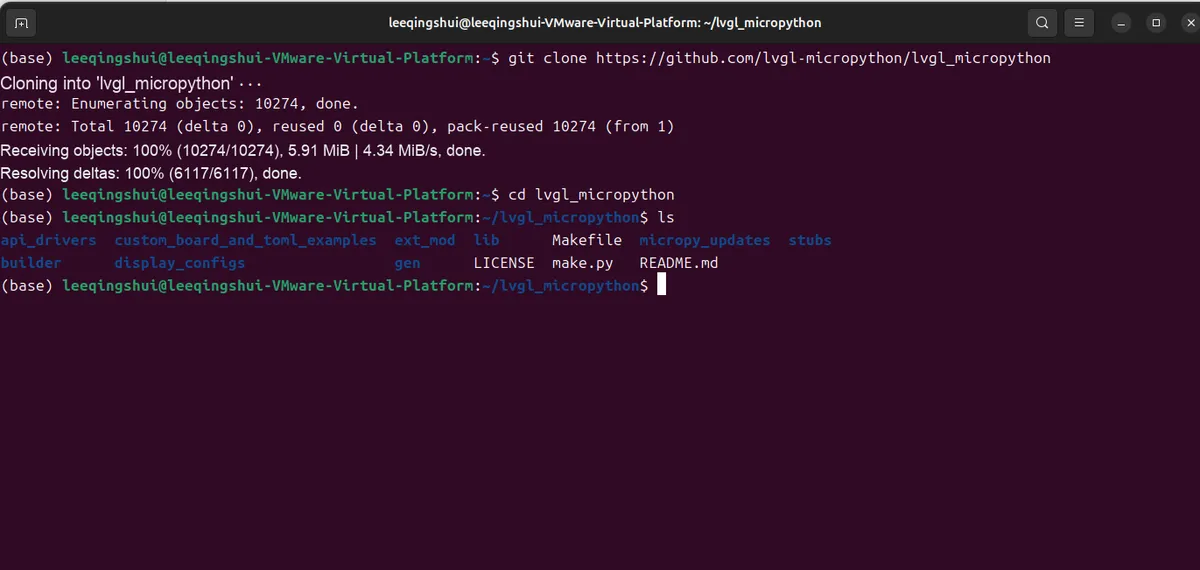
2.2 Install Dependencies
- Python Version: All compilation types must satisfy Python ≥ 3.10
- Windows System: Compilation is not currently supported across all platforms
- Comply with the core rules of the project: Submodule initialization is prohibited, and updates require re-cloning the repository
We can use the following command to check the Python version:
python --version
Cross-platform Compilation Dependency Comparison Table
| Target build platform | Runtime environment | Required dependency packages | One-click install command |
|---|---|---|---|
| ESP32 | Ubuntu (Linux) | build-essential, cmake, ninja-build, python, python3-venv, libusb-1.0-0-dev | apt-get install build-essential cmake ninja-build python python3-venv libusb-1.0-0-dev |
| macOS | Xcode command line tools, cmake, ninja, python | Omitted | |
| RP2 | Ubuntu (Linux) | build-essential, cmake, ninja-build, python, gcc-arm-none-eabi, libnewlib-arm-none-eabi | apt-get install build-essential cmake ninja-build python gcc-arm-none-eabi libnewlib-arm-none-eabi |
| macOS | Xcode command line tools, make, cmake, ninja, python, arm-none-eabi-gcc | Omitted | |
| STM32 | Ubuntu (Linux) | gcc-arm-none-eabi, build-essential, ninja-build, python | apt-get install gcc-arm-none-eabi build-essential ninja-build python |
| macOS | Xcode command line tools, make, ninja, python, arm-none-eabi-gcc | Omitted | |
| Ubuntu local machine | Ubuntu (Linux) | build-essential, libffi-dev, pkg-config, cmake, ninja-build, gnome-desktop-testing, libasound2-dev, libpulse-dev, libaudio-dev, libjack-dev, libsndio-dev, libx11-dev, libxext-dev, libxrandr-dev, libxcursor-dev, libxfixes-dev, libxi-dev, libxss-dev, libxkbcommon-dev, libdrm-dev, libgbm-dev, libgl1-mesa-dev, libgles2-mesa-dev, libegl1-mesa-dev, libdbus-1-dev, libibus-1.0-dev, libudev-dev, fcitx-libs-dev, libpipewire-0.3-dev, libwayland-dev, libdecor-0-dev | See the long command below |
| macOS local machine | macOS | Xcode command line tools, libffi, ninja, make, SDL2 | Omitted |
| All platforms | Windows | Not supported yet | - |
2.2.1 One-click installation of dependency commands by environment
Under Ubuntu (Linux) environment:
- ESP32 Compile Dependencies:
sudo apt-get update
sudo apt-get install build-essential cmake ninja-build python python3-venv libusb-1.0-0-dev -y- RP2 Compile Dependencies
sudo apt-get update
sudo apt-get install build-essential cmake ninja-build python3 python-is-python3 gcc-arm-none-eabi libnewlib-arm-none-eabi -y- STM32 Compile Dependencies
sudo apt-get update
sudo apt-get install gcc-arm-none-eabi build-essential ninja-build python -y- Ubuntu Native Compilation Dependencies
sudo apt-get update
sudo apt-get install build-essential libffi-dev pkg-config cmake ninja-build gnome-desktop-testing libasound2-dev libpulse-dev libaudio-dev libjack-dev libsndio-dev libx11-dev libxext-dev libxrandr-dev libxcursor-dev libxfixes-dev libxi-dev libxss-dev libxkbcommon-dev libdrm-dev libgbm-dev libgl1-mesa-dev libgles2-mesa-dev libegl1-mesa-dev libdbus-1-dev libibus-1.0-dev libudev-dev fcitx-libs-dev libpipewire-0.3-dev libwayland-dev libdecor-0-dev -y
2.2.2 Install Dependencies
2.2.2.1 ESP32 Installation Dependencies
Enter the following command:
sudo apt-get update
sudo apt-get install build-essential cmake ninja-build python3 python3-venv libusb-1.0-0-dev python-is-python3 -y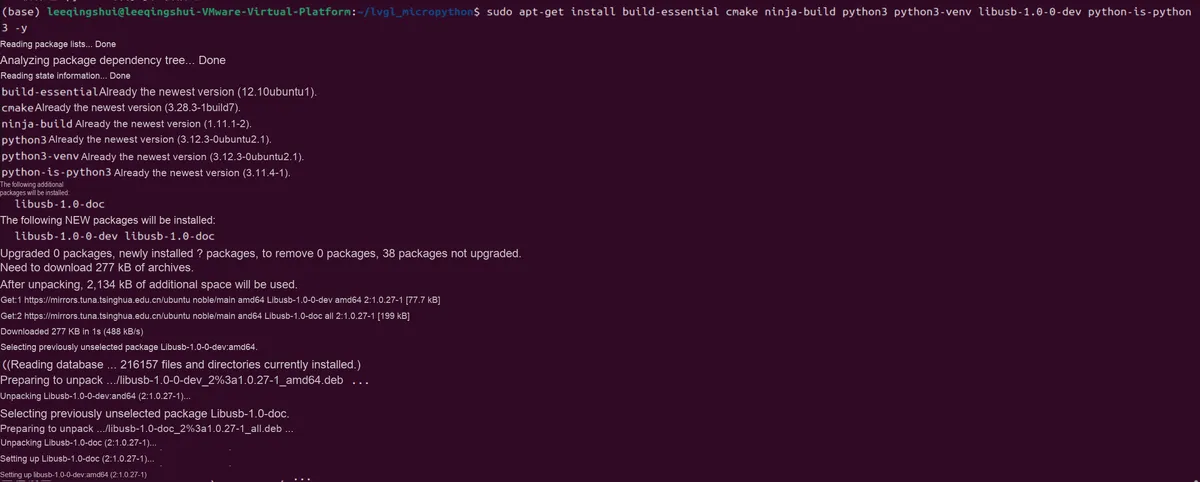
2.2.2.2 Raspberry Pi Pico (RP2) Install Dependencies
Enter the following command:
sudo apt-get update
sudo apt-get install build-essential cmake ninja-build python3 python-is-python3 gcc-arm-none-eabi libnewlib-arm-none-eabi -y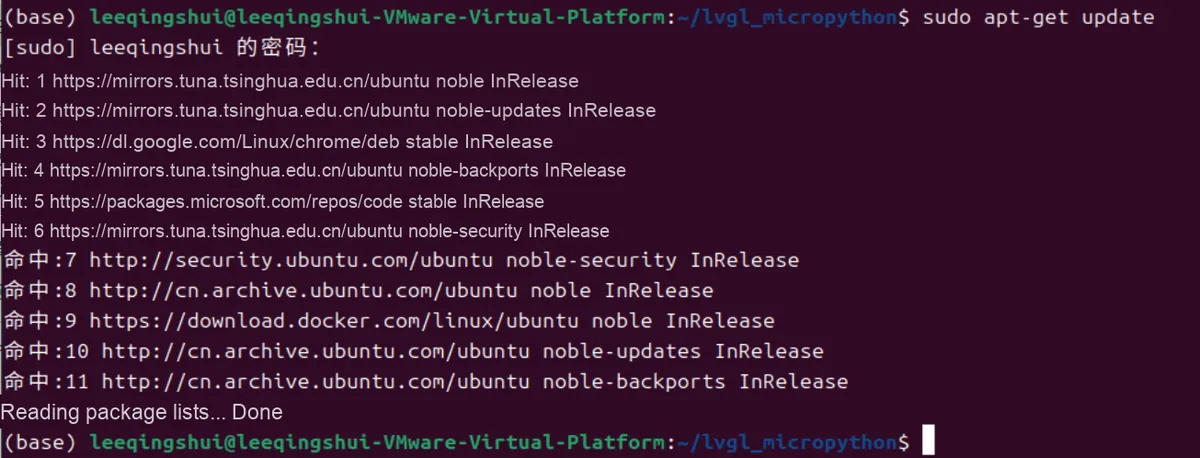
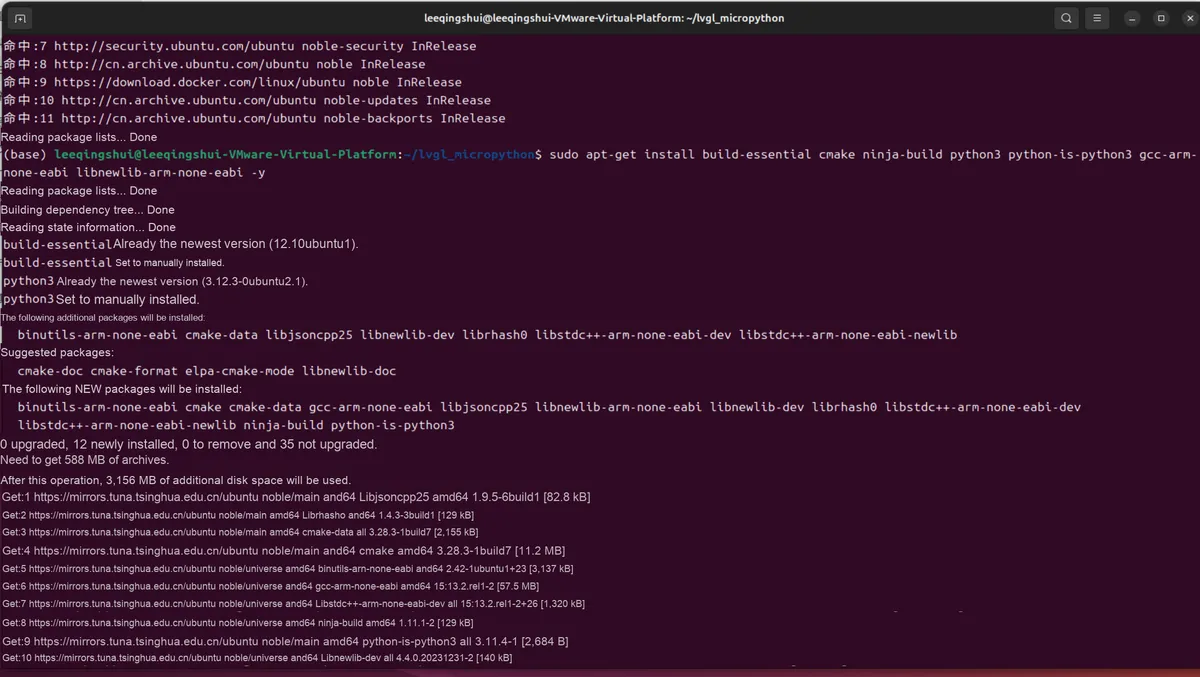
Verification dependencies are as follows:
# Verify the cross-compiler
arm-none-eabi-gcc --version
2.3 Compile Firmware
2.3.1 Standard Syntax Format and Compile Selection
Compiling the firmware only requiresa fixed command, which consists of4 partsin sequence, andthe sequence must never be disrupted:
python3 make.py {build target} {build options} {target options} {global options}Each parameter can be understood as follows:
python3 make.py 目标芯片 清理选项 开发板型号 硬件驱动The parameter explanations are as follows:
| Command snippet | Purpose | Required? |
|---|---|---|
| python3 make.py | Start the build script (fixed, do not change) | ✅ Required |
| Target chip | Which microcontroller you are building firmware for | ✅ Required |
| Clean option | Delete the leftover files from the last build | ❌ Optional |
| Board model | The specific model of your microcontroller | ❌ Advanced, optional |
| Hardware drivers | Display / touch chip configuration | ❌ Advanced, optional |
2.3.1.1 Compile Target (Build Target)
This is a command The first parameter , must be written! Its function is to tell the compiler: which microcontroller to compile the firmware for.
List of available chips:
| Platform | Description |
|---|---|
| esp32 | Espressif ESP32 series MCU |
| macOS | Runs on macOS after building; note: it must be built and run on the same computer |
| stm32 | ST Microprocessors series MCU |
| unix | Runs on Unix after building; note: it must be built and run on the same computer |
| rp2 | Raspberry Pi Pico 2 MCU |
| renesas-ra | Renesas RA series MCU |
| nrf | Nordic Semiconductor MCU |
| mimxrt | NXP i.MX RT series MCU |
| samd | Microchip Technology SAM D series MCU |
2.3.1.2 Compile Options (Build Options)
This is a command The second parameter , which is optional! There is only 1 optional value: clean :
clean: Completely delete the compilation cache folder and clear the residual files from the previous compilation.
When encountering the following situations, you can choose:
- Compile error, compilation failure
- Switched the development board model and recompiled
- Desires a brand new, clean compilation environment
2.3.1.3 Target Options
The third parameter of the command, advanced configuration, does not need to be written for the simplest compilation !
Function: Select the specific development board model (for example, for Raspberry Pi Pico, write BOARD=RPI_PICO, and for Pico W, write BOARD=RPI_PICO_W).
Minimal Summary:
- For the microcontroller, use
BOARD=model numberto specify the board - The computer version uses
VARIANT = typeto specify the compilation mode
The list of available development boards is as follows:
| Platform | Item |
|---|---|
| esp32 | ARDUINO_NANO_ESP32 |
| ESP32_GENERIC | |
| D2WD | |
| OTA | |
| SPIRAM | |
| UNICORE | |
| ESP32_GENERIC_C3 | |
| ESP32_GENERIC_S2 | |
| ESP32_GENERIC_S3 | |
| SPIRAM_OCT | |
| LILYGO_TTGO_LORA32 | |
| LOLIN_C3_MINI | |
| LOLIN_S2_MINI | |
| LOLIN_S2_PICO | |
| M5STACK_ATOM | |
| OLIMEX_ESP32_POE | |
| SIL_WESP32 | |
| UM_FEATHERS2 | |
| UM_FEATHERS2NEO | |
| UM_FEATHERS3 | |
| UM_NANOS3 | |
| UM_PROS3 | |
| UM_TINYPICO | |
| UM_TINYS2 | |
| UM_TINYS3 | |
| UM_TINYWATCHS3 | |
| stm32 | ADAFRUIT_F405_EXPRESS |
| ARDUINO_GIGA | |
| ARDUINO_NICLA_VISION | |
| ARDUINO_PORTENTA_H7 | |
| B_L072Z_LRWAN1 | |
| B_L475E_IOT01A | |
| CERB40 | |
| ESPRUINO_PICO | |
| GARATRONIC_NADHAT_F405 | |
| GARATRONIC_PYBSTICK26_F411 | |
| HYDRABUS | |
| LEGO_HUB_NO6 | |
| LEGO_HUB_NO7 | |
| LIMIFROG | |
| MIKROE_CLICKER2_STM32 | |
| MIKROE_QUAIL | |
| NETDUINO_PLUS_2 | |
| NUCLEO_F091RC | |
| NUCLEO_F401RE | |
| NUCLEO_F411RE | |
| NUCLEO_F412ZG | |
| NUCLEO_F413ZH | |
| NUCLEO_F429ZI | |
| NUCLEO_F439ZI | |
| NUCLEO_F446RE | |
| NUCLEO_F722ZE | |
| NUCLEO_F746ZG | |
| NUCLEO_F756ZG | |
| NUCLEO_F767ZI | |
| NUCLEO_G0B1RE | |
| NUCLEO_G474RE | |
| NUCLEO_H563ZI | |
| NUCLEO_H723ZG | |
| NUCLEO_H743ZI | |
| NUCLEO_H743ZI2 | |
| NUCLEO_L073RZ | |
| NUCLEO_L152RE | |
| NUCLEO_L432KC | |
| NUCLEO_L452RE | |
| NUCLEO_L476RG | |
| NUCLEO_L4A6ZG | |
| NUCLEO_WB55 | |
| NUCLEO_WL55 | |
| OLIMEX_E407 | |
| OLIMEX_H407 | |
| PYBD_SF2 | |
| PYBD_SF3 | |
| PYBD_SF6 | |
| PYBLITEV10 | |
| PYBV10 | |
| PYBV11 | |
| PYBV3 | |
| PYBV4 | |
| SPARKFUN_MICROMOD_STM32 | |
| STM32F411DISC | |
| STM32F429DISC | |
| STM32F439 | |
| STM32F4DISC | |
| STM32F769DISC | |
| STM32F7DISC | |
| STM32H573I_DK | |
| STM32H7B3I_DK | |
| STM32L476DISC | |
| STM32L496GDISC | |
| USBDONGLE_WB55 | |
| VCC_GND_F407VE | |
| VCC_GND_F407ZG | |
| VCC_GND_H743VI | |
| rp2 | ADAFRUIT_FEATHER_RP2040 |
| ADAFRUIT_ITSYBITSY_RP2040 | |
| ADAFRUIT_QTPY_RP2040 | |
| ARDUINO_NANO_RP2040_CONNECT | |
| GARATRONIC_PYBSTICK26_RP2040 | |
| NULLBITS_BIT_C_PRO | |
| PIMORONI_PICOLIPO_16MB | |
| PIMORONI_PICOLIPO_4MB | |
| PIMORONI_TINY2040 | |
| POLOLU_3PI_2040_ROBOT | |
| POLOLU_ZUMO_2040_ROBOT | |
| RPI_PICO | |
| RPI_PICO_W | |
| SIL_RP2040_SHIM | |
| SPARKFUN_PROMICRO | |
| SPARKFUN_THINGPLUS | |
| W5100S_EVB_PICO | |
| W5500_EVB_PICO | |
| WEACTSTUDIO | |
| FLASH_2M | |
| FLASH_4M | |
| FLASH_8M | |
| renesas-ra | ARDUINO_PORTENTA_C33 |
| EK_RA4M1 | |
| EK_RA4W1 | |
| EK_RA6M1 | |
| EK_RA6M2 | |
| RA4M1_CLICKER | |
| VK_RA6M5 | |
| nrf | ACTINIUS_ICARUS |
| ARDUINO_NANO_33_BLE_SENSE | |
| ARDUINO_PRIMO | |
| BLUEIO_TAG_EVIM | |
| DVK_BL652 | |
| EVK_NINA_B1 | |
| EVK_NINA_B3 | |
| FEATHER52 | |
| IBK_BLYST_NANO | |
| IDK_BLYST_NANO | |
| MICROBIT | |
| NRF52840_MDK_USB_DONGLE | |
| PARTICLE_XENON | |
| PCA10000 | |
| PCA10001 | |
| PCA10028 | |
| PCA10031 | |
| PCA10040 | |
| PCA10056 | |
| PCA10059 | |
| PCA10090 | |
| SEEED_XIAO_NRF52 | |
| WT51822_S4AT | |
| mimxrt | ADAFRUIT_METRO_M7 |
We can use the following command in the terminal to view the supported development boards:
# List all boards supported by ESP32
ls lib/micropython/ports/esp32/boards/

# List all boards supported by RP2
ls lib/micropython/ports/rp2/boards/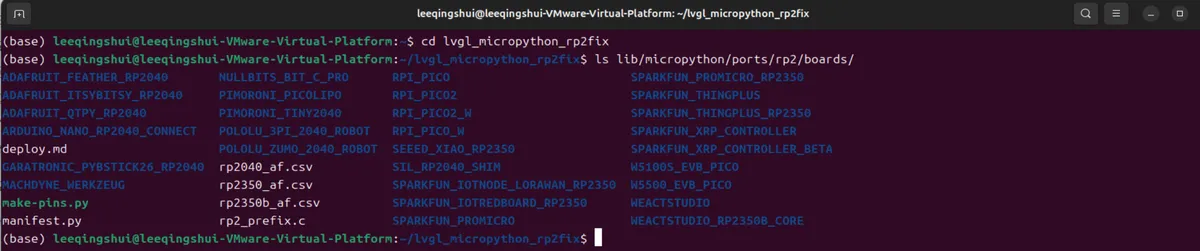

2.3.1.4 Global Options
The last parameter of the command, advanced configuration, can be completely omitted in the simplest compilation!
Function: Add screen and touch chip drivers , only used when the drivers need to be solidified into the firmware:
DISPLAY=xxx: Specify the screen driverINDEV=xxx: Specify touch/input driver
Support configuration of multiple screens and multiple input devices:
DISPLAYScreen Driver Configuration:- Fill inthe built-in driver model: The driver file is stored in the project directory
api_drivers/common_api_drivers/display. - Fill inCustom Path: The full path of the screen driver folder you created yourself
- Fill inthe built-in driver model: The driver file is stored in the project directory
INDEVInput Device Driver Configuration:- Fill inthe built-in driver model: The driver file is stored in the project directory
api_drivers/common_api_drivers/display. - Fill inCustom Path: The full path of the screen driver folder you created yourself
- Fill inthe built-in driver model: The driver file is stored in the project directory
2.3.1.5 Model/Variant Specific Configuration (ESP32 Specific Instructions)
The following parameters apply to all ESP32 chips , which are the most commonly used advanced configurations. Beginners only need to understand the commonly used items marked with ✅:
| Parameter format | Official English description | Beginner-friendly translation & usage |
|---|---|---|
| BAUD=number | Speed for flashing the firmware; must be used with deploy | ✅ Flashing baud rate function: Sets the speed for flashing firmware to the microcontroller (the larger the number, the faster) Example: BAUD=921600 |
| PORT=serial port name | Serial port the microcontroller is connected to; must be used together with deploy | ✅ Serial port function: Specifies the ESP32 port recognized by the computer Example: PORT=/dev/ttyUSB0 |
| deploy | Automatically flash the firmware to the microcontroller after building | ✅ Build + automatic flashing Function: no need to copy the firmware manually; flash it to the chip directly after building ⚠️ Must be used with the ESP32 connected to the computer |
| --skip-partition-resize | Disable automatic partition size adjustment | Advanced: prevents the system from automatically modifying the firmware partitions; beginners can ignore |
| --partition-size=size | Manually set the application partition size | Advanced: for OTA remote updates only; beginners ignore |
| --optimize-size | Prioritize compressing firmware size | ✅ Reduce firmware size Function: generates a smaller firmware when the chip's storage space is insufficient |
| --debug | Enable ESP-IDF debug logging | Advanced: for finding bugs; beginners do not need to enable |
| --ccache | Speed up building | Advanced: requires installing extra tools; beginners ignore |
| --flash-size=4/8/16... | Set the microcontroller's Flash storage size | ✅ Configure flash size Function: fill in according to your ESP32 hardware (4/8/16/32G, etc.) |
| --ota | Enable the remote firmware update feature | Advanced: enable when doing wireless OTA updates; beginners do not need it |
| --dual-core-threads | Enable ESP32 dual-core operation (experimental feature) | Advanced: lets both cores of the microcontroller run code at the same time; beginners use with caution |
| --task-stack-size=number | Set the thread stack size | Advanced: used when running multithreaded code; beginners ignore |
| CONFIG_*=value | Modify the low-level ESP-IDF configuration | Advanced: official kernel parameter changes; beginners should not touch these at all |
| --uart-repl-bitrate=baud rate | Set the serial debug communication speed | Advanced: raises the serial speed when transferring large files; beginners ignore |
| --enable-uart-repl=y/n | Enable / disable the serial debug feature | Advanced: the serial port can be turned off when debugging over USB; beginners keep it enabled by default |
There are also some parameters that can only be used by specific models of ESP32 MCUs:
Classification | Parameter Format | Xiaobai Instructions | Scope of Application / Remarks |
Exclusive to ESP32-S3 |
| Enable eight-line SPI flash | Only supported by ESP32-S3; enabled when the hardware is equipped with an eight-line high-speed flash memory, not required for the standard version |
Universal for ESP32-S2 / S3 / C3 / C6 |
| ✅ USB Debugging Switch (enables direct USB debugging without the need for a serial port module) | Compatible with S2 / S3 / C3 / C6; old ESP32 hardware is not supported |
| Advanced Debugging: JTAG Hardware Debugging Switch | New users generally do not need to use it; only applicable to S2 / S3 / C3 / C6 |
Meanwhile, there are also parameters related to custom development boards, suitable for developers who design their own ESP32 hardware,which are completely unnecessary for beginners / general-purpose modules:
| Parameter format | Beginner's note |
|---|---|
| --custom-board-path=path | Fill in the path of the custom board configuration file |
| --toml=configuration file path | Use a custom hardware configuration file in TOML format |
2.3.2 Take ESP32_GENERIC_S3 as an example for compilation
2.3.2.1 Simplest Compile
2.3.2.1.1 Initial Compile
Open the terminal and navigate to the project root directory (must be under the lvgl_micropython folder)
cd ~/lvgl_micropythonPure minimal compilation (used for the first compilation):
python3 make.py esp32 BOARD=ESP32_GENERIC_S3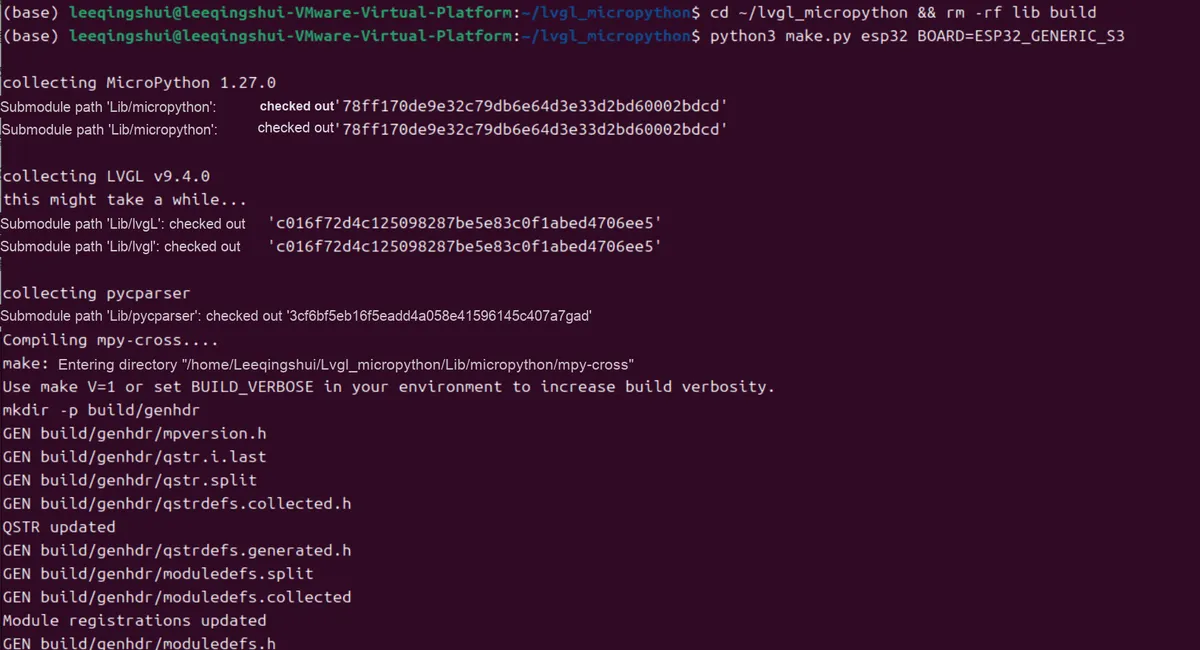
2.3.2.1.2 Recompile after compilation failure
If there are issues, you need to run:
# 1. Clean the compile cache and build directory
rm -rf build lib/micropython/ports/esp32/build-ESP32_GENERIC_S3

# 2. Clean the openthread submodule that failed to download (so the script downloads it again)
rm -rf lib/esp-idf/components/openthread/lib
Then recompile:
python3 make.py esp32 clean BOARD=ESP32_GENERIC_S3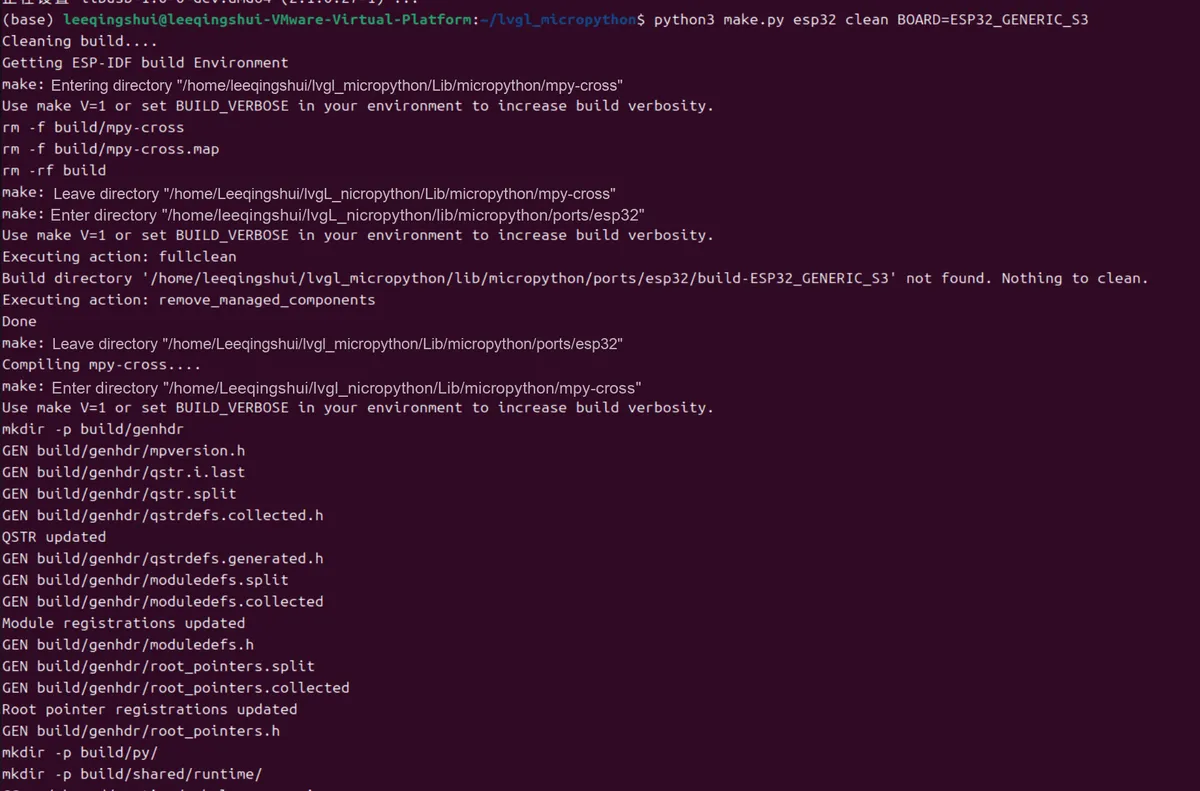
2.3.2.1.3 Frequently Asked Questions: Git SSL verification failed
If compilation fails due to network issues:

You can choose to turn off Git's SSL verification:
git config --global http.sslVerify false
git config --global http.postBuffer 524288000
2.3.2.1.4 Frequently Asked Questions: Submodule Pull Failed
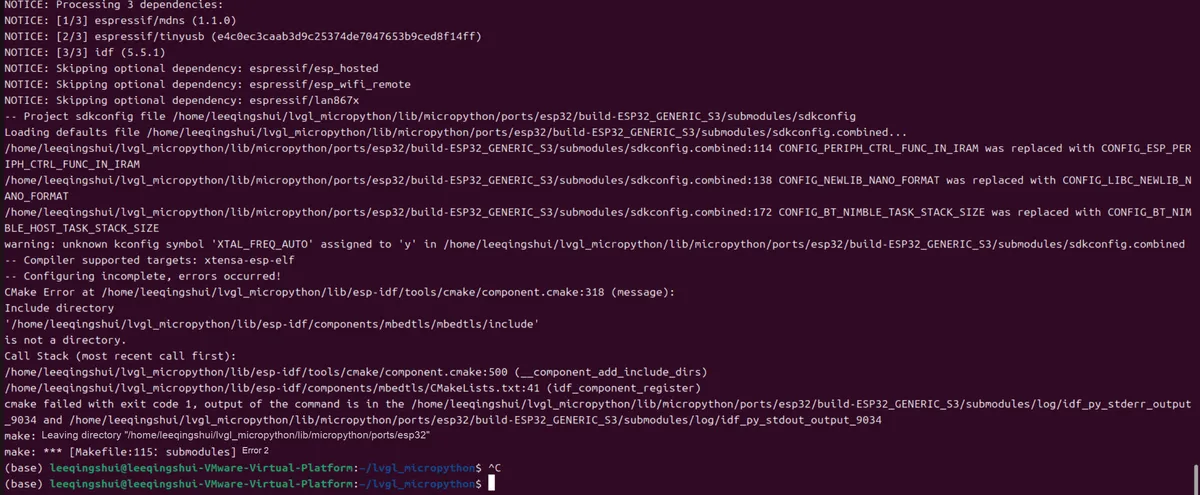
If a prompt indicates that a submodule cannot be successfully pulled, manual pulling is required, as shown in the figure below:
Git submodule components/mbedtls/mbedtls is out of date.
Run the following command to fix: git submodule update --init --recursive
The system clearly tells you: mbedtls submodule is missing / outdated, final fatal error (root cause of compile hang):
CMake Error: Include directory '/.../mbedtls/include' is not a directory.The mbedtls folder is empty! There is no include Header File directory , so CMake cannot compile.
Next, we will enter the corresponding directory to pull the submodule:
cd /home/leeqingshui/lvgl_micropython/lib/esp-idf
git submodule update --init components/mbedtls/mbedtls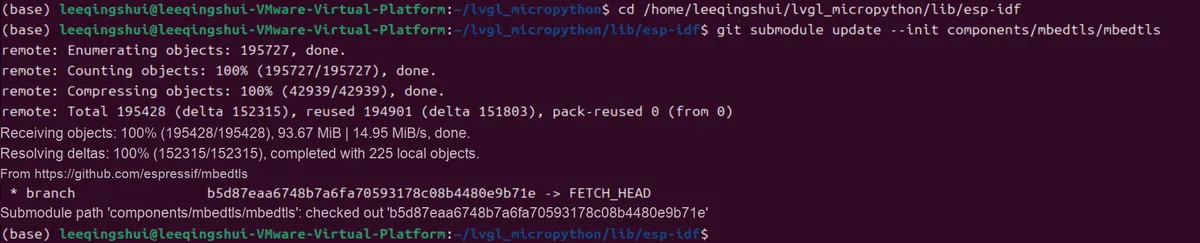
Next, execute:
# Return to the repository root directory
cd /home/leeqingshui/lvgl_micropython

# 1. Clean the compile cache and build directory
rm -rf build lib/micropython/ports/esp32/build-ESP32_GENERIC_S3

# 2. Clean the openthread submodule that failed to download (so the script downloads it again)
rm -rf lib/esp-idf/components/openthread/lib
Execute again:
python3 make.py esp32 clean BOARD=ESP32_GENERIC_S3 BOARD_VARIANT=SPIRAM_OCT DISPLAY=st7789 INDEV=gt911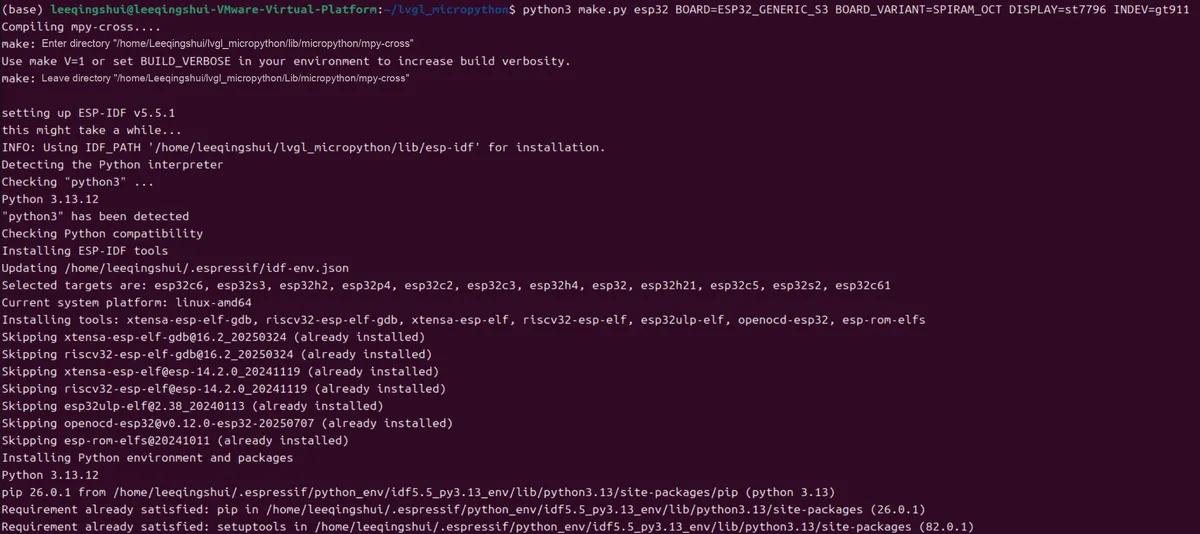
When the result shows as follows, it indicates that the compilation was successful:
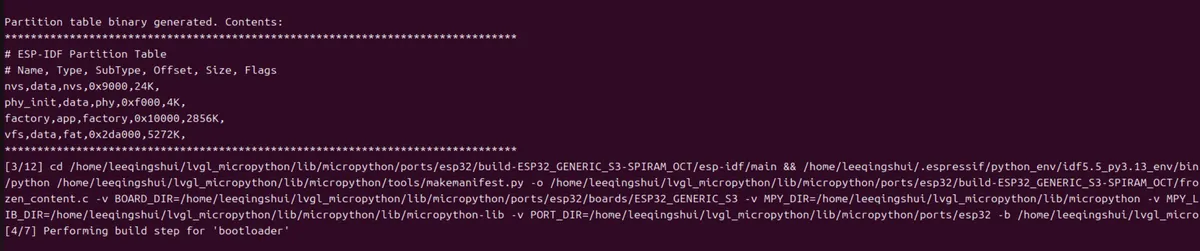
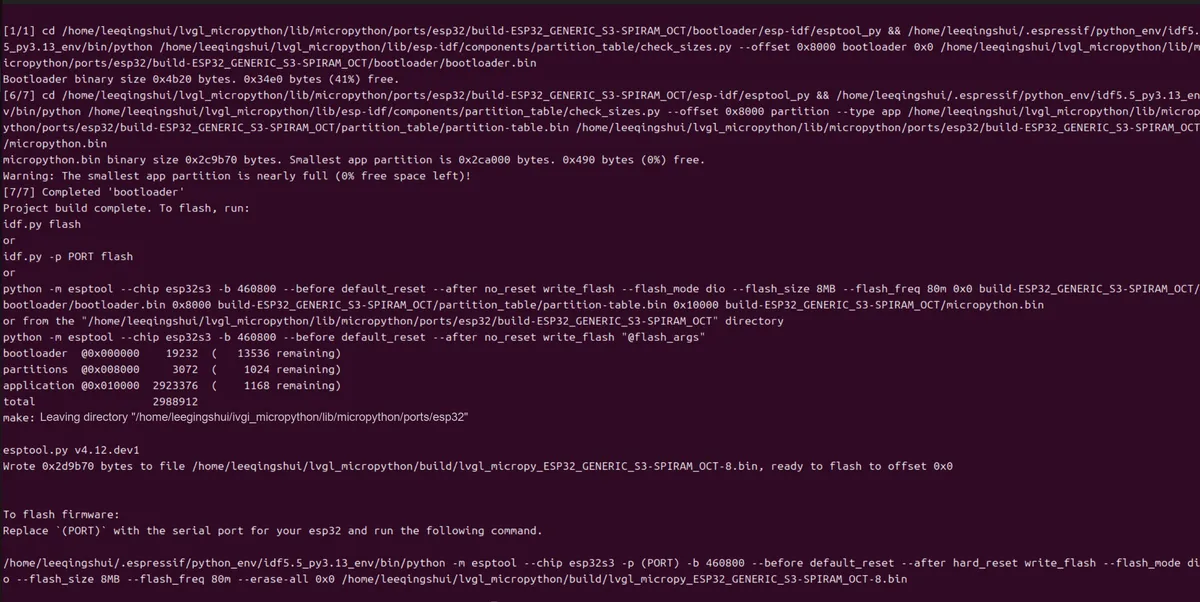
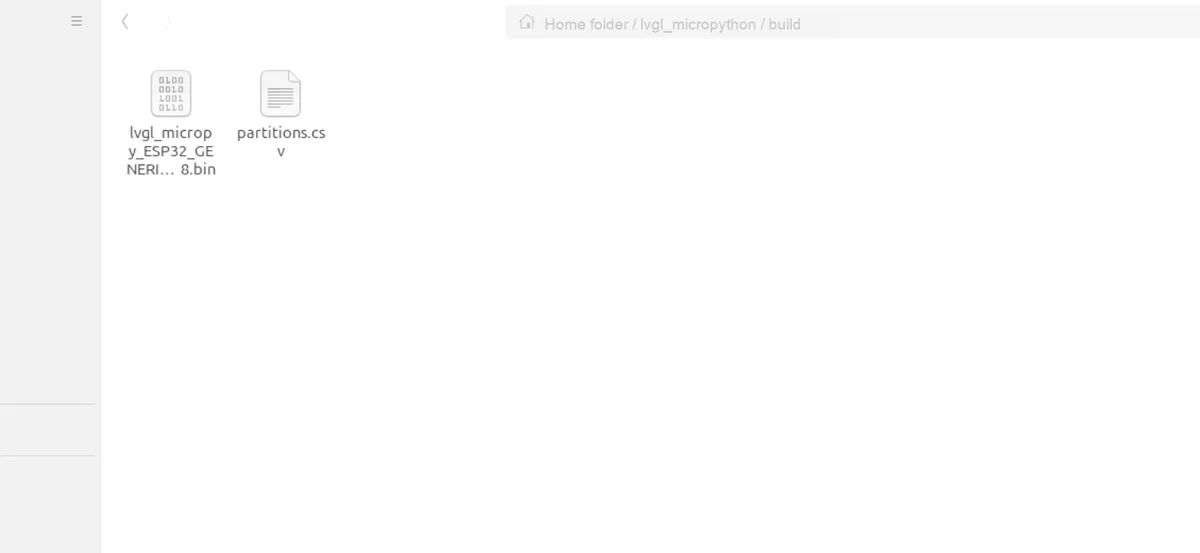
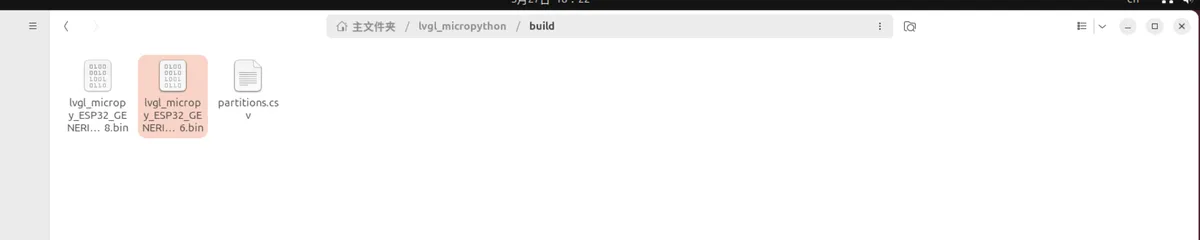
We will find the compiled firmware in this folder:/home/leeqingshui/lvgl_micropython/build
2.3.2.2 Compile the Weixue ESP32S3 2-inch Touch LCD Screen Development Board
The first compilation command is as follows:
python3 make.py esp32 --flash-size=16 --optimize-size --enable-cdc-repl=y BOARD=ESP32_GENERIC_S3 BOARD_VARIANT=SPIRAM_OCT DISPLAY=st7789 INDEV=cst816sIf it is a new compilation after cleaning, it is as follows:
python3 make.py esp32 clean --flash-size=16 --optimize-size --enable-cdc-repl=y BOARD=ESP32_GENERIC_S3 BOARD_VARIANT=SPIRAM_OCT DISPLAY=st7789 INDEV=cst816s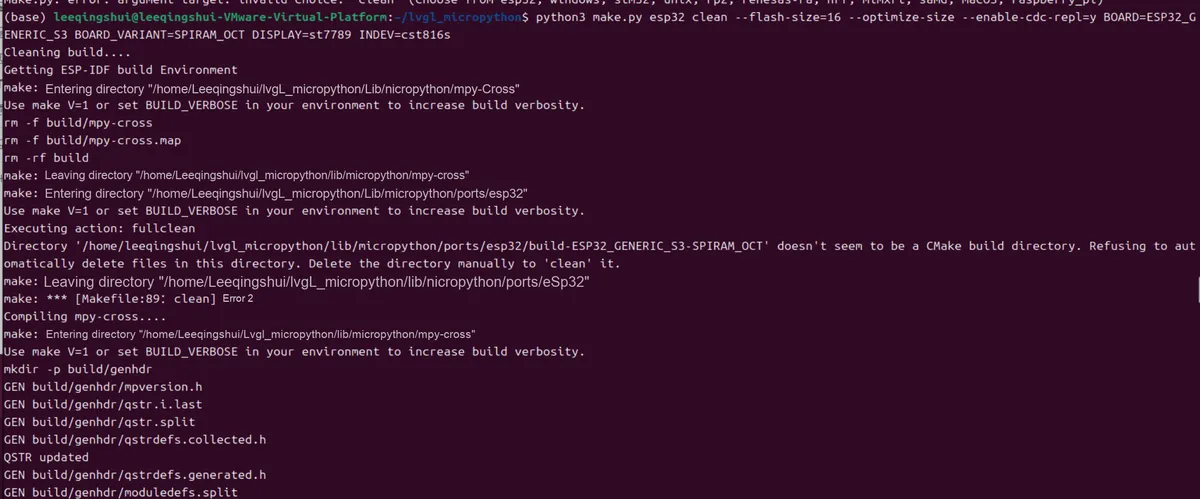
When the output is as follows, it indicates that the compilation was successful:
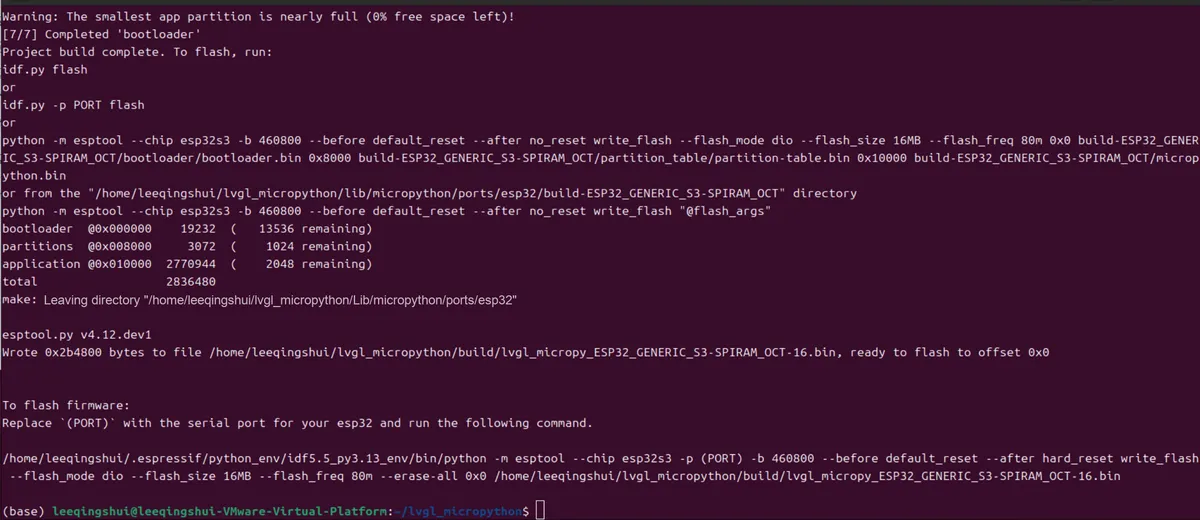
It can be seen that the LVGL-MicroPython firmware for the ESP32-S3 + 8MB Octal PSRAM + 16MB Flash version has been fully generated and can be directly flashed to the device:
- Meaning: The application partition (the area where MicroPython firmware and user code are stored) has almost filled up, with only
2048 bytes(0% available) remaining. - Impact:
- The current firmware can be normally flashed and run
- If new features, drivers, or user code need to be added later, compilation will directly fail due to insufficient space
From the log, the occupancy of each partition can be seen:
| Partition | Flash offset | Size | Free space |
|---|---|---|---|
| bootloader | 0x000000 | 19232 B | 13536 B |
| Partition table | 0x008000 | 3072 B | 1024 B |
| Application firmware | 0x010000 | 2770944 B | 2048 B |
| Total | 2836480 B (about 2.7MB) | ||
2.3.3 Compile using Raspberry Pi Pico2 as an example
2.3.3.1 Preparation before Compilation
On the basis of having completed the dependency installation, ensure that the terminal enters the project root directory:lvgl_micropython:
cd lvgl_micropython
2.3.3.2 Simplest Compile
No cleaning or solidification drivers, perfectly supports.py format screen/touch drivers , with the smallest and most stable firmware.
Simply enter the following command:
# Standard Raspberry Pi Pico2
python3 make.py rp2 BOARD=RPI_PICO2
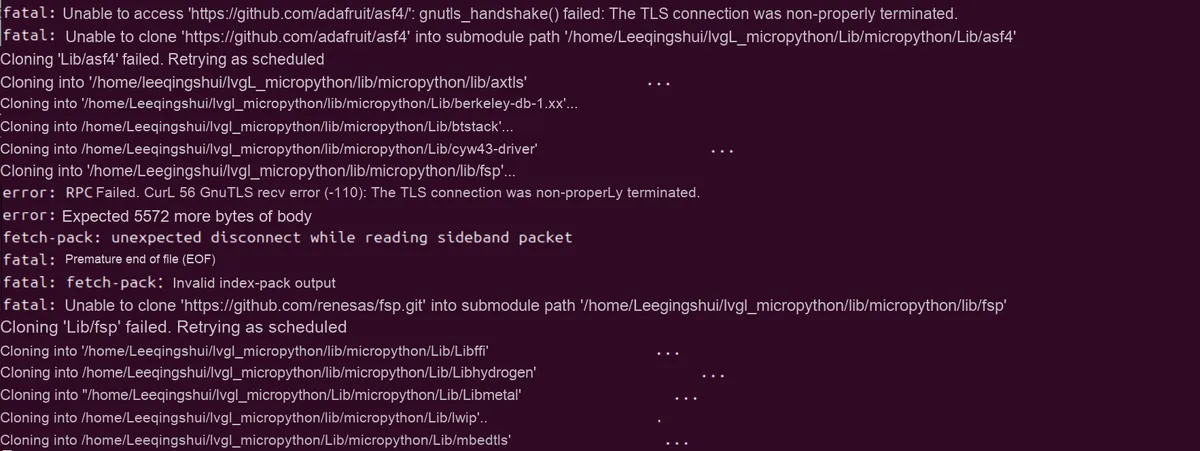
2.3.3.2.1 Frequently Asked Questions: Git SSL verification failed
If compilation fails due to network issues:

You can choose to turn off Git's SSL verification:
git config --global http.sslVerify false
git config --global http.postBuffer 524288000
2.3.3.2.2 Recompile after compilation failure
Use the following command to clean the old cache, then recompile:
cd ~/lvgl_micropython && rm -rf lib build
python3 make.py rp2 clean BOARD=RPI_PICO2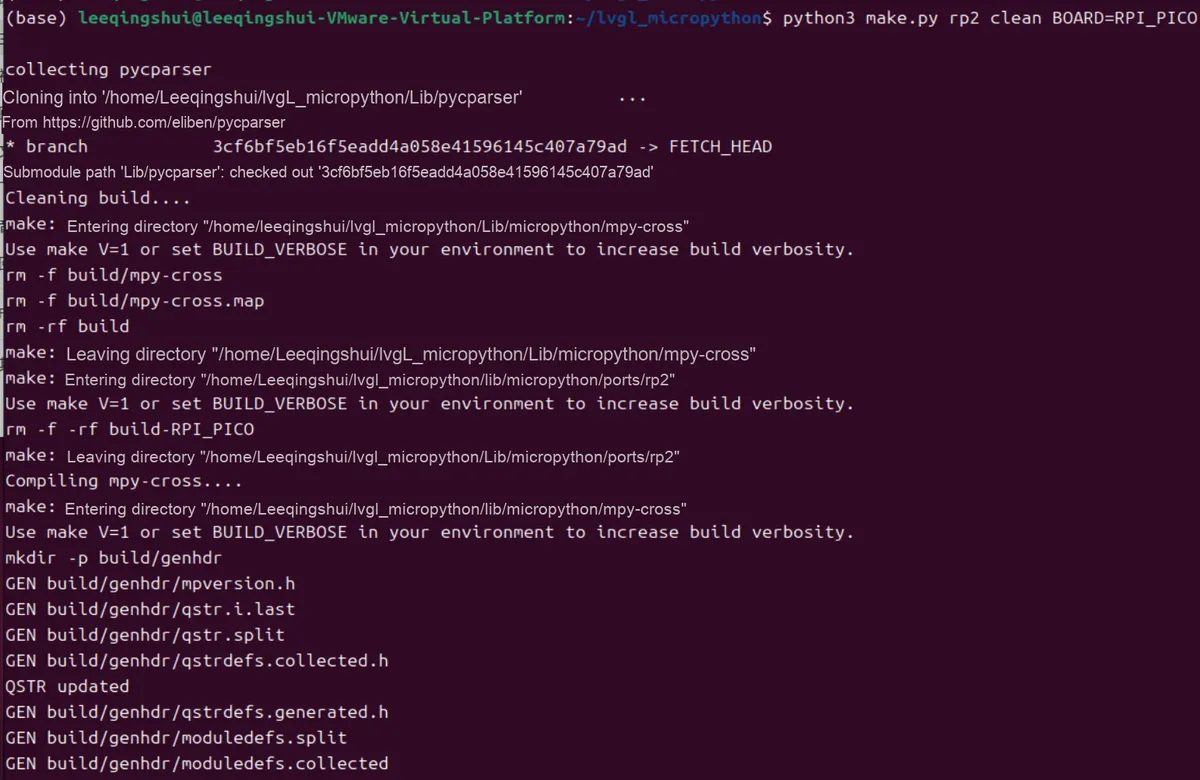
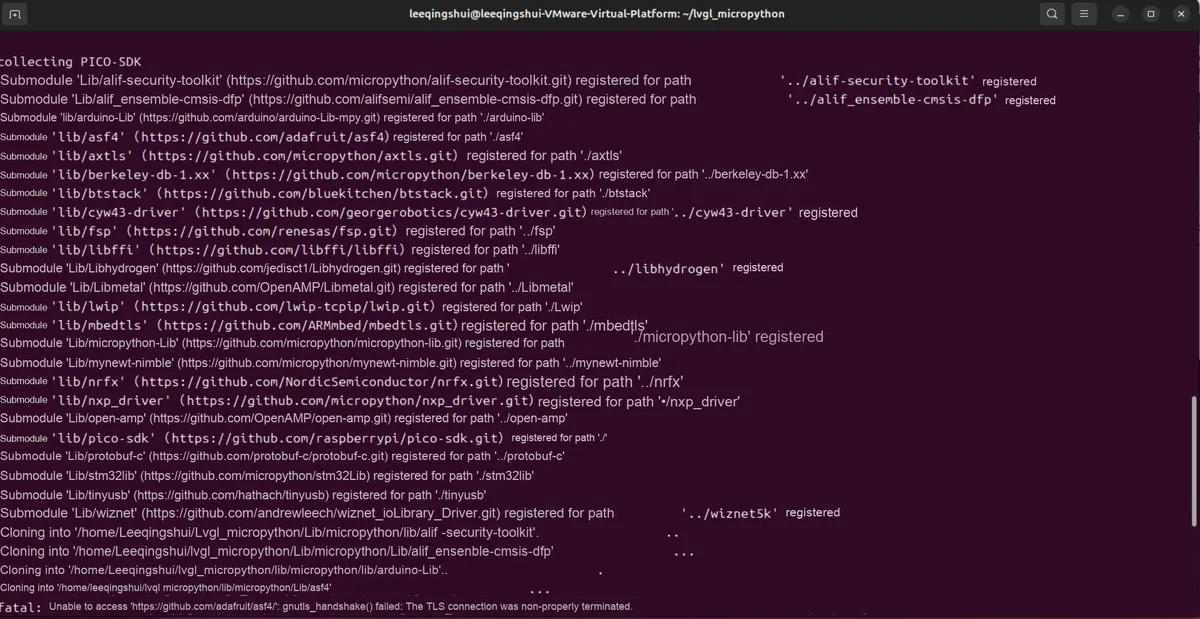
2.3.3.2.3 Common Issue: Script not found during compile gen/
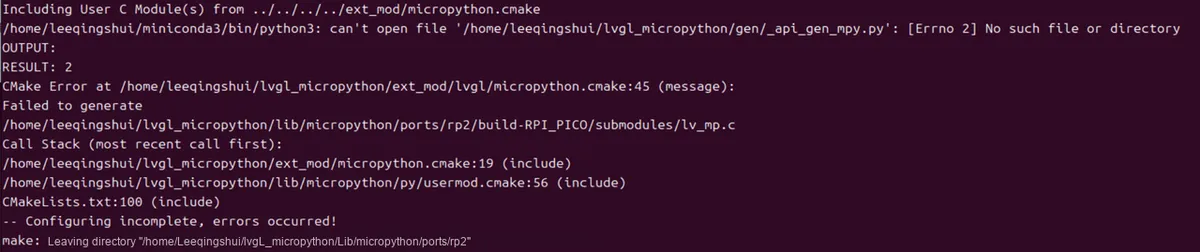
At this point, if you find that compilation fails with an error indicating that the compilation-time script cannot be found gen/_api_gen_mpy.py, the root cause is that the RP2-related auto-generation logic in the project is incomplete and the file has not been created. Here, the original author clearly stated that "RP2 support is still in future plans and requires someone familiar with RP2 to help write the driver".
The community has a temporary solution : https://github.com/lvgl-micropython/lvgl_micropython/issues/415
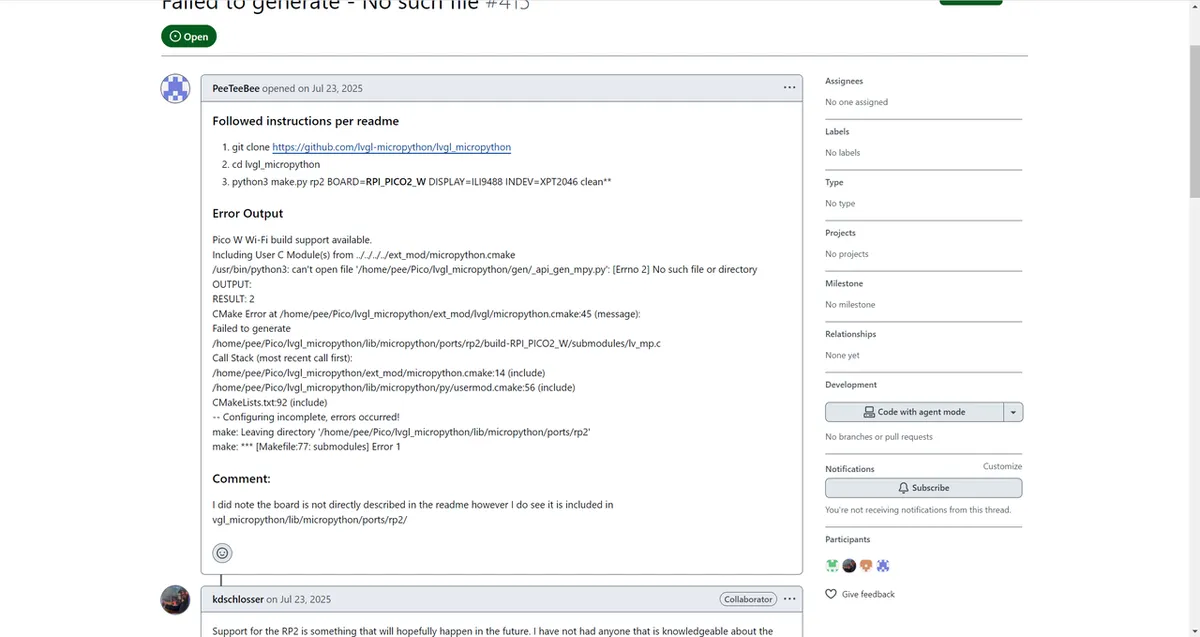
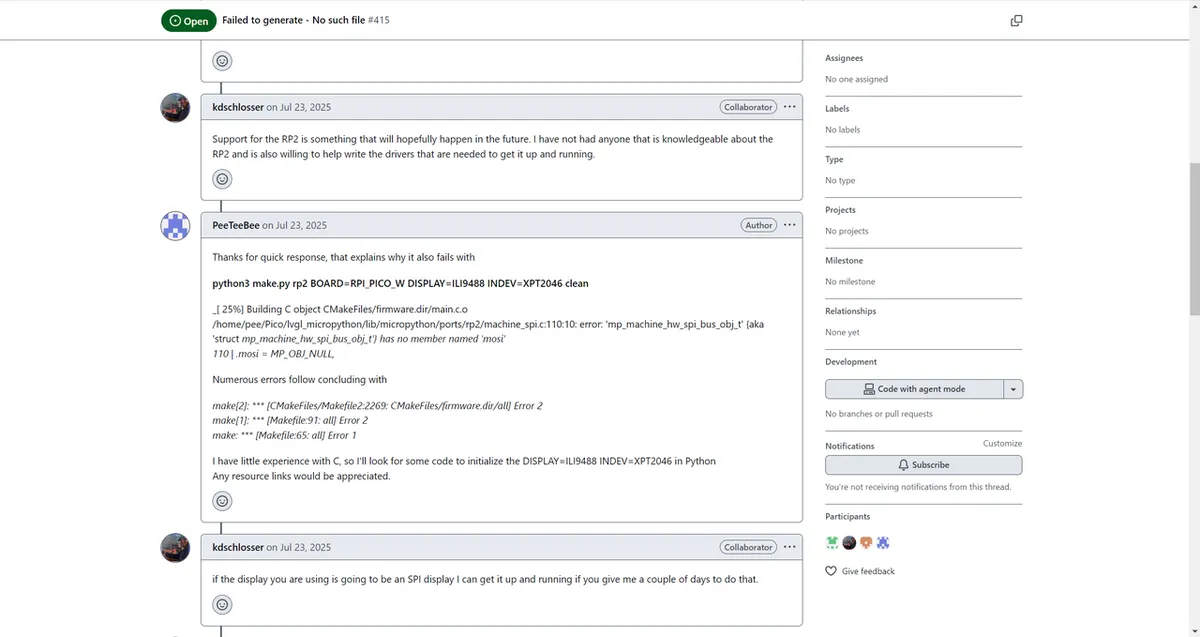
Some developers have created the rp2-fix branch in their own forks, which has already made the RP2 version of the SPI screen run (address: https://github.com/hemonu/lvgl_micropython/tree/rp2-fix ).
2.3.3.2.4 Compile third-party developers' code
Code address: https://github.com/hemonu/lvgl_micropython/tree/rp2-fix
First, clone the repository:
git clone -b rp2-fix https://github.com/hemonu/lvgl_micropython.git lvgl_micropython_rp2fix
cd lvgl_micropython_rp2fix
python3 make.py rp2 BOARD=RPI_PICO2
If compilation fails due to network issues:
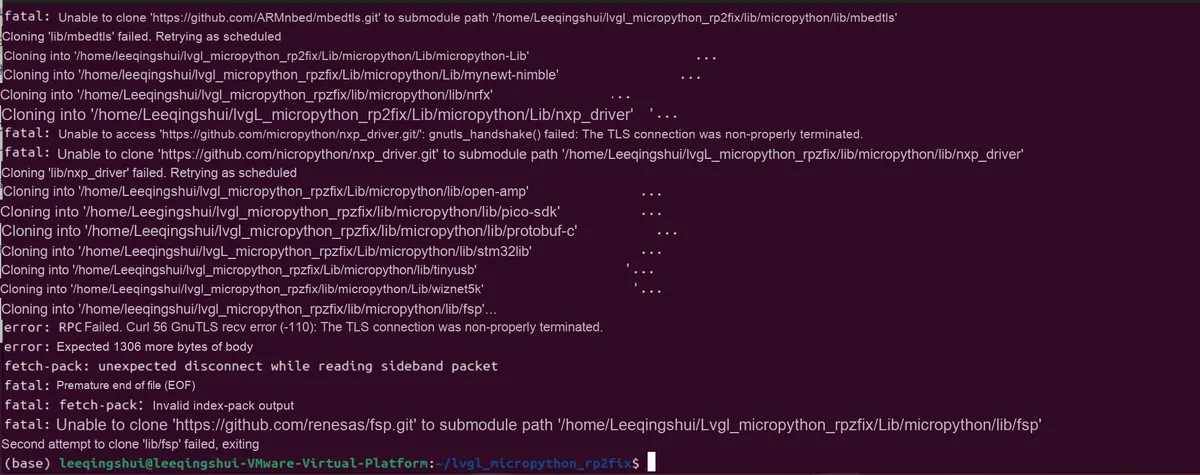
Use the following command to clean the old cache, then recompile:
# First go back to the parent directory
cd ..

# Completely delete the folder that failed to download (irreversible, run after confirming)
rm -rf lvgl_micropython_rp2fix

git clone -b rp2-fix https://github.com/hemonu/lvgl_micropython.git lvgl_micropython_rp2fix
Turn off Git's SSL verification:
cd lvgl_micropython_rp2fix
git config --global http.sslVerify false
git config --global http.postBuffer 524288000
Execute the compile command:
cd lvgl_micropython_rp2fix
python3 make.py rp2 BOARD=RPI_PICO2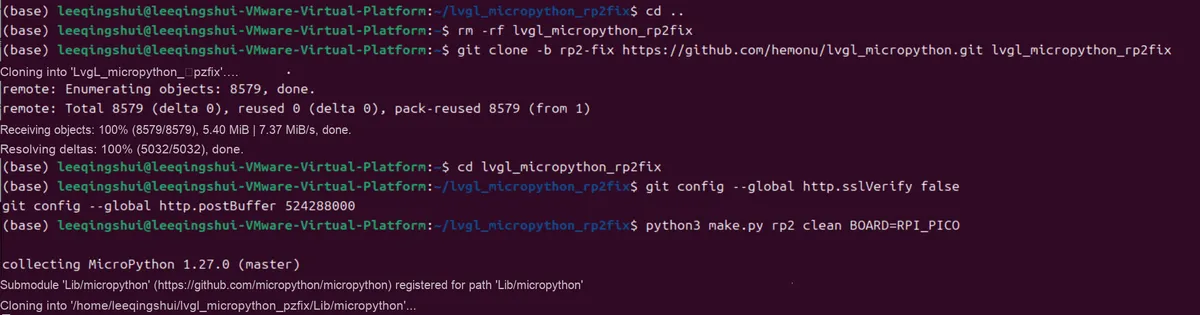
We need to go to the lvgl_micropython_rp2fix/gen directory to copy the python_api_gen_mpy.py file and rename it to
_api_gen_mpy.py file:

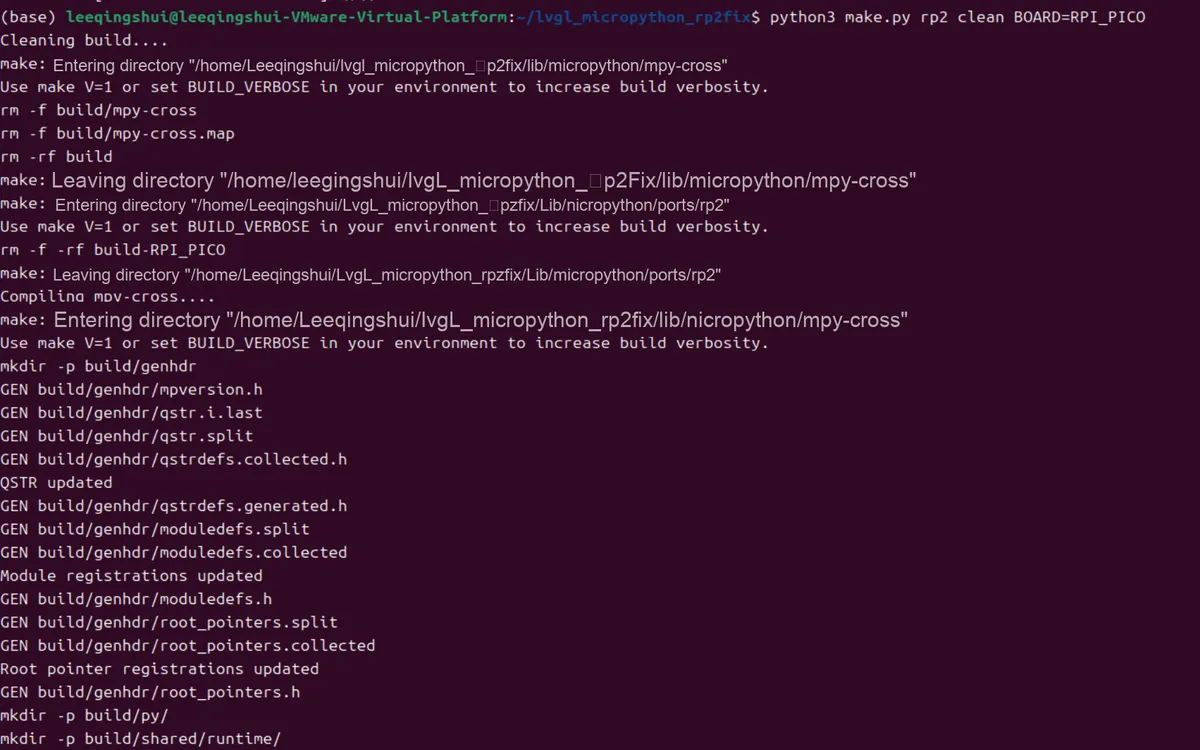
When the following output appears, it indicates that there is no problem:

We can see that the firmware file is now in the following directory:

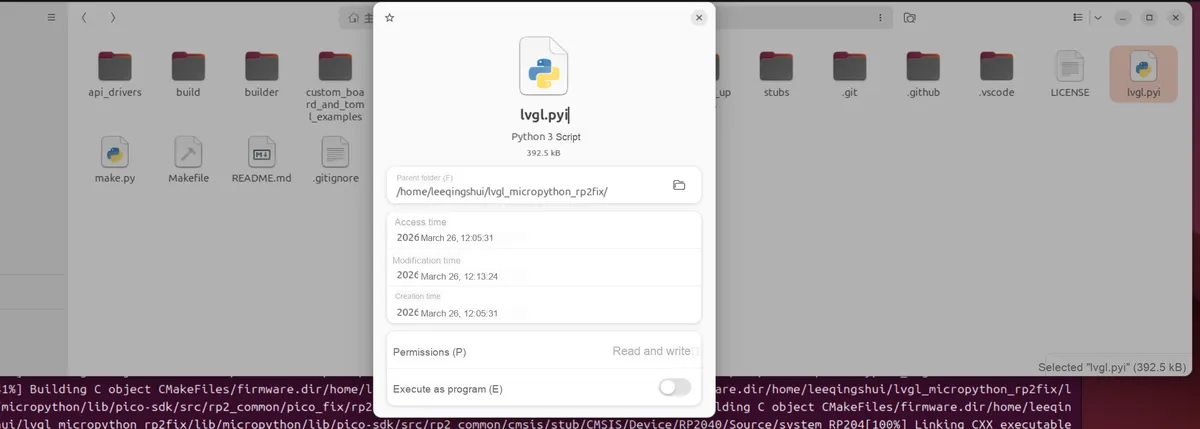
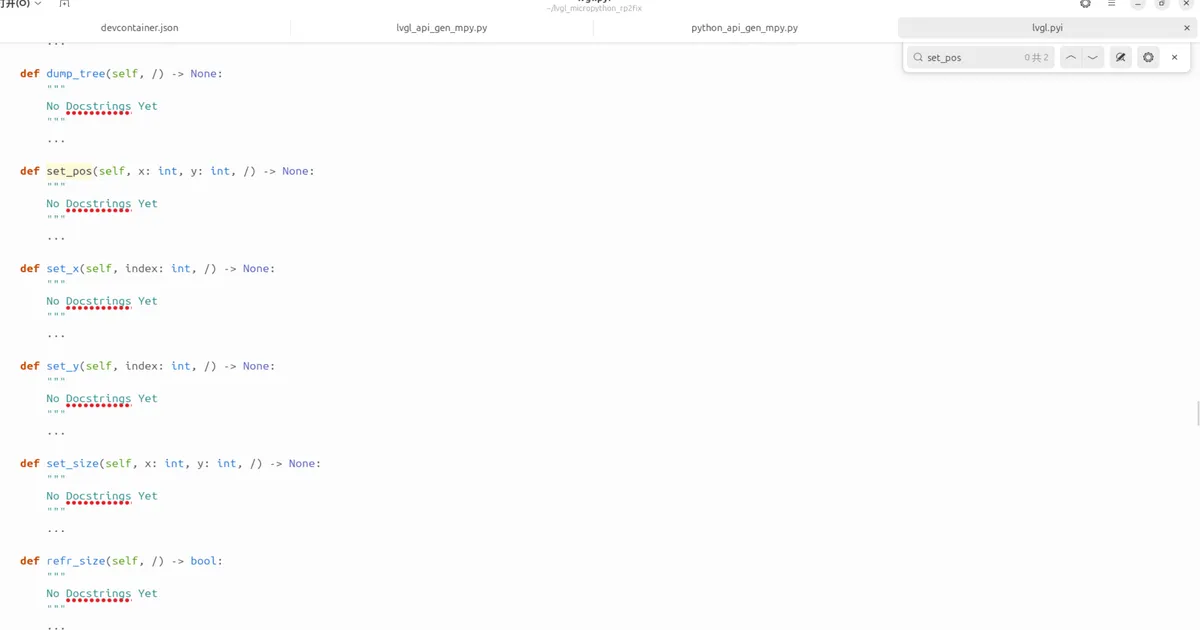
Meanwhile, the LVGL API class names, method names, parameters, and return values we need are all in the type hint file (lvgl.pyi) automatically generated by the project:
2.3.3.3 Compile the firmware for the ST7789 screen and GT911 touch chip
We are using code from third-party developers here.
Code address: https://github.com/hemonu/lvgl_micropython/tree/rp2-fix
First Compile:
python3 make.py rp2 BOARD=RPI_PICO2 DISPLAY=st7789 INDEV=gt911Recompile:
python3 make.py rp2 clean BOARD=RPI_PICO2 DISPLAY=st7789 INDEV=gt911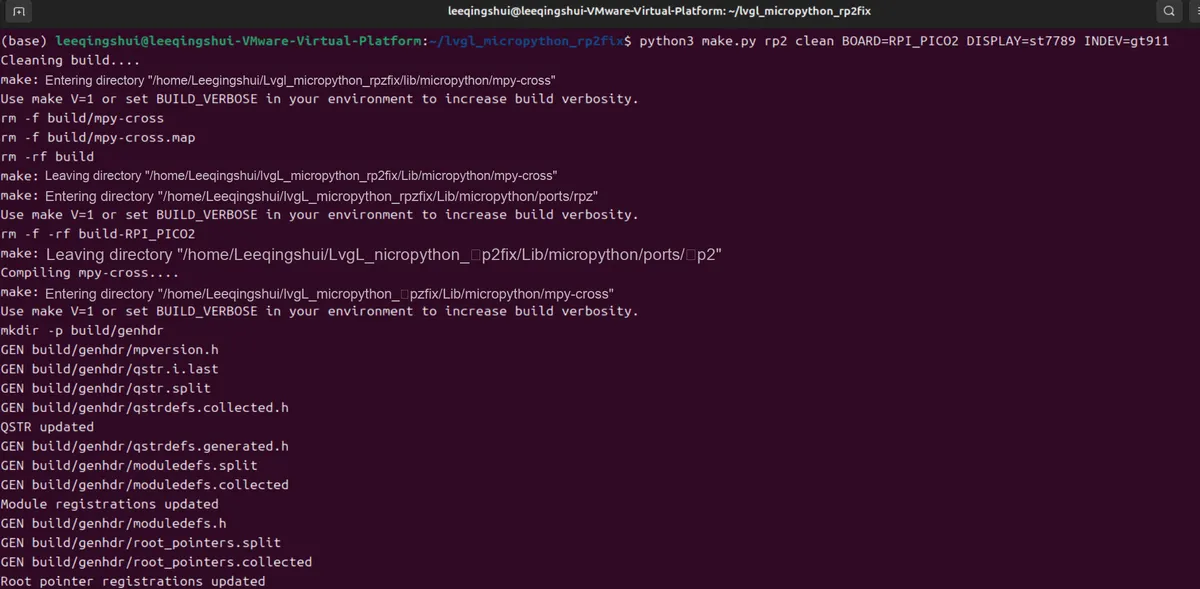
Compilation is successful if the output is as follows:
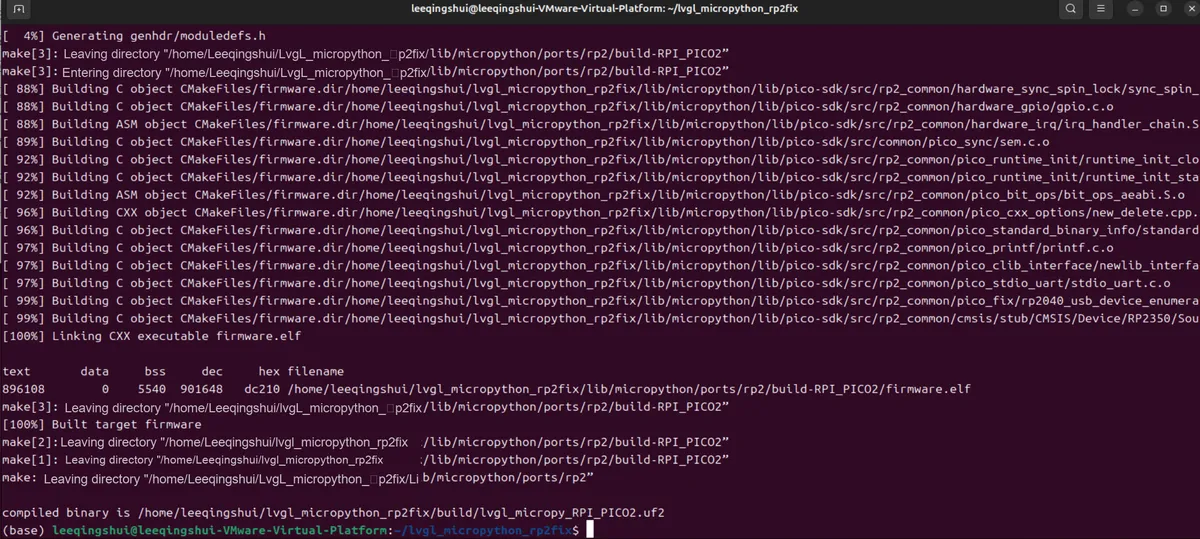
Under the build folder, we can see the compiled firmware:
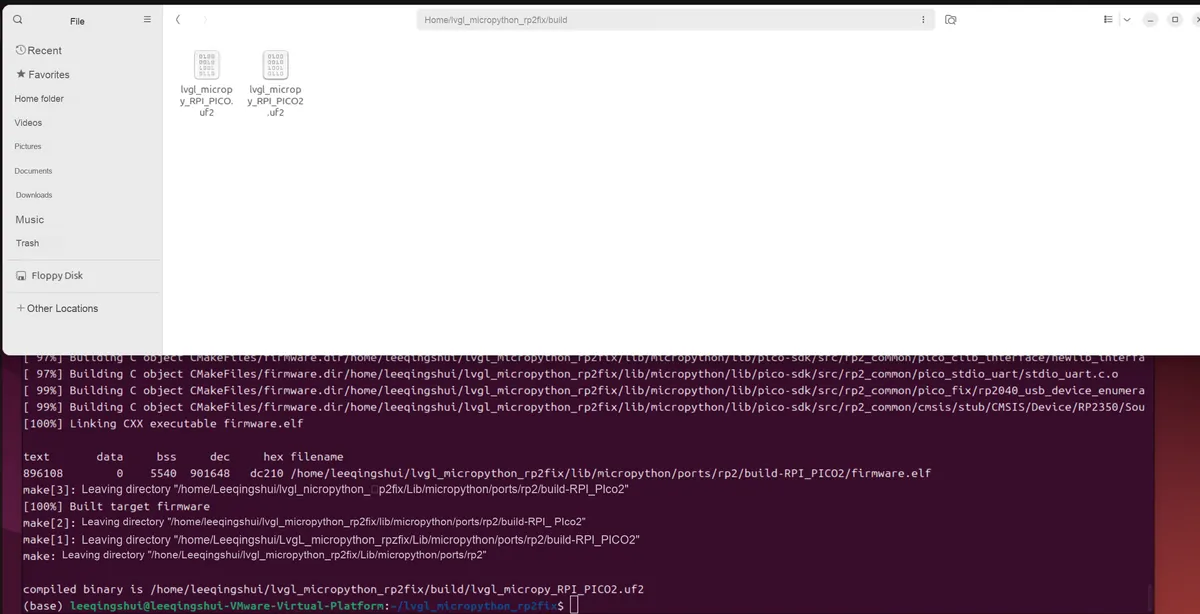
We can transfer it to the host computer via Secure Copy:
scp leeqingshui@192.168.17.130:/home/leeqingshui/lvgl_micropython_rp2fix/build/lvgl_micropy_RPI_PICO2.uf2 F:\ubuntu-vm\share\
2.4 Burn the firmware and test
2.4.1 ESP32S3 Development Board
2.4.1.1 Burn-in Test of the Simplest Compiled Firmware
Open the terminal and execute the following commands in sequence:
# 1. Upgrade Pip to the latest version
python3 -m pip install --upgrade pip

# 2. Configure the Aliyun mirror for Pip (permanent, makes later tool installs faster)
mkdir -p ~/.pip
cat > ~/.pip/pip.conf << EOF
[global]
index-url = https://mirrors.aliyun.com/pypi/simple/
[install]
trusted-host = mirrors.aliyun.com
EOF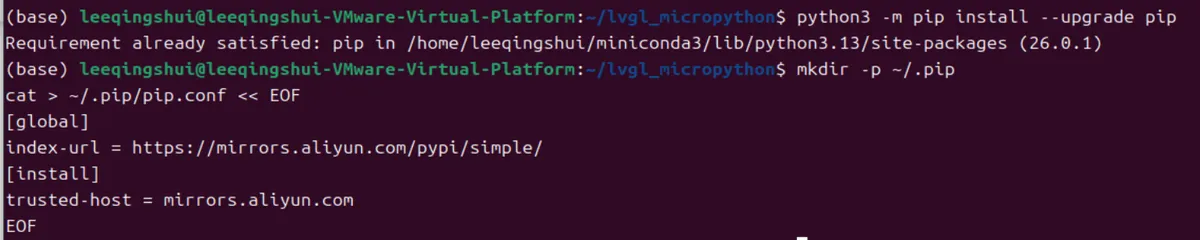
Create and activate a Python virtual environment:
# 1. Create a virtual environment (named mp_env, isolates the environment to avoid conflicts)
python3 -m venv mp_env

# 2. Activate the virtual environment (the terminal prompt will start with `(mp_env)` afterward)
source mp_env/bin/activate
Execute in the activated virtual environment:
pip install esptool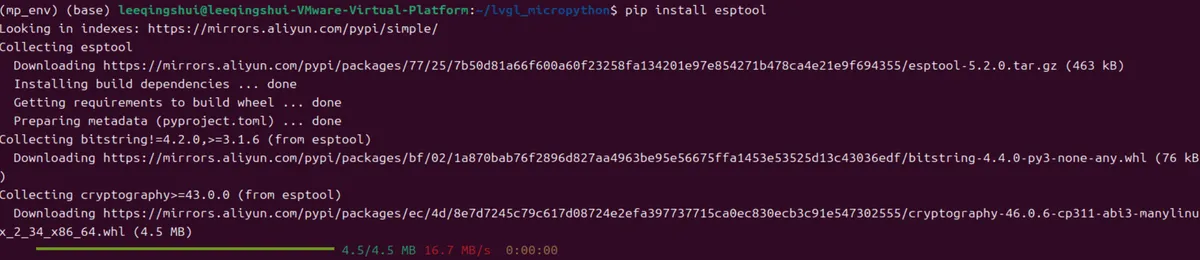
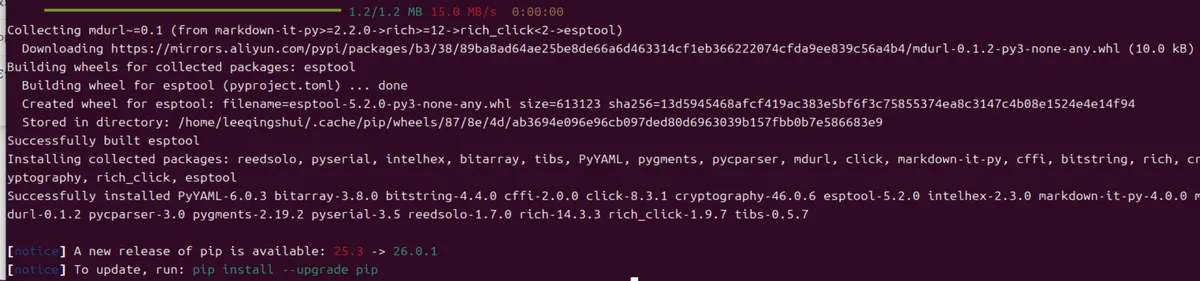
Connect the ESP32-S3 development board to the computer using a USB cable (press and hold the BOOT button while powering on), then execute the following command to check the USB device and serial port device:
lsusb
ls /dev/ttyACM*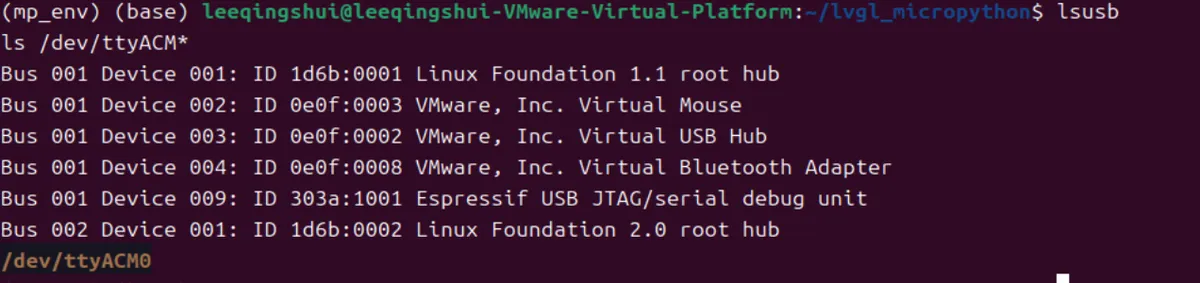
Grant serial port permissions (to avoid the prompt "Insufficient permissions" during programming):
# 1. Add the current user to the dialout group (serial port permission group)
sudo usermod -aG dialout $USER

# 2. Apply the permission temporarily (no need to log out/restart the computer)
newgrp dialout
Execute a command to test communication and verify the ESP32 connection (read the chip ID):
esptool --port /dev/ttyACM0 --chip esp32s3 chip-id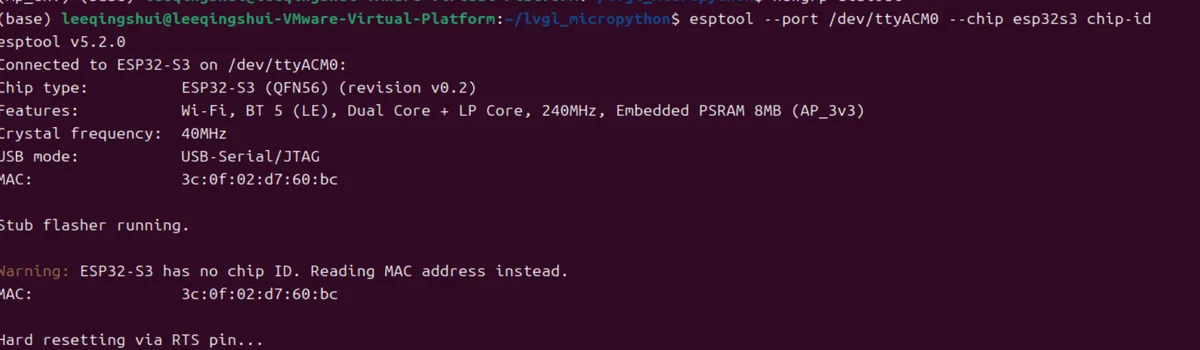
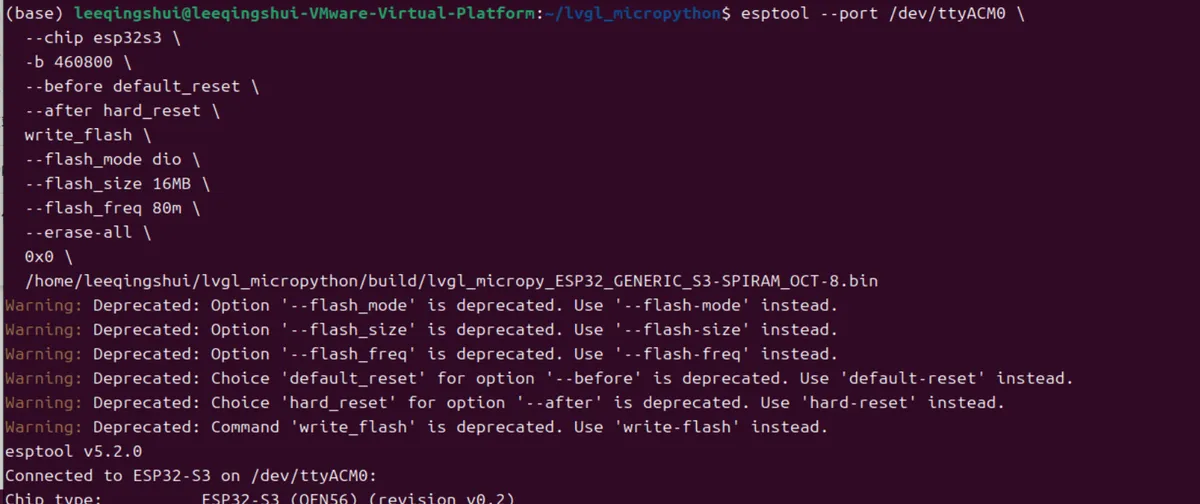
Replace the firmware path in the following command with your own .bin file path, then execute:
esptool --port /dev/ttyACM0 \
  --chip esp32s3 \
  -b 460800 \
  --before default_reset \
  --after hard_reset \
  write_flash \
  --flash_mode dio \
  --flash_size 16MB \
  --flash_freq 80m \
  --erase-all \
  0x0 \
  /home/leeqingshui/lvgl_micropython/build/lvgl_micropy_ESP32_GENERIC_S3-SPIRAM_OCT-8.bin
Note:
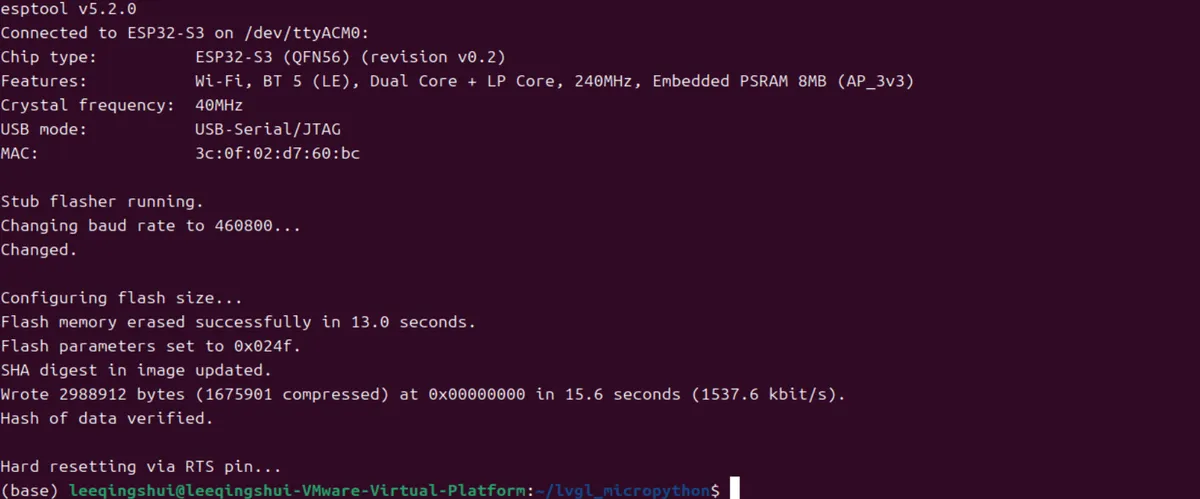
--erase-all: Recommended to add when performing a full burn, which will completely erase the Flash before writing- After the programming is completed, press the RESET button on the development board to restart, and the firmware will run!
When the following output appears, press the RST button to restart:
Next, we need to install the mpremote tool, connect to the development board, enter the MicroPython REPL interactive mode, and verify whether the firmware is running properly:
pip install mpremote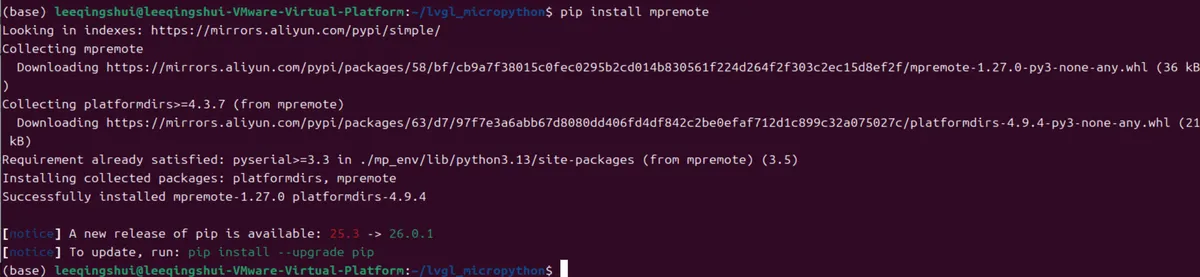
Execute the command to list all serial ports:
mpremote connect list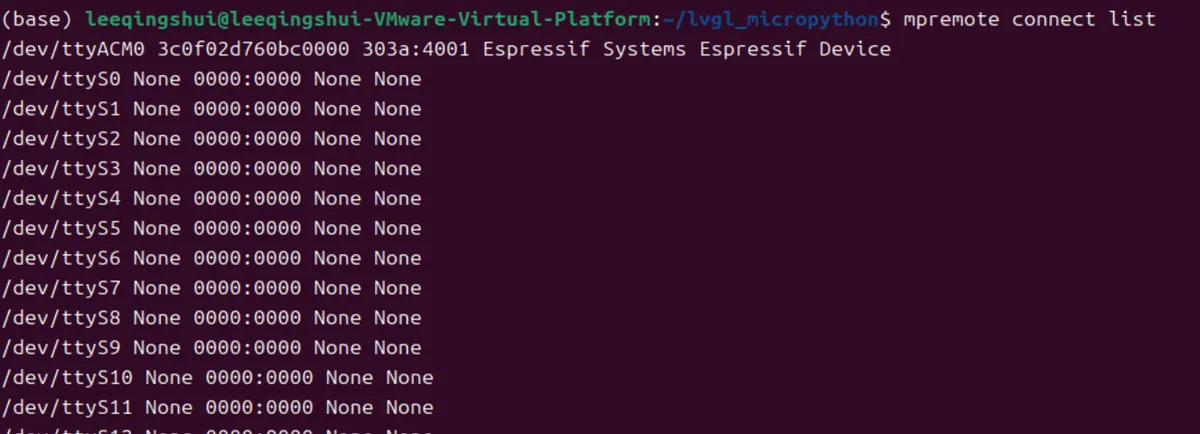
Execute the command (replace with your serial port):
mpremote connect /dev/ttyACM0
The terminal displays >>> prompt, indicating MicroPython is running normally and the firmware has been successfully flashed!
Then we execute the following two commands for verification:
import lvgl
dir(lv)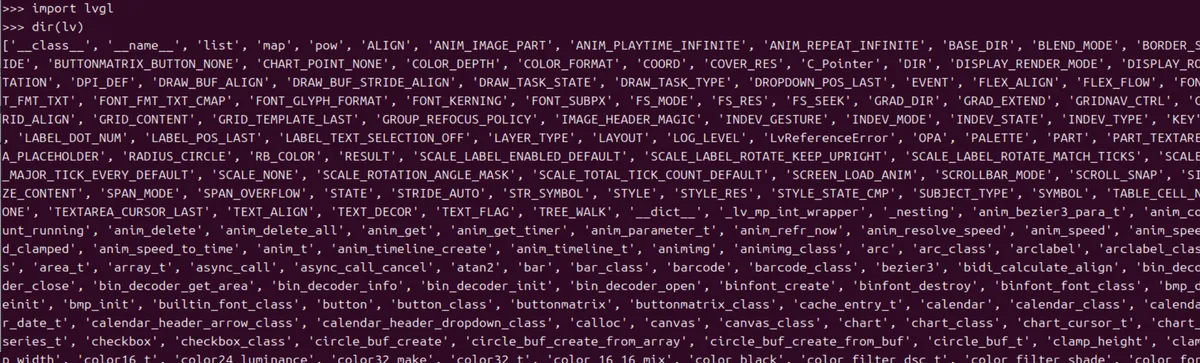
Execute only the import part in the REPL; if no error occurs, it indicates success:
import lcd_bus
import lvgl as lv
import st7789
import gt911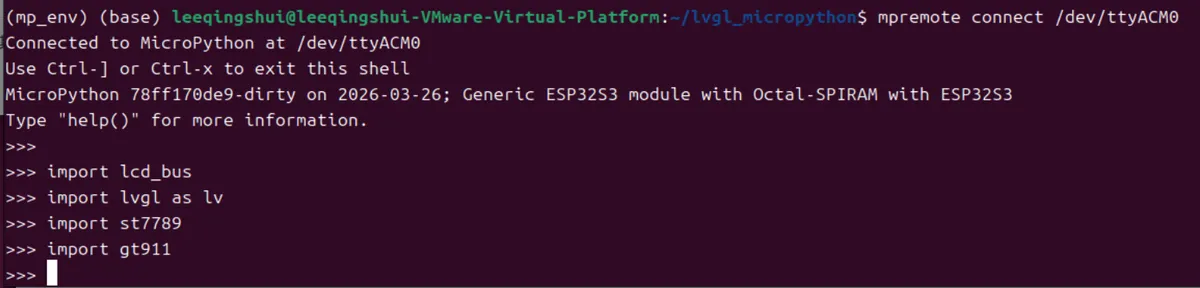
2.4.1.2 Weixue ESP32S3 2-inch Touch LCD Screen Development Board
Open the terminal and execute the following commands in sequence:
# 1. Upgrade Pip to the latest version
python3 -m pip install --upgrade pip

# 2. Configure the Aliyun mirror for Pip (permanent, makes later tool installs faster)
mkdir -p ~/.pip
cat > ~/.pip/pip.conf << EOF
[global]
index-url = https://mirrors.aliyun.com/pypi/simple/
[install]
trusted-host = mirrors.aliyun.com
EOF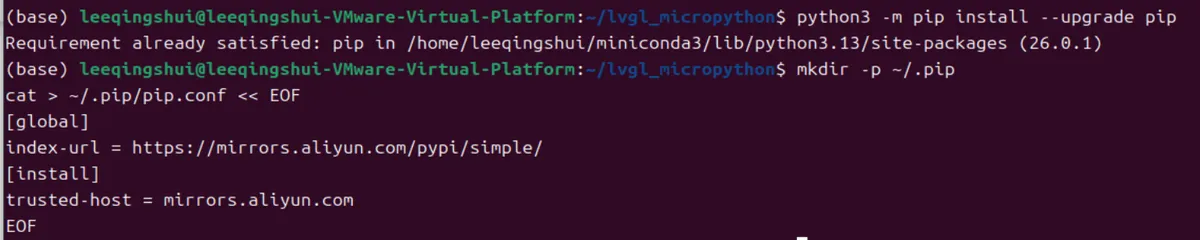
Create and activate a Python virtual environment:
# 1. Create a virtual environment (named mp_env, isolates the environment to avoid conflicts)
python3 -m venv mp_env

# 2. Activate the virtual environment (the terminal prompt will start with `(mp_env)` afterward)
source mp_env/bin/activate
Execute in the activated virtual environment:
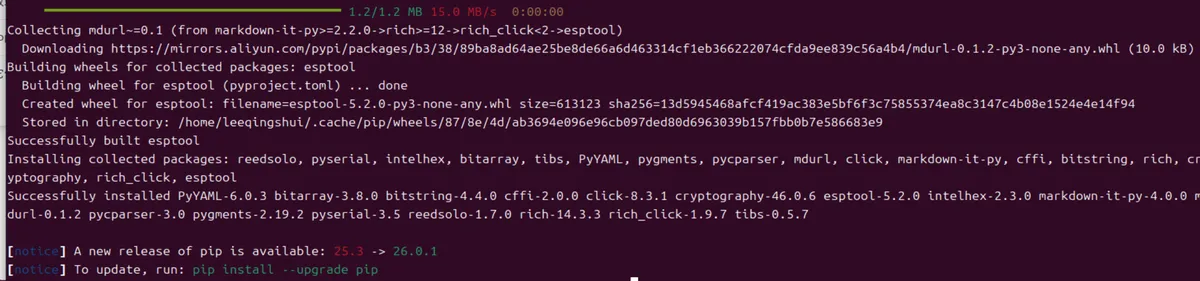
pip install esptool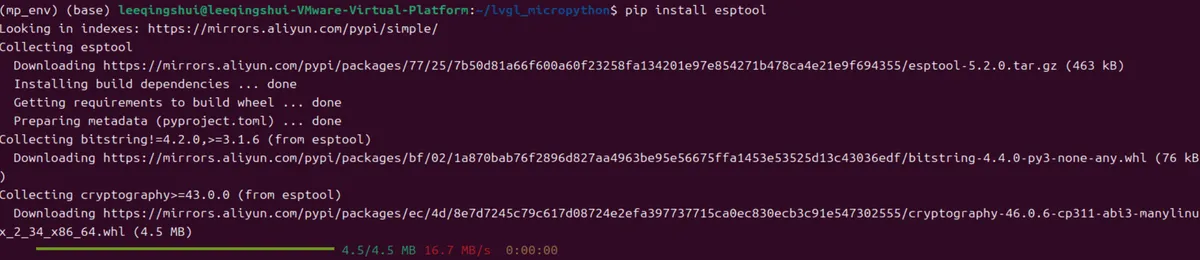
Connect the ESP32-S3 development board to your computer using a USB cable (press the BOOT button and then power on), and execute the following command to check the USB device and serial port device:
lsusb
ls /dev/ttyACM*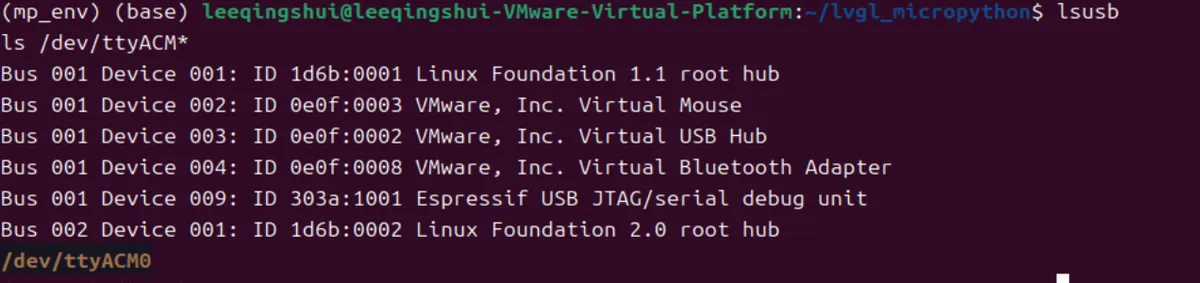
Grant serial port permissions (to avoid the prompt "Insufficient permissions" during programming):
# 1. Add the current user to the dialout group (serial port permission group)
sudo usermod -aG dialout $USER

# 2. Apply the permission temporarily (no need to log out/restart the computer)
newgrp dialout
Execute a command to test communication to verify the ESP32 connection (read the chip ID):
esptool --port /dev/ttyACM0 --chip esp32s3 chip-id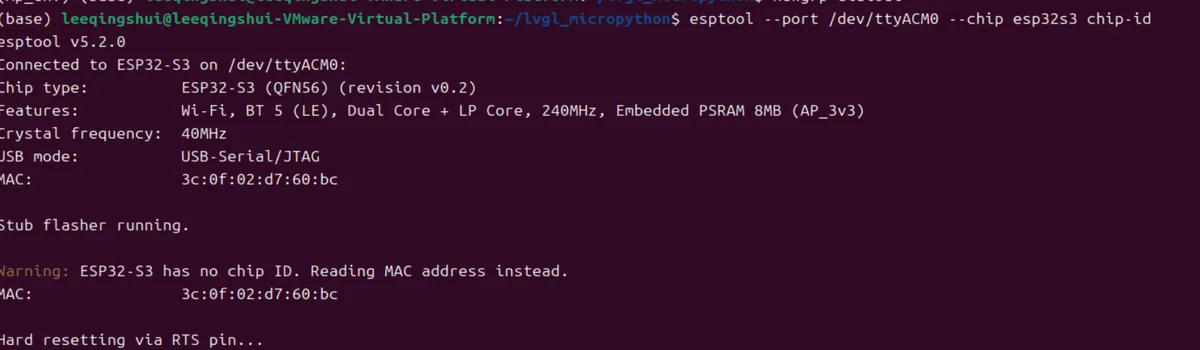
Replace the firmware path in the following command with your own .bin file path, then execute:
esptool --port /dev/ttyACM0 \
  --chip esp32s3 \
  -b 460800 \
  --before default_reset \
  --after hard_reset \
  write_flash \
  --flash_mode dio \
  --flash_size 16MB \
  --flash_freq 80m \
  --erase-all \
  0x0 \
  /home/leeqingshui/lvgl_micropython/build/lvgl_micropy_ESP32_GENERIC_S3-SPIRAM_OCT-16.bin
Note:
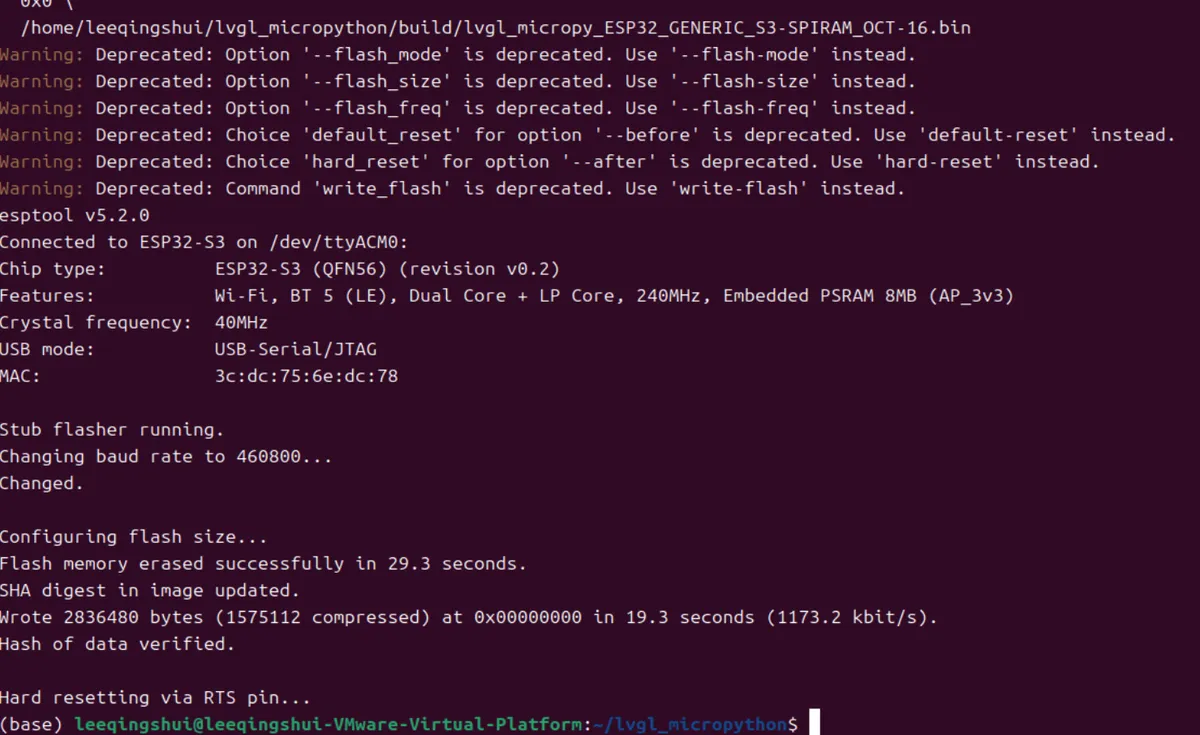
--erase-all: Recommended to add during a fresh burn, which will completely erase the Flash before writing- After the programming is completed, press the RESET button on the development board to restart, and the firmware will start running!
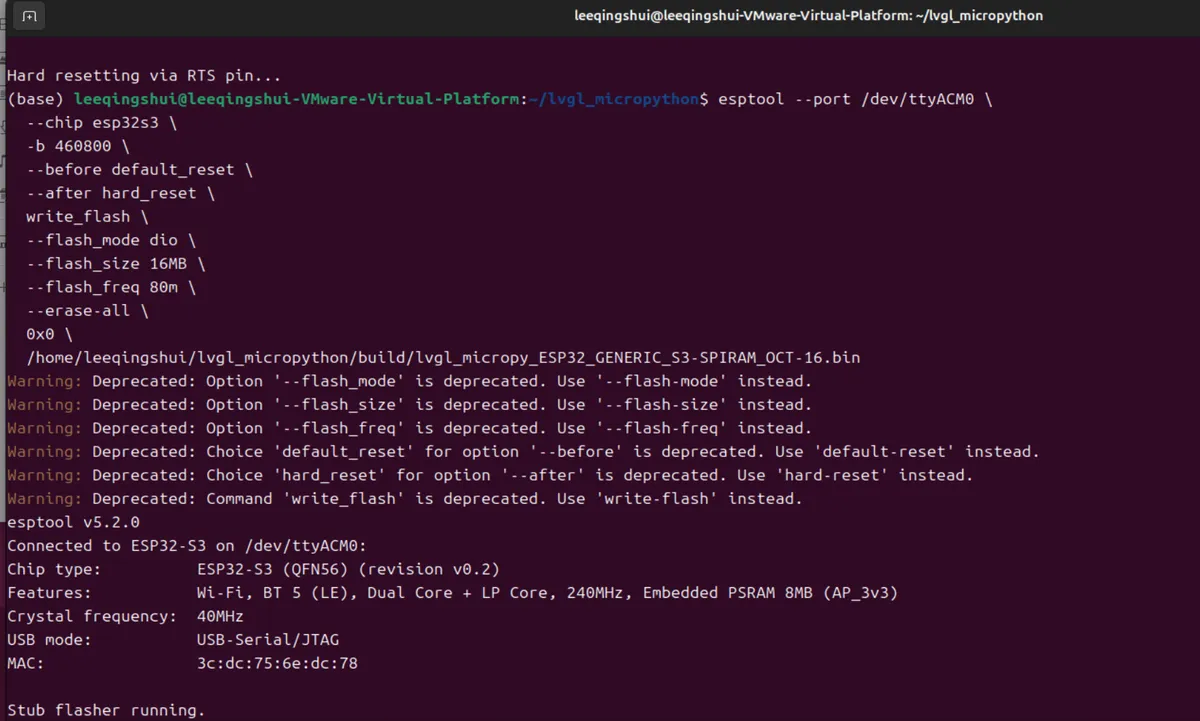
When the following output appears, press the RST button to restart:
Next, we need to install the mpremote tool, connect to the development board, enter the MicroPython REPL interactive mode, and verify whether the firmware is running properly:
pip install mpremote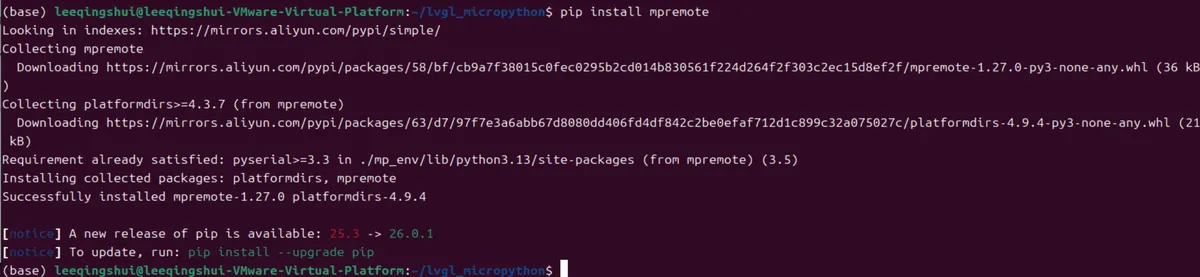
Execute the command to list all serial ports:
mpremote connect list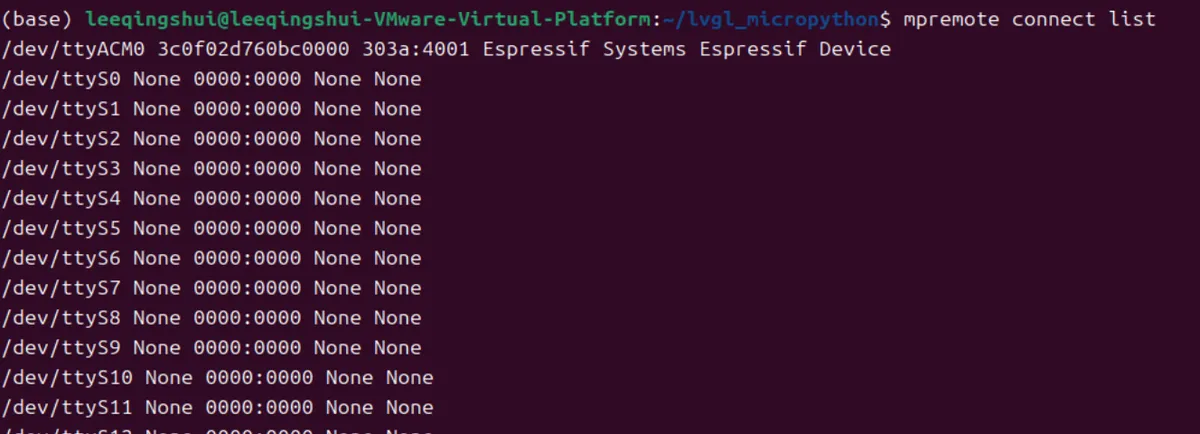
Execute the command (replace with your serial port):
mpremote connect /dev/ttyACM0
The terminal displays >>> prompt, indicating MicroPython is running normally and the firmware has been successfully flashed!
Then we execute the following two commands for verification:
import lvgl
dir(lv)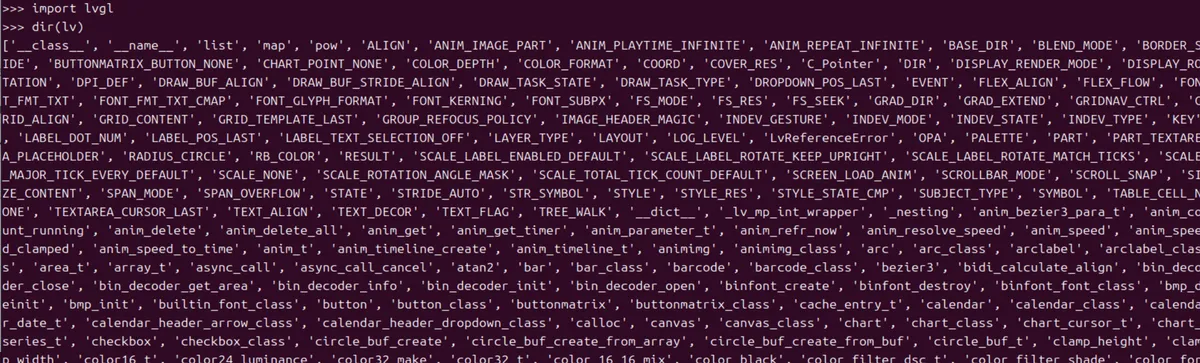
Execute only the import part in the REPL; if there are no errors, it indicates success:
import lcd_bus
import lvgl as lv
import st7789
import cst816s 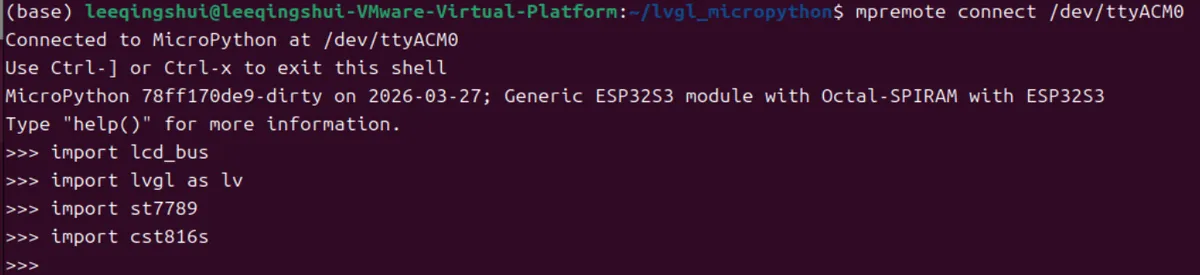
Next, flash the following main.py file into the development board and run it:
import lcd_bus
import lvgl as lv
import st7789
import cst816s
import time
import machine
import i2c
from micropython import const
import task_handler

# SPI screen parameters
SPI_BUS = 2
SPI_FREQ = 40000000
LCD_SCLK = 39
LCD_MOSI = 38
LCD_MISO = 40
LCD_DC = 42
LCD_CS = 45
LCD_BL = 1

# I2C touch parameters
I2C_BUS = 0
I2C_FREQ = 400000
TP_SDA = 48
TP_SCL = 47
TP_ADDR = 0x15
TP_REGBITS = 8

# Screen resolution
TFT_HOR_RES = 320
TFT_VER_RES = 240

# Frame buffer size (fixes the REPL variable error)
BUFFER_SIZE = const(28800)

# ====================== Initialize screen hardware ======================
# Initialize the SPI bus
spi_bus = machine.SPI.Bus(host=SPI_BUS, mosi=LCD_MOSI, miso=LCD_MISO, sck=LCD_SCLK)

# Initialize the display bus
display_bus = lcd_bus.SPIBus(
    spi_bus=spi_bus,
    freq=SPI_FREQ,
    dc=LCD_DC,
    cs=LCD_CS,
)

# Allocate double frame buffers
fb1 = display_bus.allocate_framebuffer(BUFFER_SIZE, lcd_bus.MEMORY_INTERNAL | lcd_bus.MEMORY_DMA)
fb2 = display_bus.allocate_framebuffer(BUFFER_SIZE, lcd_bus.MEMORY_INTERNAL | lcd_bus.MEMORY_DMA)

# Initialize the ST7789 display
main_display = st7789.ST7789(
    data_bus=display_bus,
    frame_buffer1=fb1,
    frame_buffer2=fb2,
    display_width=TFT_VER_RES,
    display_height=TFT_HOR_RES,
    color_space=lv.COLOR_FORMAT.RGB565,
    color_byte_order=st7789.BYTE_ORDER_BGR,
    rgb565_byte_swap=True,
    backlight_pin=LCD_BL,
    backlight_on_state=st7789.STATE_PWM,
)
main_display.init()
main_display.set_power(True)
main_display.set_backlight(100)  # Turn on the backlight (100% brightness)

# ====================== Initialize touch ======================
i2c_bus = i2c.I2C.Bus(host=I2C_BUS, scl=TP_SCL, sda=TP_SDA, freq=I2C_FREQ, use_locks=False)
touch_dev = i2c.I2C.Device(bus=i2c_bus, dev_id=TP_ADDR, reg_bits=TP_REGBITS)
indev = cst816s.CST816S(touch_dev, startup_rotation=lv.DISPLAY_ROTATION._180)

# [Order fix] After touch initialization is done, set the screen rotation last (officially required)
main_display.set_rotation(lv.DISPLAY_ROTATION._90)  # Rotate 90 degrees

# ====================== LVGL UI (Label displays correctly) ======================

# Get the current screen and set a white background
scrn = lv.screen_active()
scrn.set_style_bg_color(lv.color_hex(0xFFFFFF), 0)

# Create the Label
label = lv.label(scrn)
label.set_text("FreakStudio")
label.set_style_text_color(lv.color_black(), 0)
label.set_pos(20, 20)

# Create the slider
slider = lv.slider(scrn)
# Set the slider size (width 300, height 25)
slider.set_size(300, 25)
# Center the slider
slider.center()

th = task_handler.TaskHandler(duration=5)
Here, there are a few points to note!
- ❌ Screen rotation cannot be set in advance:
set_rotation()must be called after display + touch initialization is completed, otherwise coordinates will be disordered, resulting in freezing and laggy performance; - ❌ Manual call of lv.init() is prohibited:
st7789.ST7789()will automatically initialize LVGL, and manual call will cause conflicts; - ❌ Initializing the screen before frame buffer allocation is prohibited: The frame buffer must be created before screen initialization; otherwise, there will be no buffer
Usethonnyfor programming:
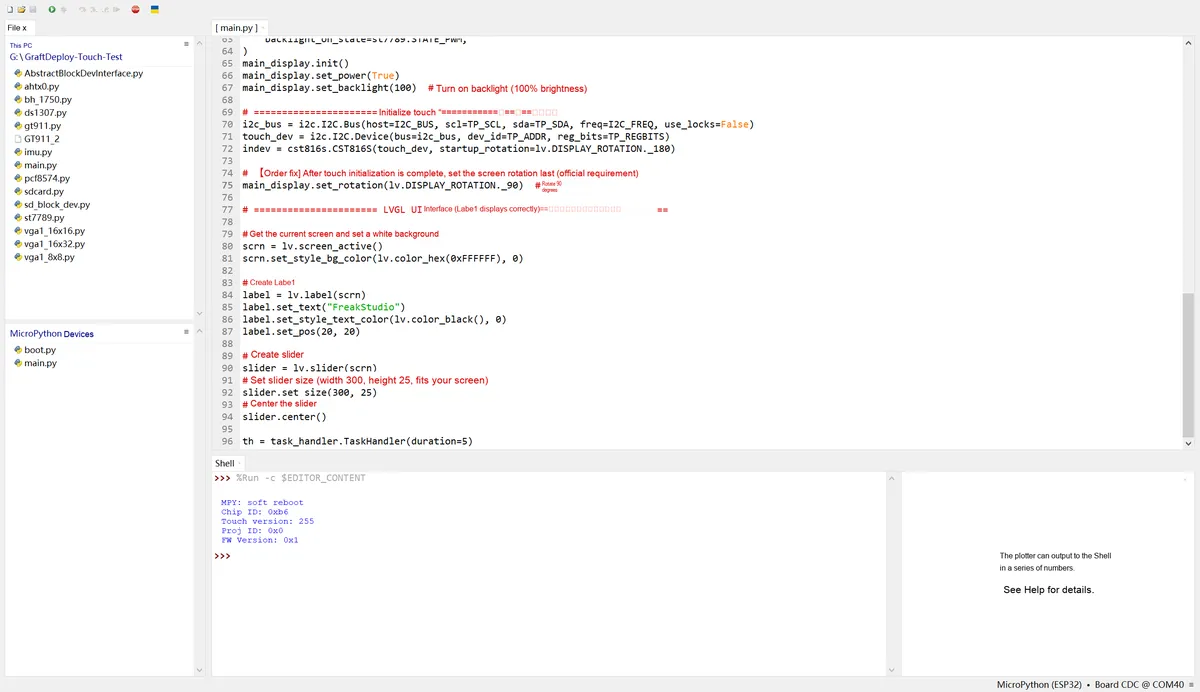
Shows as follows:
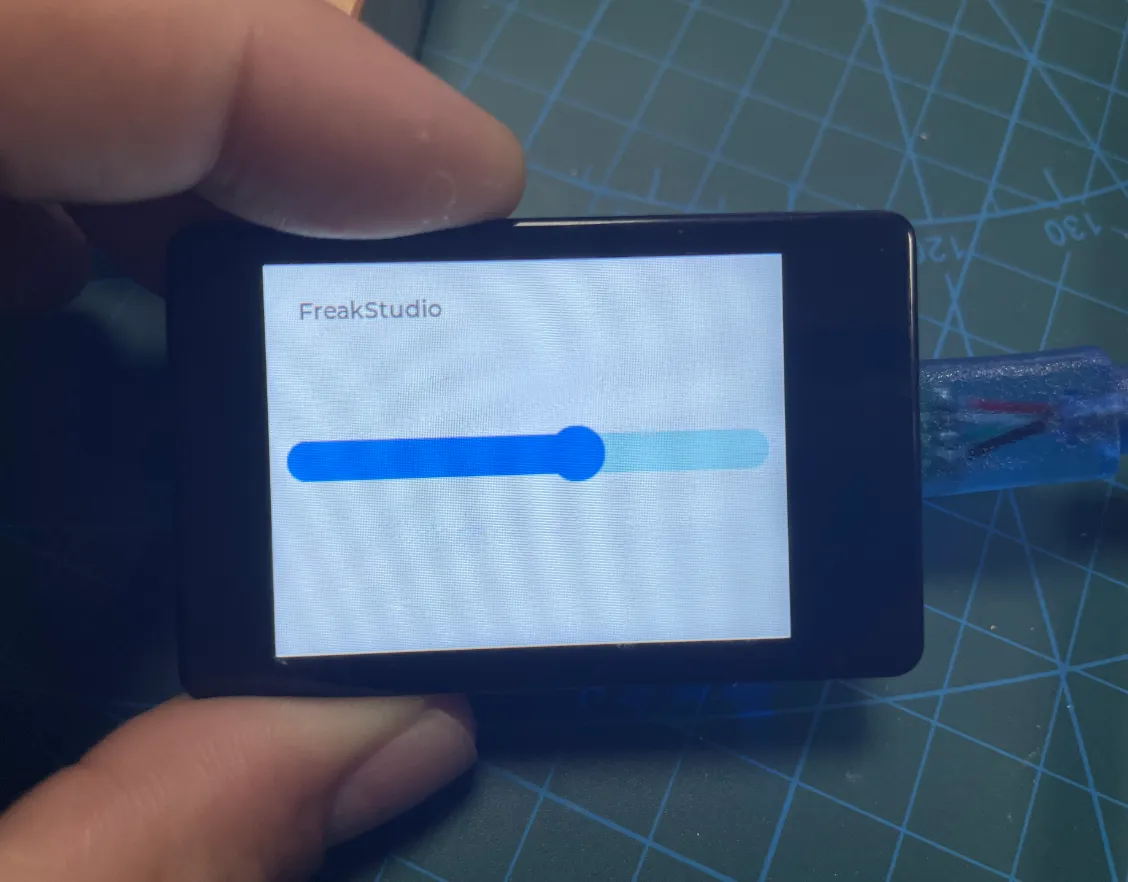
2.4.2 Raspberry Pi Pico 2 Development Board
Press and hold the BOOT button on Raspberry Pi Pico 2, then power it on, and drag the compiled firmware into the virtual USB drive.
2.4.2.1 ST7789V Screen + GT911 Touch Chip
Use Thonny to burn the following code:
from micropython import const
import machine
import lcd_bus
import lvgl as lv
import st7789
import time
import task_handler
import i2c
import gt911

# Screen-related configuration
WIDTH = const(240)
HEIGHT = const(320)
LCD_CS    = const(10)
LCD_DC    = const(9)
LCD_RST   = const(8)
LCD_BL    = const(11)
LCD_SCK   = const(6)
LCD_MOSI  = const(7)
LCD_FREQ  = const(40_000_000)

# GT911 touch parameters
I2C_HOST   = const(0)
TP_RST    = const(14)
TP_INT    = const(15)
TP_SCL    = const(13)
TP_SDA    = const(12)
TP_FREQ   = const(100_000)
TP_ADDR    = 0x5D
TP_REGBITS = 16

# ====================== Initialize screen hardware ======================

# Initialize SPI and the display bus
spi_bus = machine.SPI(0, baudrate=LCD_FREQ, sck=LCD_SCK, mosi=LCD_MOSI)
display_bus = lcd_bus.SPIBus(spi_bus=spi_bus, freq=LCD_FREQ, dc=LCD_DC, cs=LCD_CS)

# Allocate double frame buffers
fb_size = WIDTH * HEIGHT * 2 // 5
fb1 = display_bus.allocate_framebuffer(fb_size, lcd_bus.MEMORY_INTERNAL | lcd_bus.MEMORY_DMA)
fb2 = display_bus.allocate_framebuffer(fb_size, lcd_bus.MEMORY_INTERNAL | lcd_bus.MEMORY_DMA)

# Initialize the ST7789 display
display = st7789.ST7789(
    data_bus=display_bus,
    display_width=WIDTH,
    display_height=HEIGHT,
    frame_buffer1=fb1,
    frame_buffer2=fb2,
    backlight_pin=machine.Pin(LCD_BL),
    backlight_on_state=st7789.STATE_PWM,
    reset_pin=machine.Pin(LCD_RST),
    reset_state=st7789.STATE_LOW,
    offset_x=0,
    offset_y=0,
    color_space=lv.COLOR_FORMAT.RGB565,
    color_byte_order=st7789.BYTE_ORDER_RGB,
    rgb565_byte_swap=True
)

display.init()
display.set_power(True)
display.set_backlight(100)
# Turn on the backlight (100% brightness)

# ====================== Initialize touch ======================

# Initialize I2C bus
i2c_bus = i2c.I2C.Bus(host=I2C_HOST, scl=TP_SCL, sda=TP_SDA, freq=TP_FREQ, use_locks=False)
touch_dev = i2c.I2C.Device(bus=i2c_bus, dev_id=TP_ADDR, reg_bits=TP_REGBITS)
touch = gt911.GT911(device=touch_dev, reset_pin=TP_RST, interrupt_pin=TP_INT, startup_rotation=lv.DISPLAY_ROTATION._180, debug=True)

# [Order fix] After touch initialization is done, set the screen rotation last (officially required)
display.set_rotation(lv.DISPLAY_ROTATION._180)

# ====================== LVGL UI (Label displays correctly) ======================

task_handler.TaskHandler(duration=5)

# Test with a white background (easier to observe)
scrn = lv.screen_active()
scrn.set_style_bg_color(lv.color_hex(0x000000), 0)

# Create the slider widget and center it
slider = lv.slider(scrn)
slider.set_size(100, 10)
slider.center()

# Create the Label widget
label = lv.label(scrn)
label.set_text('HELLO WORLD!')
label.align(lv.ALIGN.CENTER, 0, -60)
The running results are as follows:
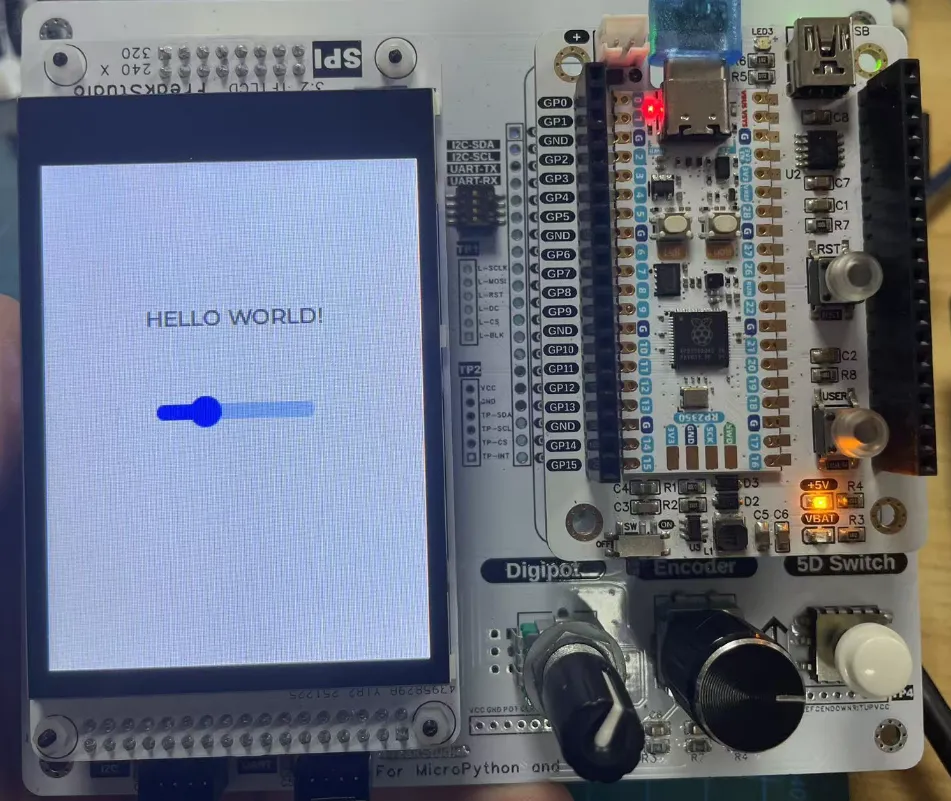
It should be noted that when using Raspberry Pi Pico2 (RP2350) with MicroPython + LVGL + lcd_bus to drive the screen, a hard reset must be performed before each rerun of the code: The underlying hardware of the RP2350 chip on Pico2 (DMA, SPI bus, frame buffer memory, GPIO peripherals) will not be released and reset with program termination or soft reset. Residual hardware occupancy and state confusion will directly lead to memory allocation failure and abnormal screen initialization. Only a full-chip hard reset can restore a clean initial hardware state.
2.4.2.1 ST7789V screen without touch chip
If you only have an ST7789V screen without a touch chip on hand, you can use the following code for programming:
from micropython import const
import machine
import lcd_bus
import lvgl as lv
import st7789
import time
import task_handler

# Keep only the screen-related configuration
WIDTH = const(240)
HEIGHT = const(320)
LCD_CS    = const(10)
LCD_DC    = const(9)
LCD_RST   = const(8)
LCD_BL    = const(11)
LCD_SCK   = const(6)
LCD_MOSI  = const(7)
LCD_FREQ  = const(20_000_000)


# Initialize SPI
spi_bus = machine.SPI(0, baudrate=LCD_FREQ, sck=LCD_SCK, mosi=LCD_MOSI)
display_bus = lcd_bus.SPIBus(spi_bus=spi_bus, freq=LCD_FREQ, dc=LCD_DC, cs=LCD_CS)

# Initialize LVGL + screen
fb_size = WIDTH * HEIGHT * 2 // 5
fb1 = display_bus.allocate_framebuffer(fb_size, lcd_bus.MEMORY_INTERNAL | lcd_bus.MEMORY_DMA)
fb2 = display_bus.allocate_framebuffer(fb_size, lcd_bus.MEMORY_INTERNAL | lcd_bus.MEMORY_DMA)

display = st7789.ST7789(
    data_bus=display_bus,
    display_width=WIDTH,
    display_height=HEIGHT,
    frame_buffer1=fb1,
    frame_buffer2=fb2,
    backlight_pin=machine.Pin(LCD_BL),
    backlight_on_state=st7789.STATE_PWM,
    reset_pin=machine.Pin(LCD_RST),
    reset_state=st7789.STATE_LOW,
    offset_x=0,
    offset_y=0,
    color_space=lv.COLOR_FORMAT.RGB565,
    color_byte_order=st7789.BYTE_ORDER_RGB,
    rgb565_byte_swap=True
)


display.init()
display.set_power(True)
display.set_backlight(100)

task_handler.TaskHandler(duration=5)

# Test with a white background (easier to observe)
scrn = lv.screen_active()
scrn.set_style_bg_color(lv.color_hex(0x000000), 0)

# Create the slider widget and center it
slider = lv.slider(scrn)
slider.set_size(100, 10)
slider.center()

# Create the Label widget
label = lv.label(scrn)
label.set_text('HELLO WORLD!')
label.align(lv.ALIGN.CENTER, 0, -60)
The running results are as follows:
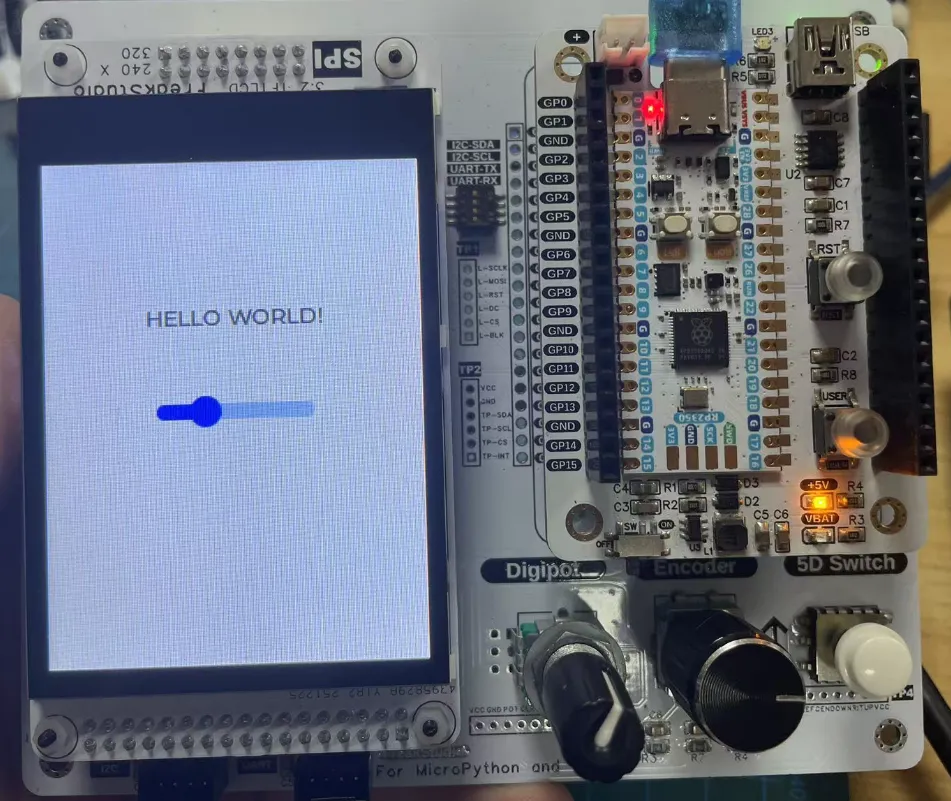
It should be noted that when using Raspberry Pi Pico2 (RP2350) with MicroPython + LVGL + lcd_bus to drive the screen, a hard reset must be performed before each re-run of the code: The underlying hardware of the RP2350 chip on Pico2 (DMA, SPI bus, frame buffer memory, GPIO peripherals) will not be released or reset with program termination or soft reset. Residual hardware occupancy and state confusion will directly lead to memory allocation failure and abnormal screen initialization. Only a full-chip hard reset can restore the clean initial state of the hardware.
Notes on the Update and Synchronization of Version 2.5
If you need to synchronize the latest remote code, do not use git pull , and you must execute:
# 1. Delete the old local repository (on Windows delete the folder directly; on Linux/macOS run this)
rm -rf lvgl_micropython

# 2. Clone the latest repository again
git clone https://github.com/lvgl-micropython/lvgl_micropython
cd lvgl_micropython

# 3. Rebuild
python3 make.py esp32
Version History
Version Number | Modified Personnel | Time | Content |
v1.0 | Li Zisheng | 2026/03/24 | Initialize the document. |
v1.0.1 | Li Zisheng | 2026/03/28 | Modify the title. |