
A terminal is useful while building a prototype, but a person trying the object should not need to read your laptop. A small screen can tell them that the device is ready, show the latest result or explain what to do next.
The need is visible in an Arduino forum question about adding an LCD to environmental sensing: getting a reading and presenting it clearly are separate steps. On our bench we started with the presentation path itself, before sensor values complicate it, using a 128 by 64 SSD1306-style OLED module, an RP2040 board on a GraftPort carrier, and BIPES blocks that generate MicroPython.
Establish the complete path to the screen
The display needs its driver library on the board before any drawing works. In BIPES, installing the library is a separate step from running the program, and a successful transfer log only proves the file arrived.
The working program initialized I2C0 with SDA on GPIO4 and SCL on GPIO5. An earlier template had placeholder pins; those were not the connection we used, and copying them is a common reason a screen stays dark. The program then created a 128 by 64 framebuffer and wrote "Hello world" at position (40, 40).
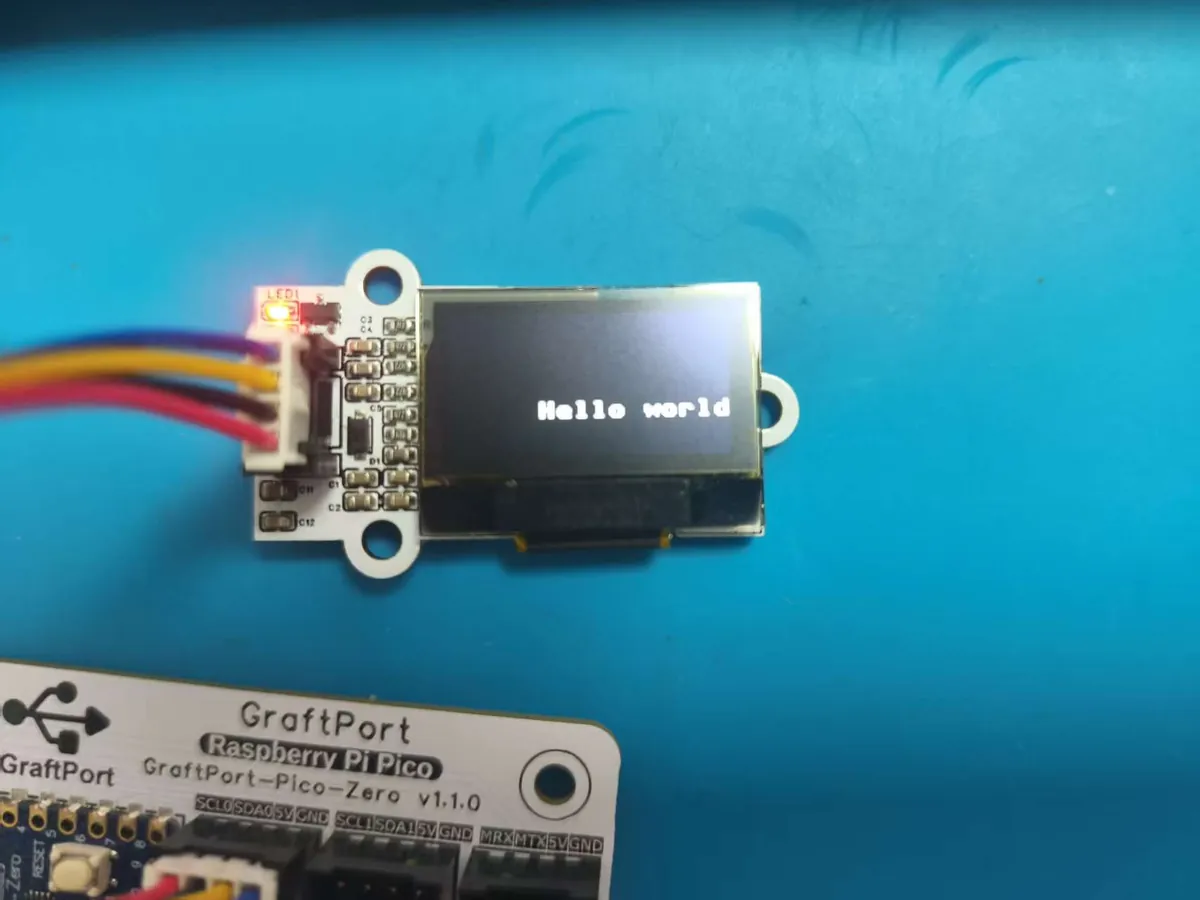
That photo completes the chain from library and program to visible output. Until the pixels appear, any of the three could be the problem.
Use the pixel space deliberately
A text position is an origin in the framebuffer, the block of memory that holds the next screen image. Our next program cleared the display, drew a 40 by 40 outline rectangle and a line to (40, 40), then updated the screen.
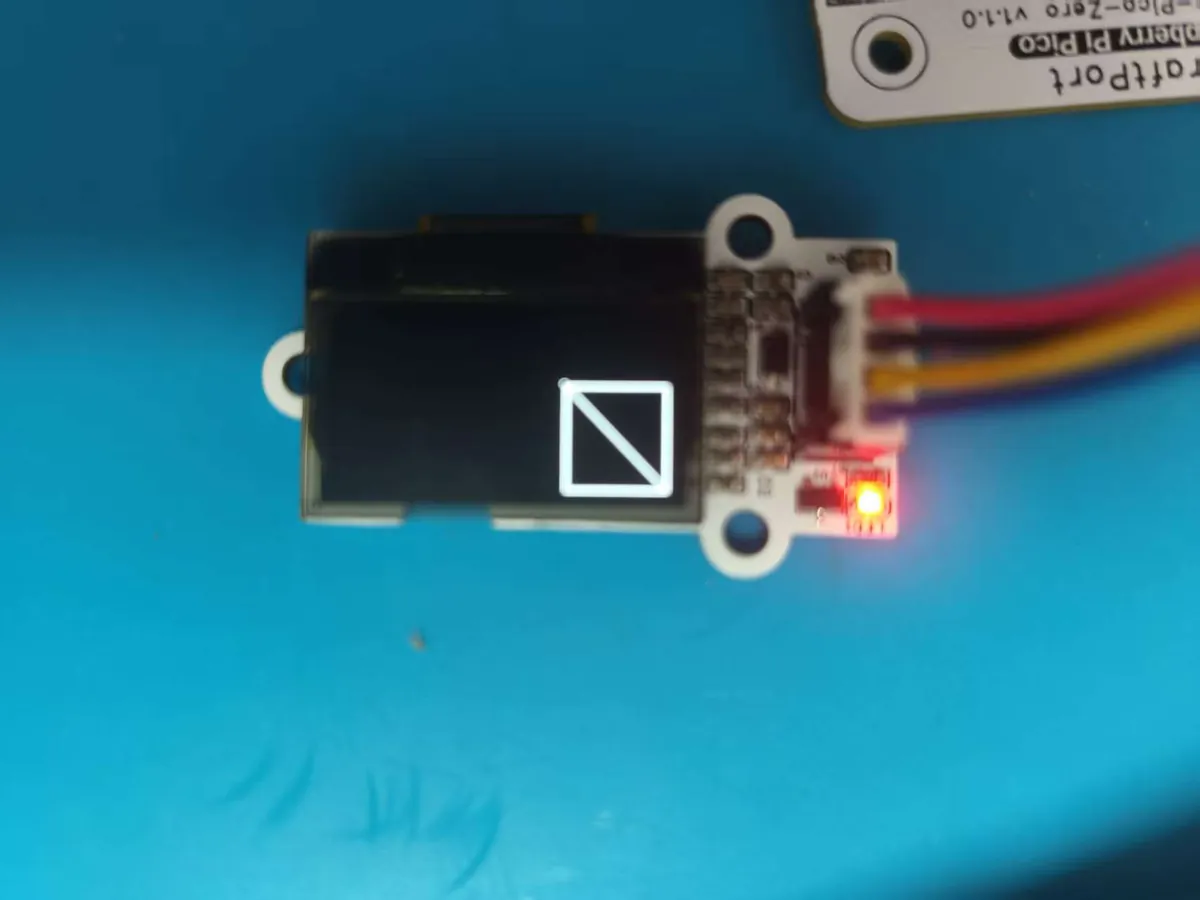
An outline can frame a value; a filled rectangle can mark a selection or a level. Those are possible interface uses, not something this exercise shows. Decide what the user needs to distinguish before assigning meanings to shapes.
Two details cause most early display bugs:
- Clearing. When shorter text replaces longer text, old pixels remain unless the buffer is cleared or the area is overwritten.
- Updating. Drawing changes memory; a separate show call sends the buffer to the panel. A program that draws without showing changes nothing on screen.
Motion is not automatically information
A later program drew a 20 by 40 filled rectangle and shifted it five pixels horizontally every second. It demonstrates scrolling. It is not yet a progress bar, because no completed work or measured quantity controls its width.
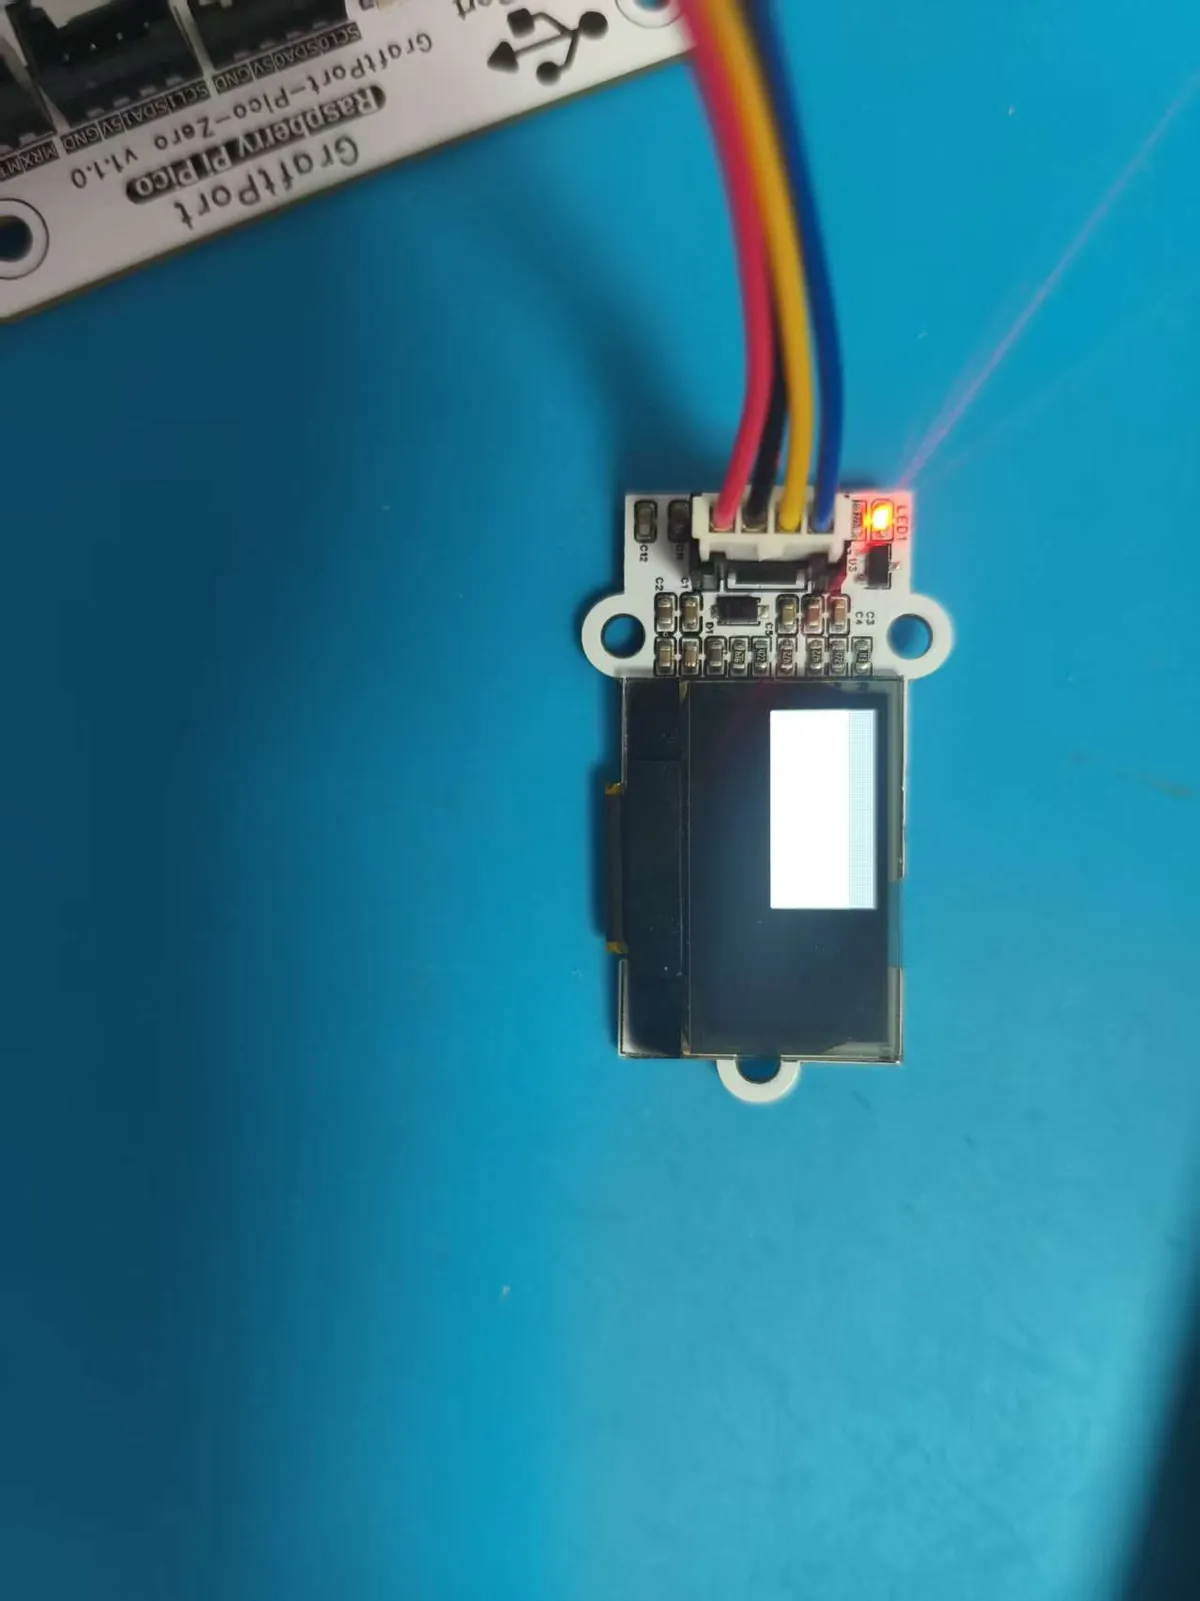
If a bar should mean "70% done" or "battery low," connect its size to that value and decide what it shows when the value is missing.
What the bench test does not answer
For a sensor display, choose a stable label, a readable unit and an explicit missing-data state. For an interactive object, show the instruction at the moment someone needs it, not before.
The screen also has to work in the product, not only on the bench. These photos were taken with the module lying open on a mat. They do not tell you whether text is readable at the intended viewing distance, behind a tinted or frosted enclosure window, or in bright room light. Test those conditions with the real enclosure and with someone who has not seen the interface before, and keep the text size, contrast and viewing angle you settle on in the design record.